A year-long project to transform a dark basement space into a custom walk-in wardrobe inspired by premium retail stores. Built with precision joinery, oak fronting, and a dark aesthetic that uses strategic lighting to highlight the clothing. This project required new tools, extensive planning, and careful execution to create a built-in storage system that would add value to the house.
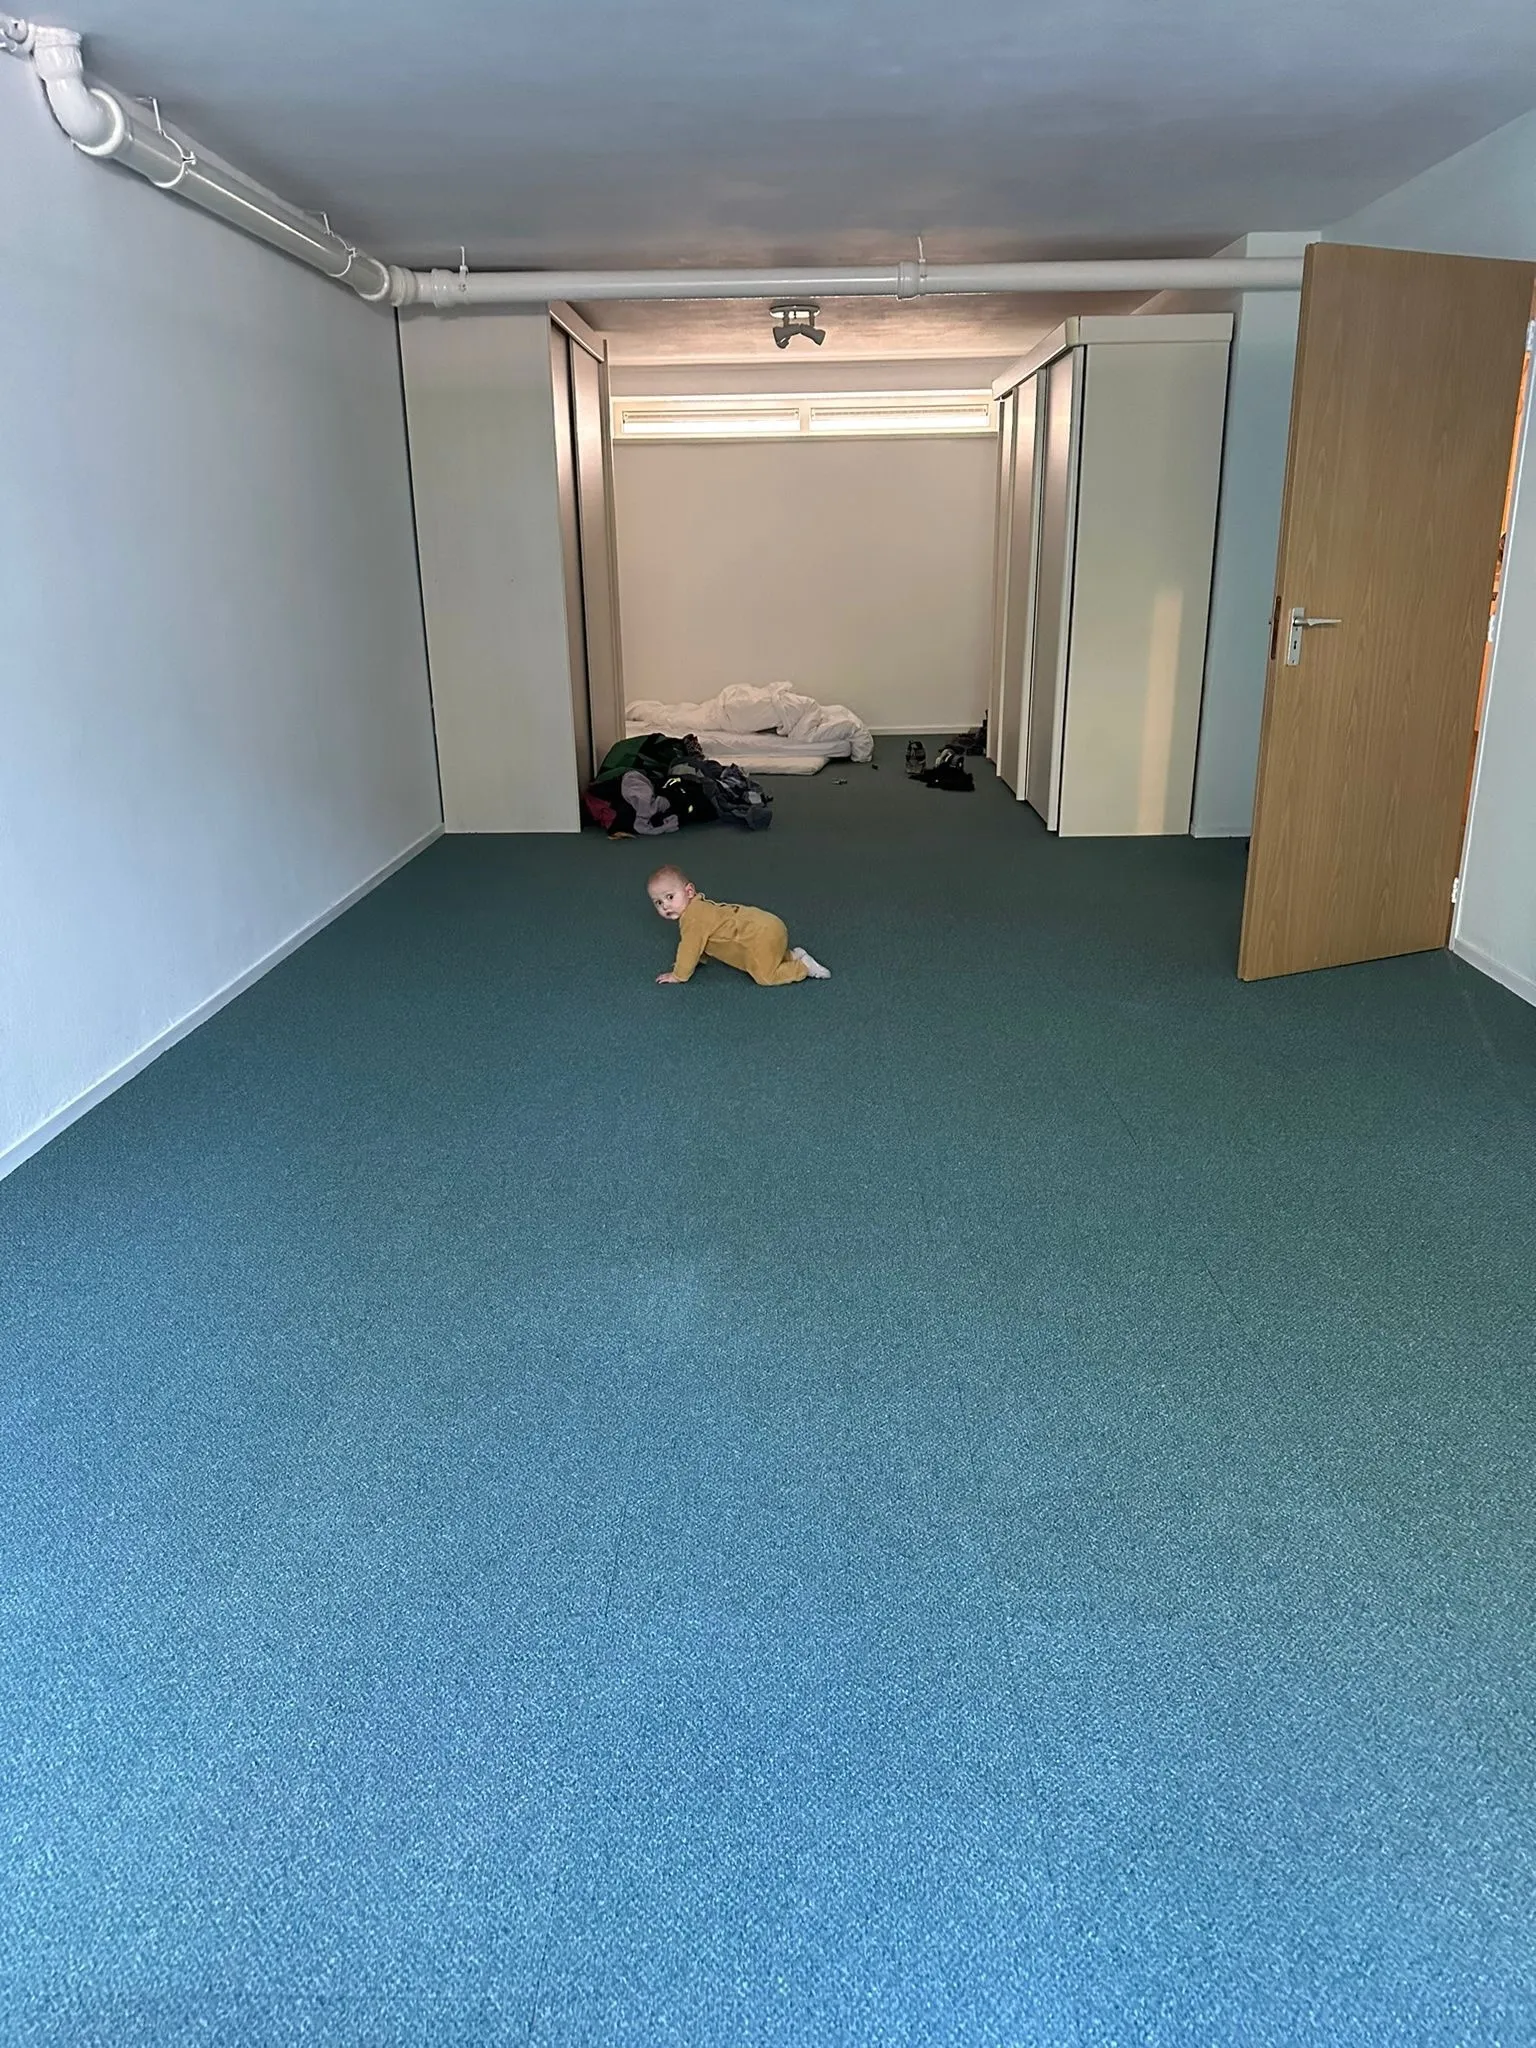
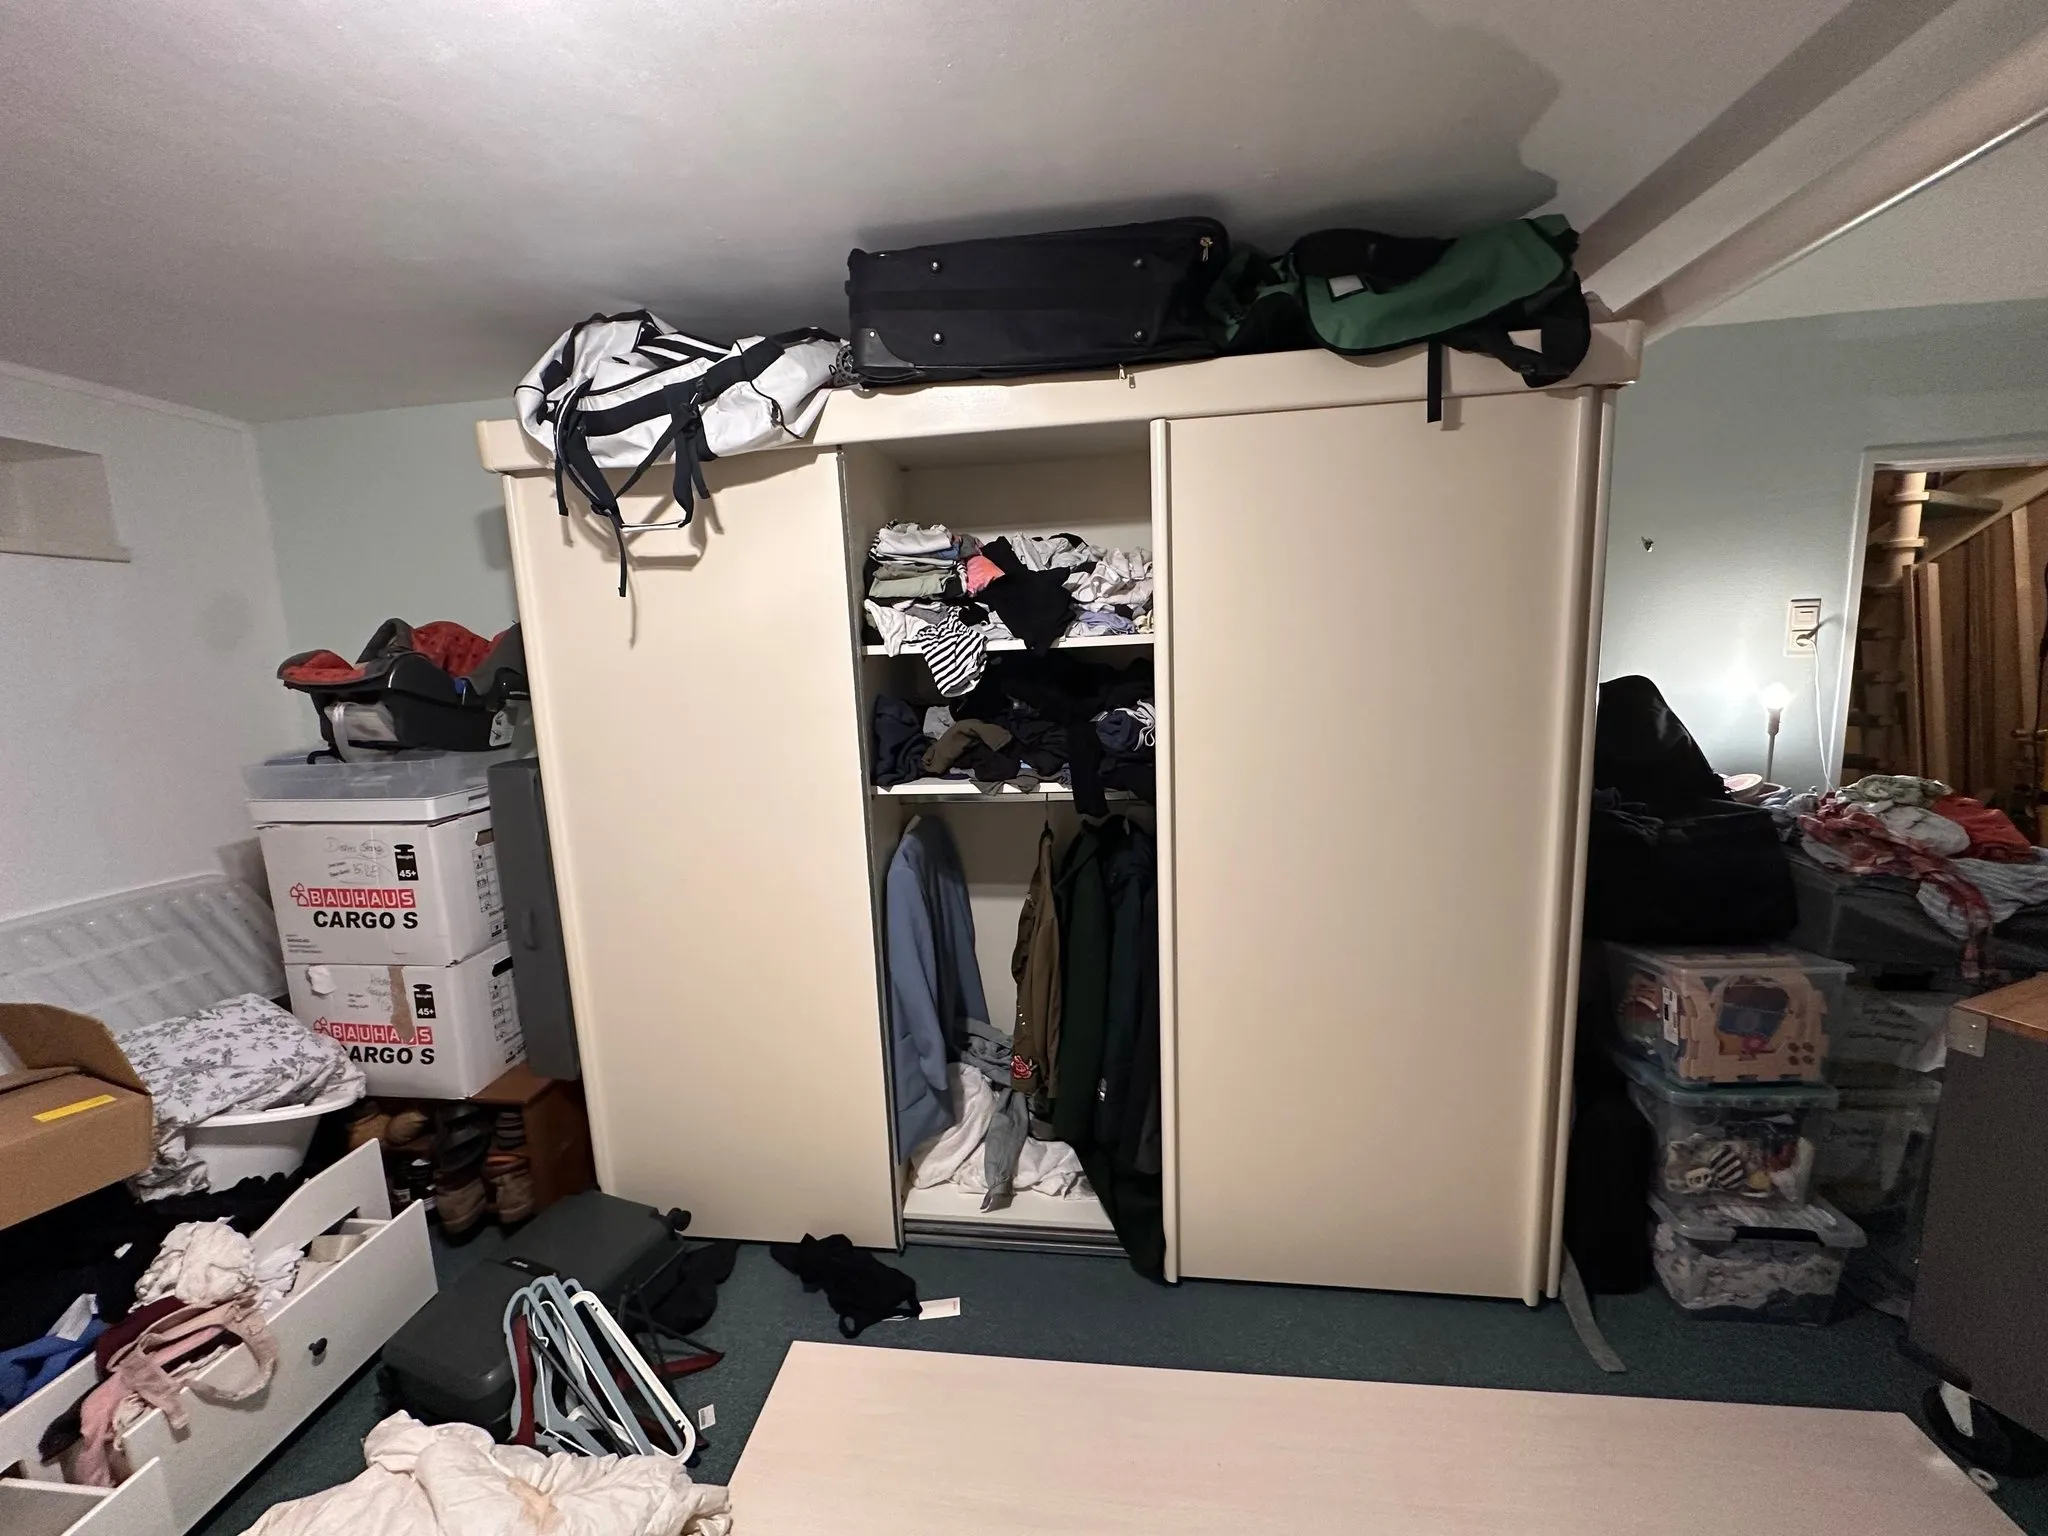
When we moved into our new house, the basement had wardrobes left by the previous owners that were poorly made and falling apart. The shells would fall down, they were weak, and just not made very well. We have a lot of clothing and things that need general storage like ski equipment and baby stuff, and we needed a lot more space. We also wanted it to look really nice.
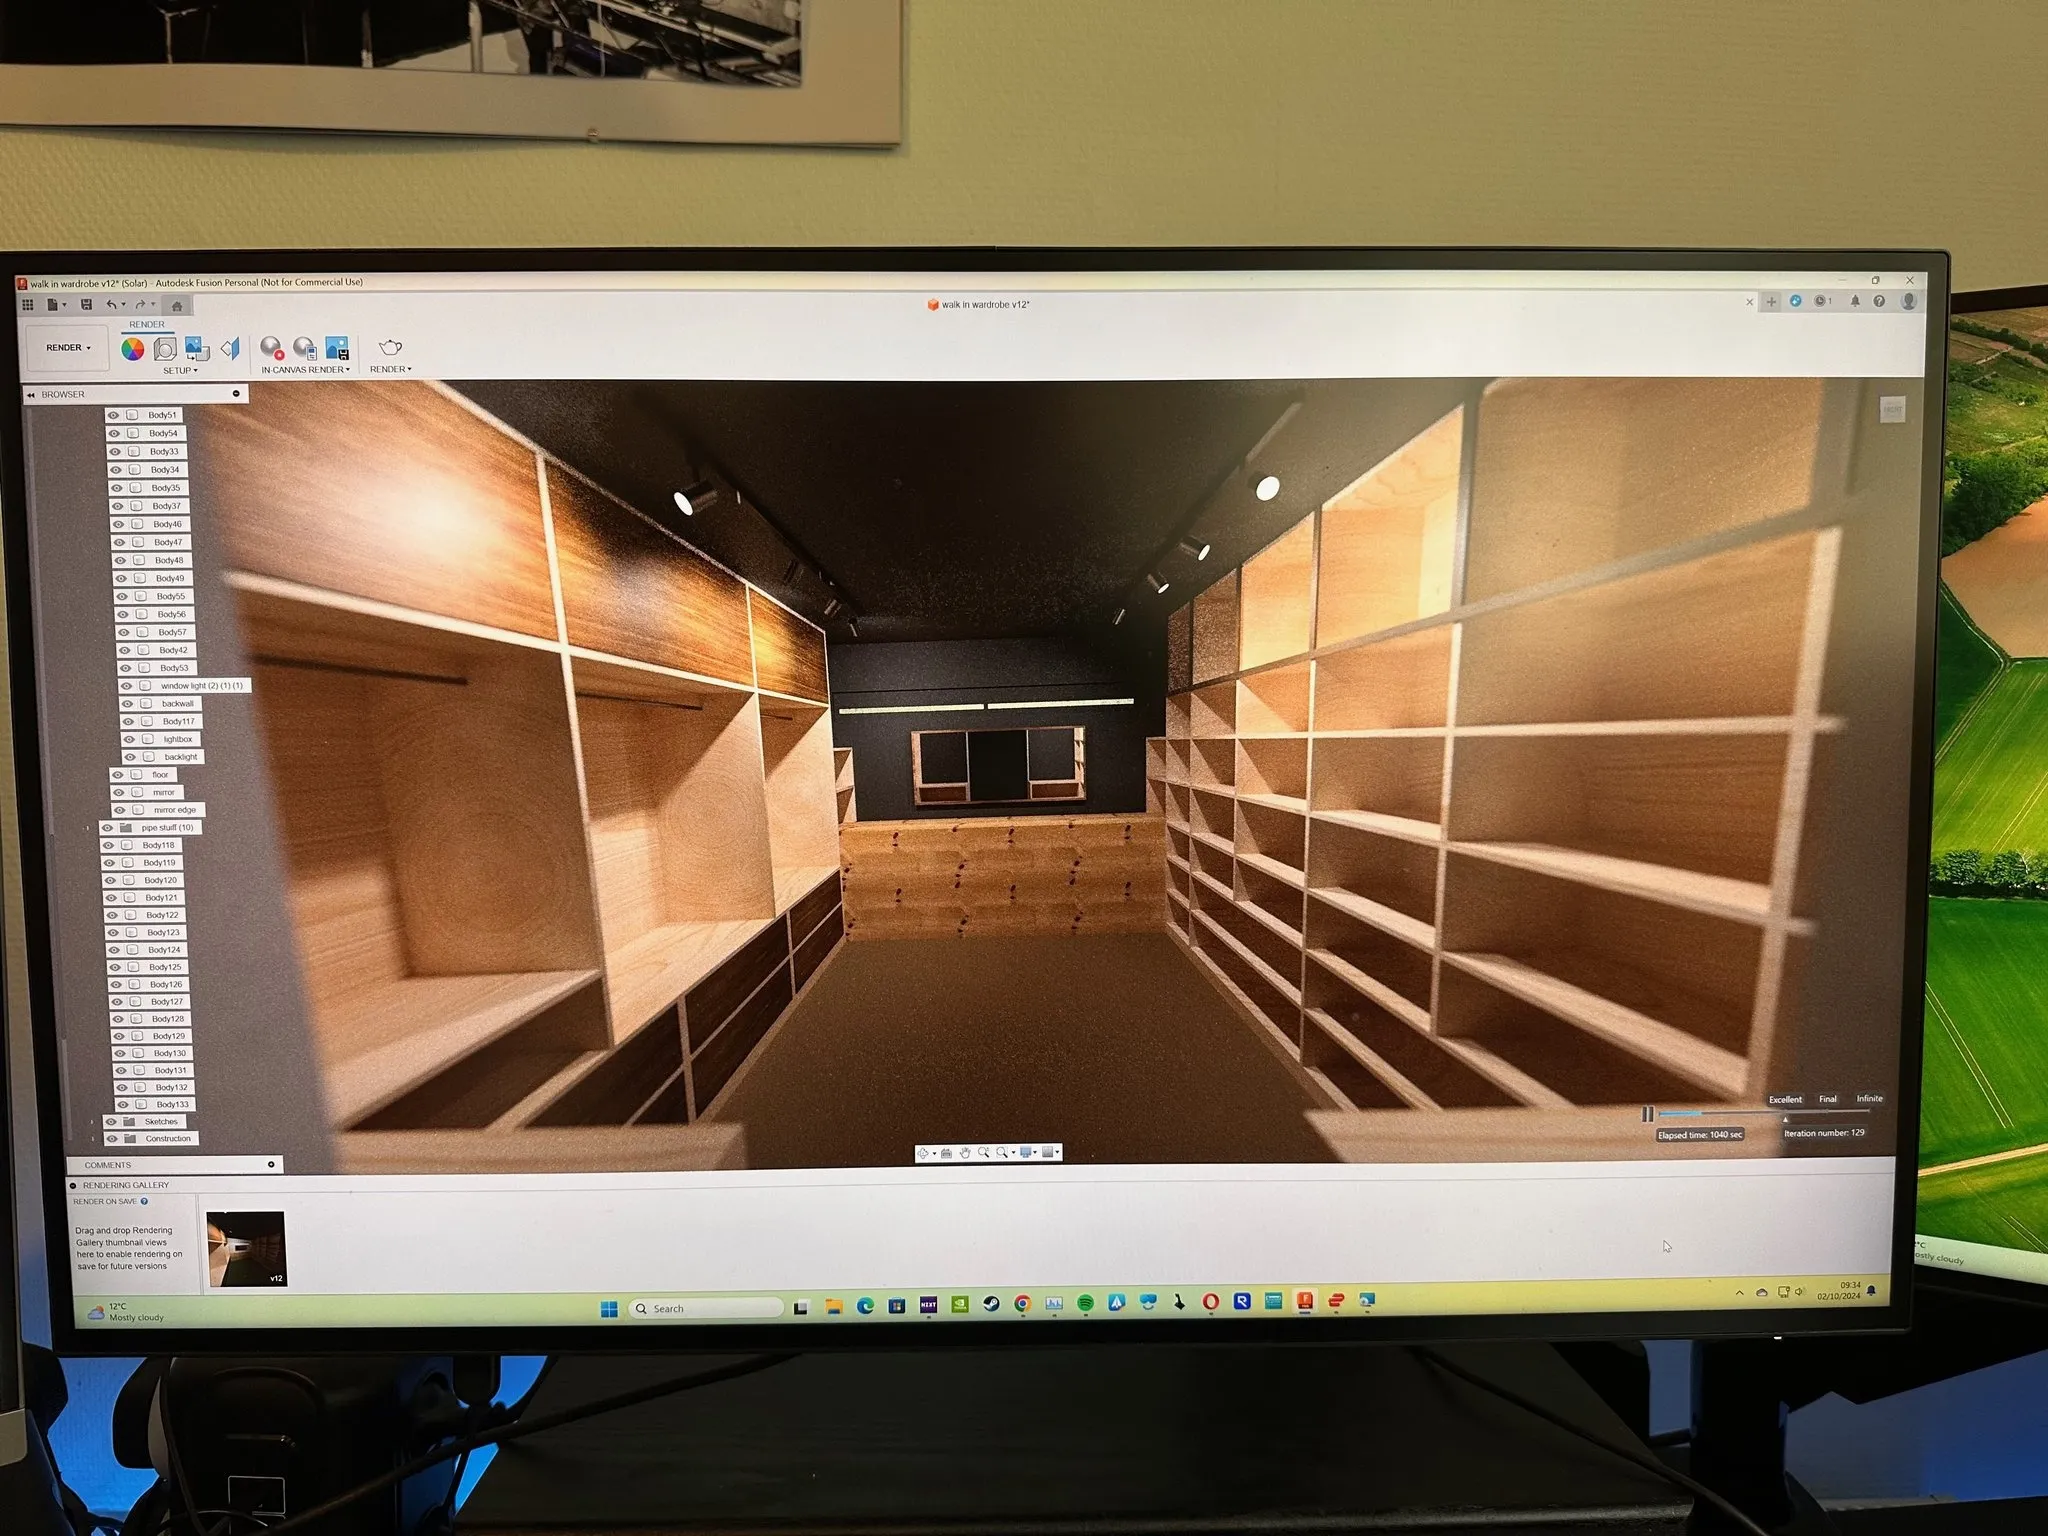
The downstairs area is naturally quite dark, so rather than trying to work against that, we thought we could actually lean into it. The inspiration was stores like Abercrombie & Fitch or Hollister that have a very dark aesthetic but then very light spotlights to shine brightly on the things that matter—which is the clothes. This became our design concept.

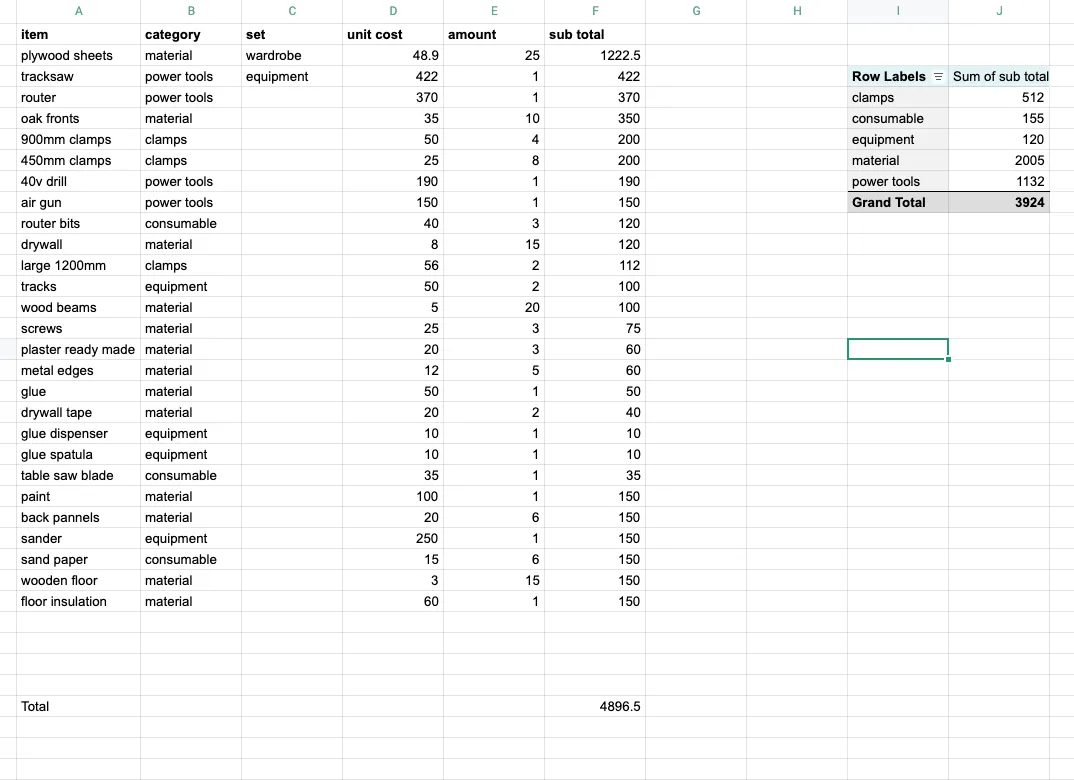
The budget was about €7,000, which would have been the cost of buying a wardrobe system from IKEA. That budget needed to include any tools that I needed to buy, obviously all of the wood, and also putting up a new wall to separate the room from the rest of the much larger room.
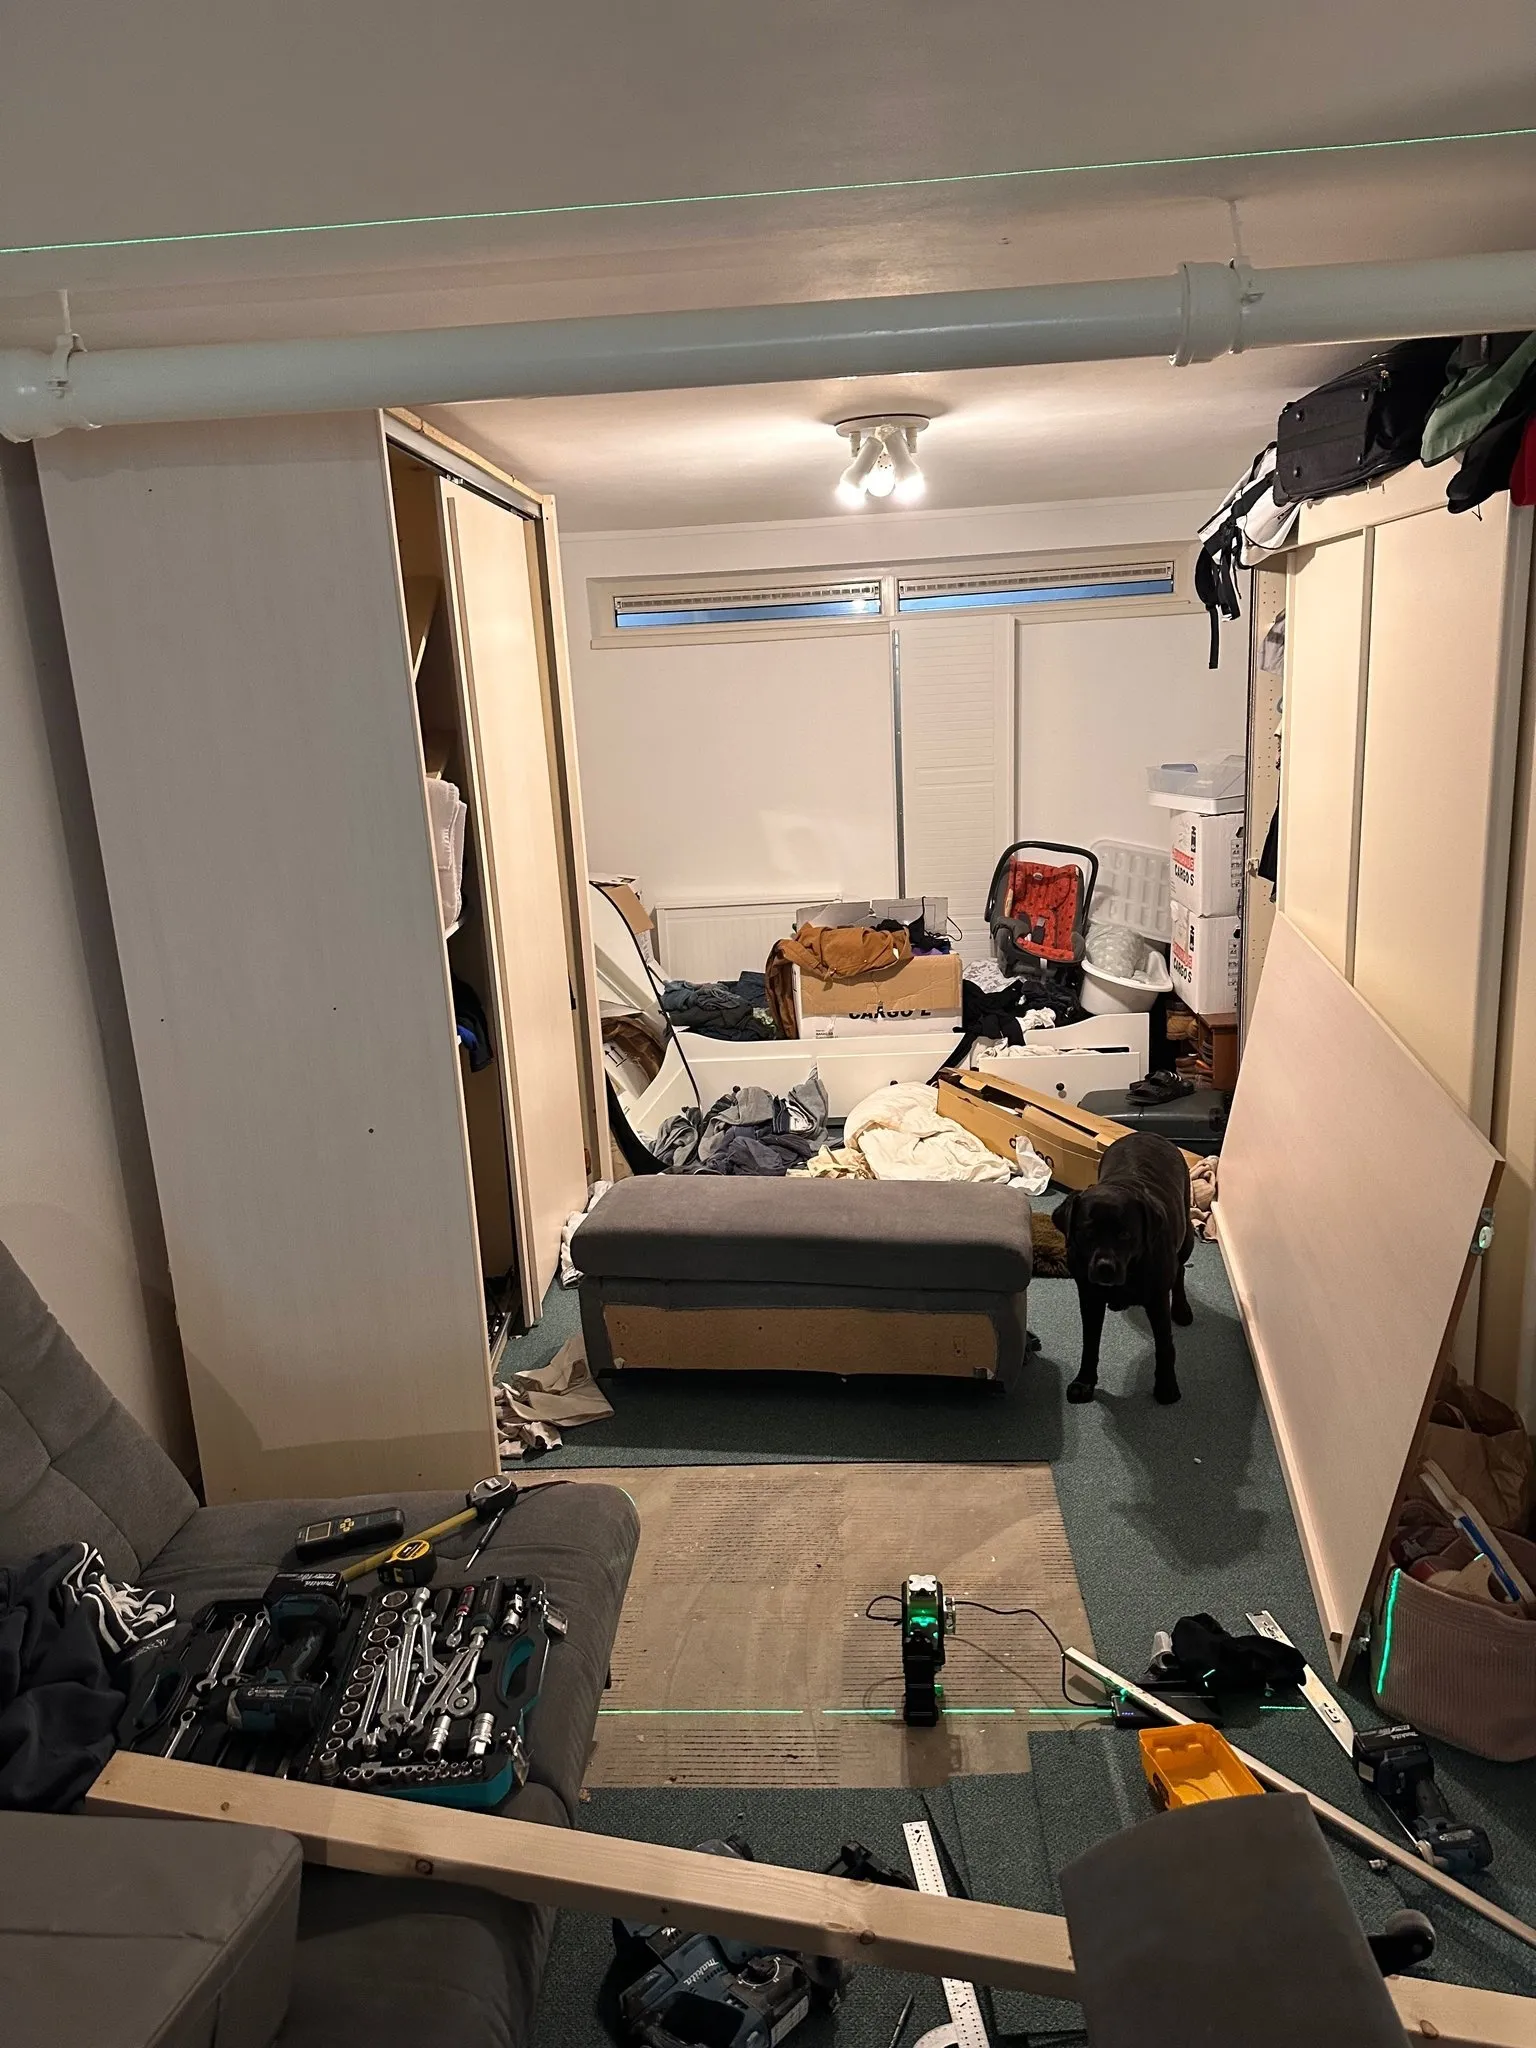
The project took about a year in terms of total duration, but that was mainly because the work needed to happen in the summer. The components were so big that realistically it couldn't be done inside, and also because of the way that it was designed, it required a huge amount of routing slots for the shelves. That creates a huge amount of dust, so that wasn't something that I wanted to do inside. We also didn't really have the space to do it inside—we had to move all of our clothes out, and for quite a long time we didn't have anywhere to put our clothes. Doing any kind of dusty work inside would have covered all of our clothes in dust, and that wasn't really an option.
The project started a few months after us moving into the house, then had to stop for winter, and then it was restarted again in the spring of the following year and was completed in the summer of 2025.
Budget
€7,000 total including tools, materials, and wall construction
Timeline
Approximately one year, with work primarily during summer months due to dust and space constraints
Design Philosophy
Dark aesthetic with strategic lighting, inspired by premium retail stores
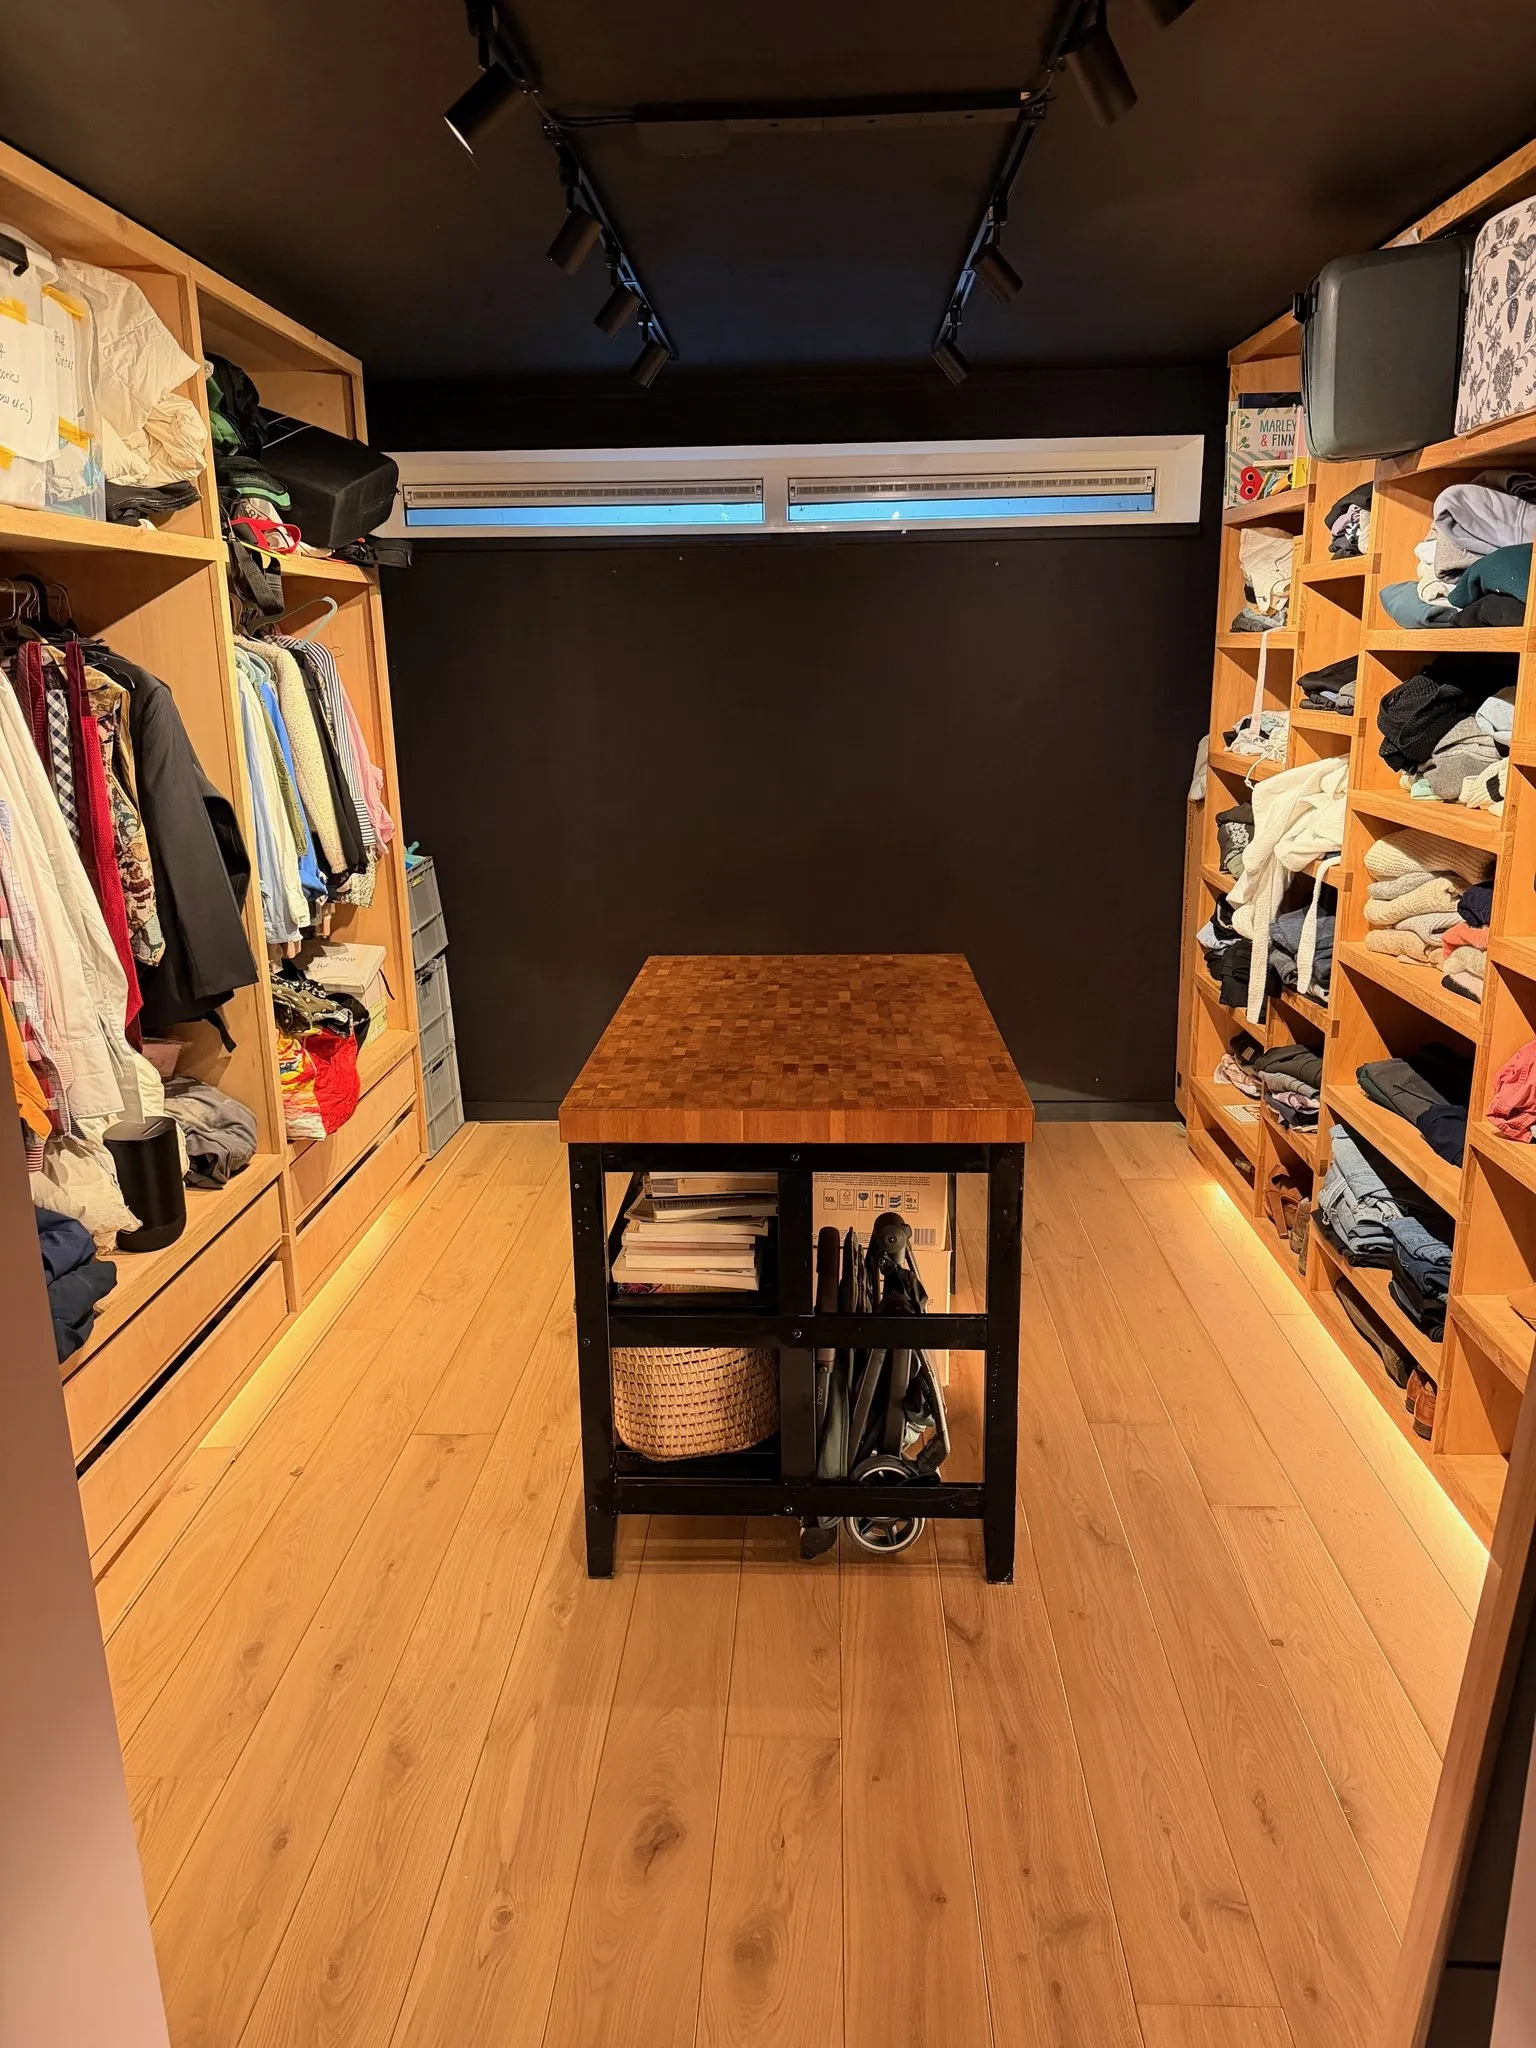
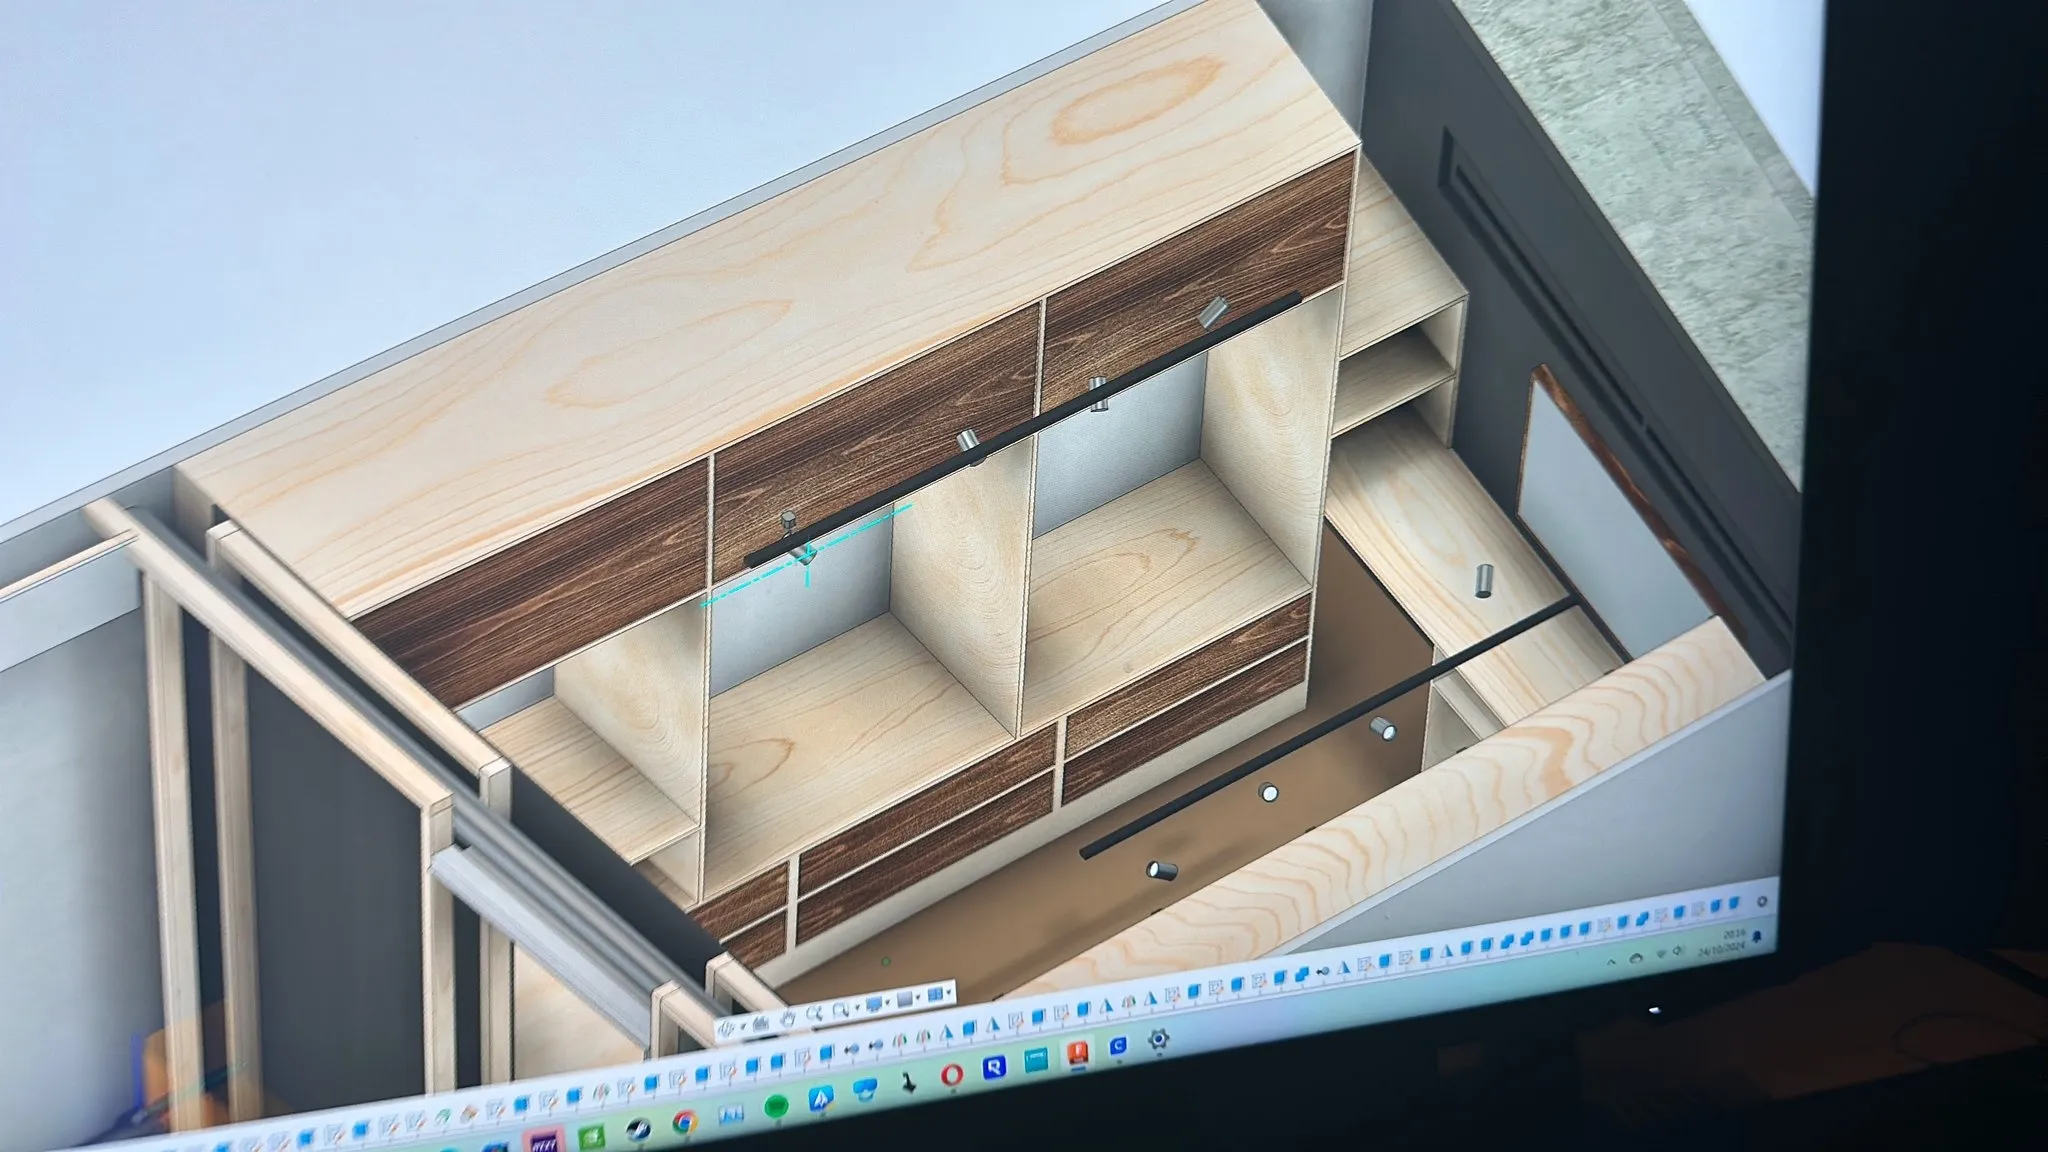
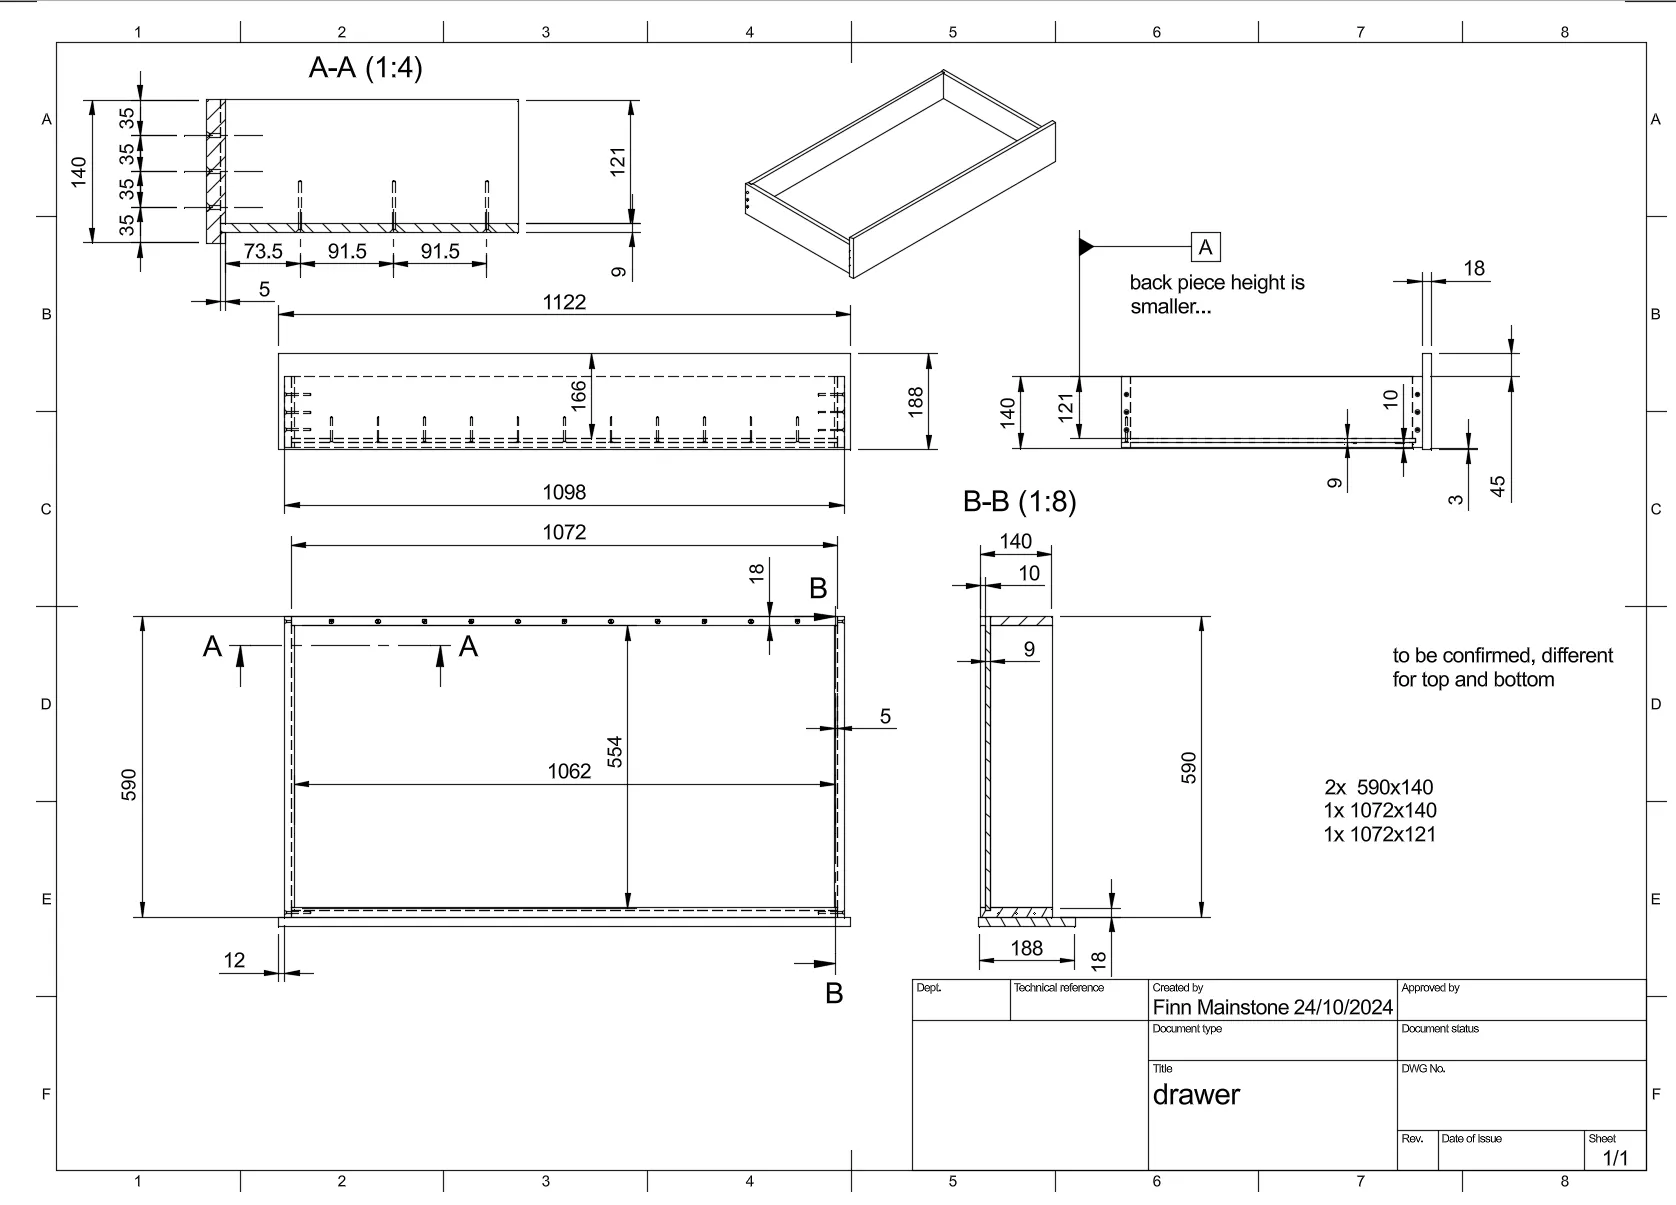
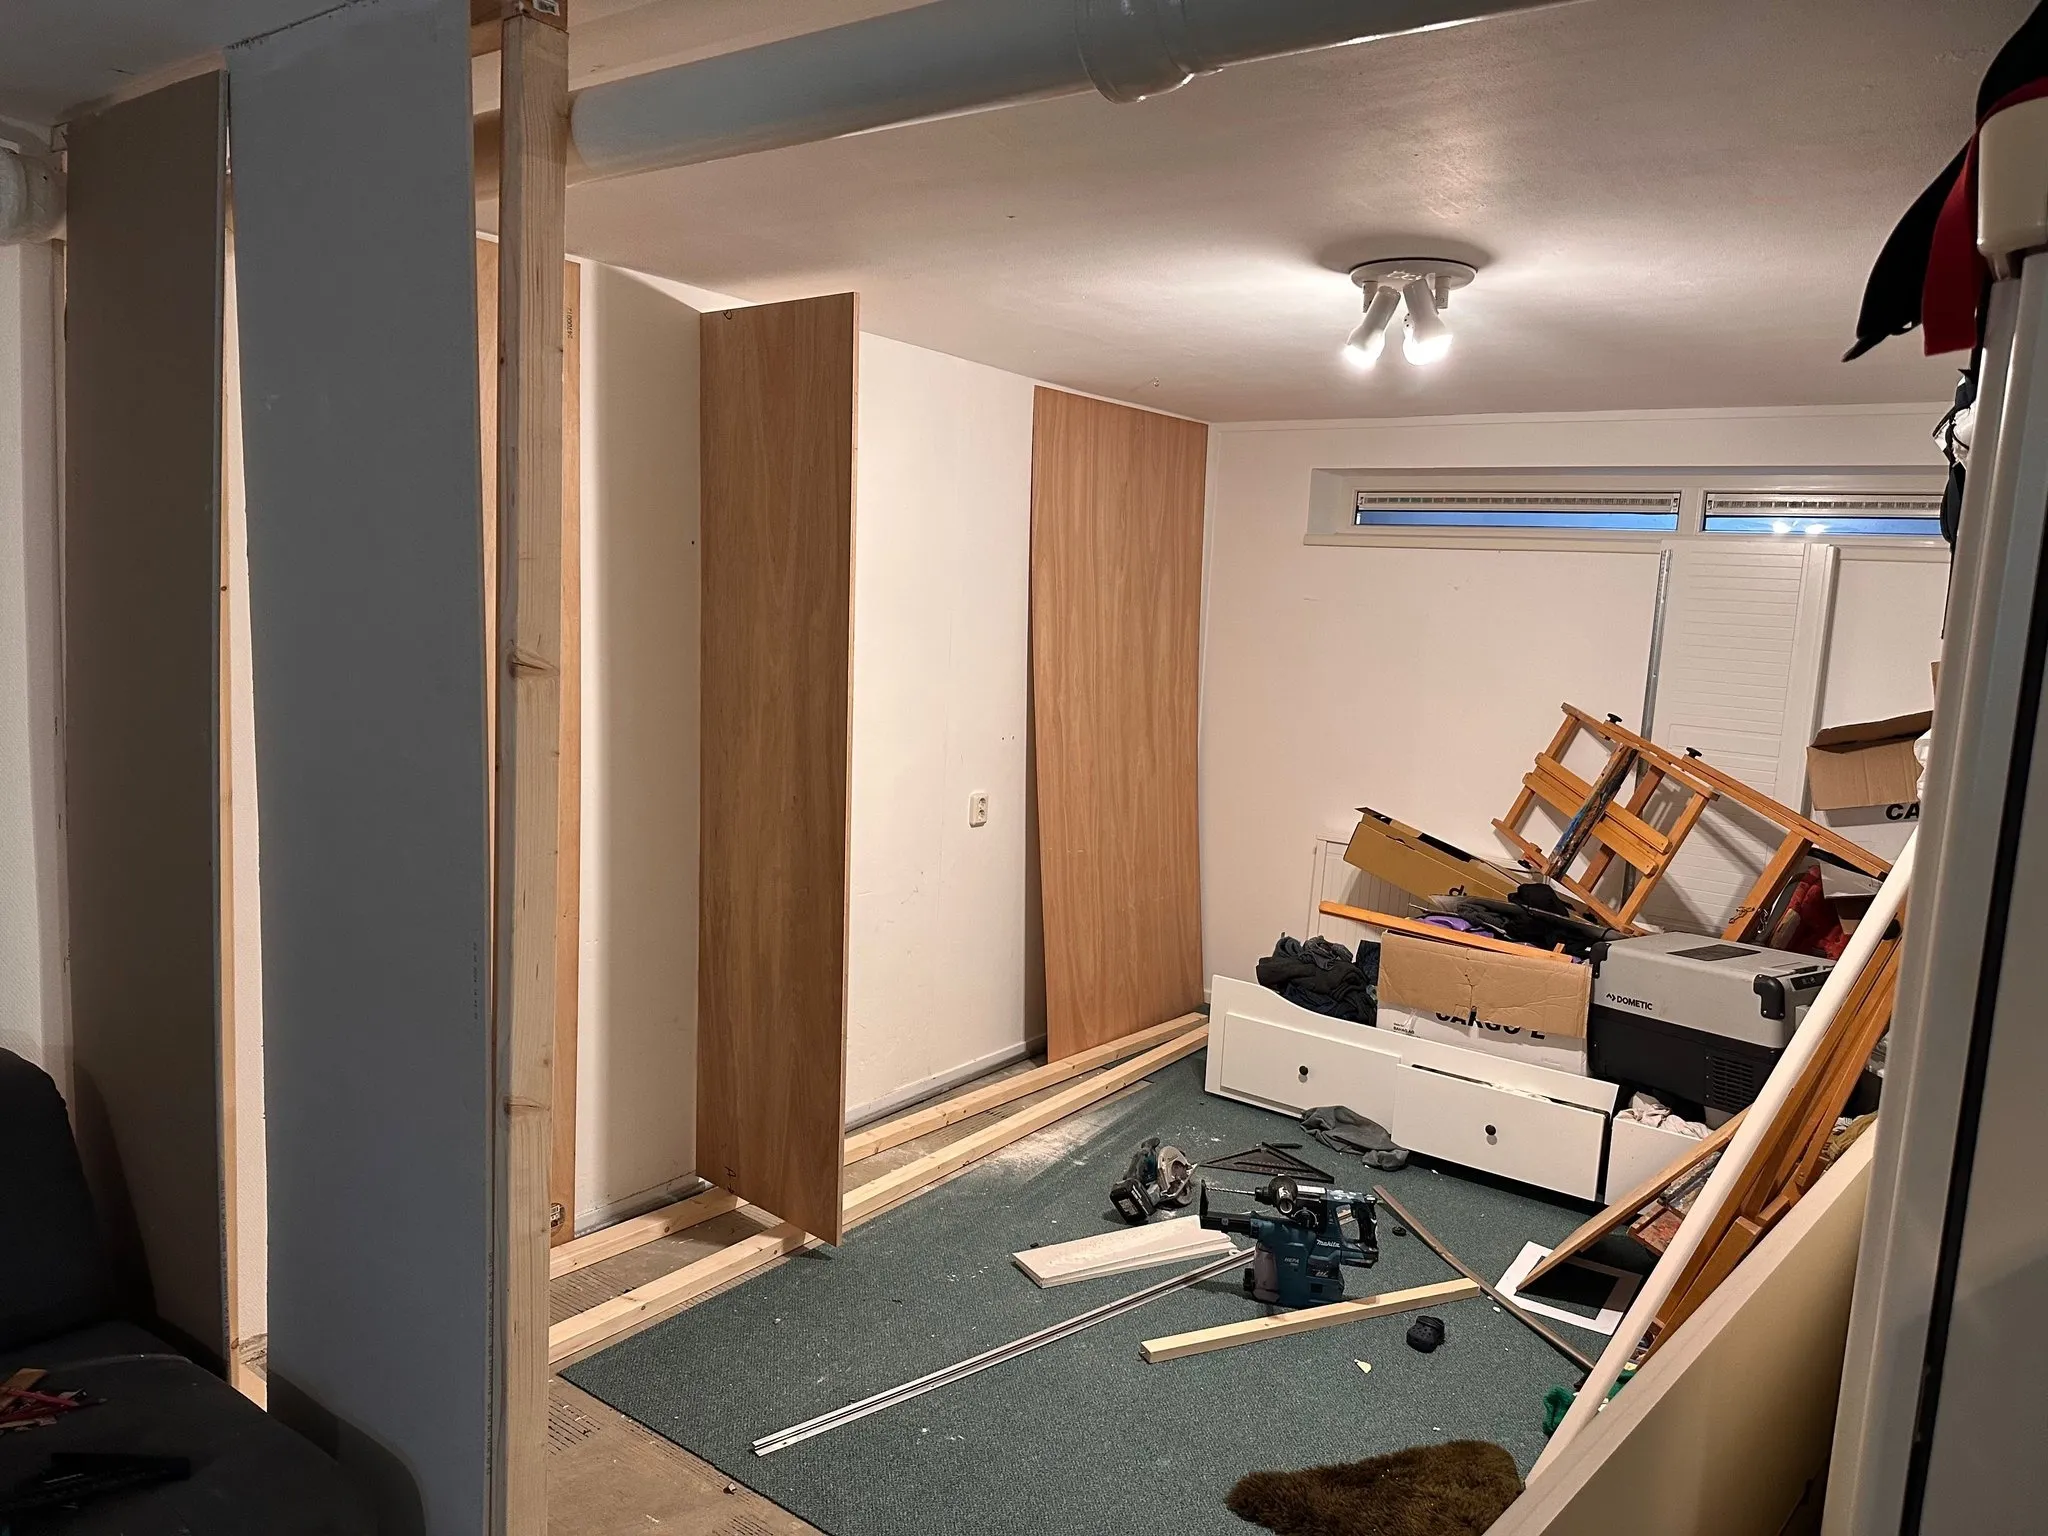
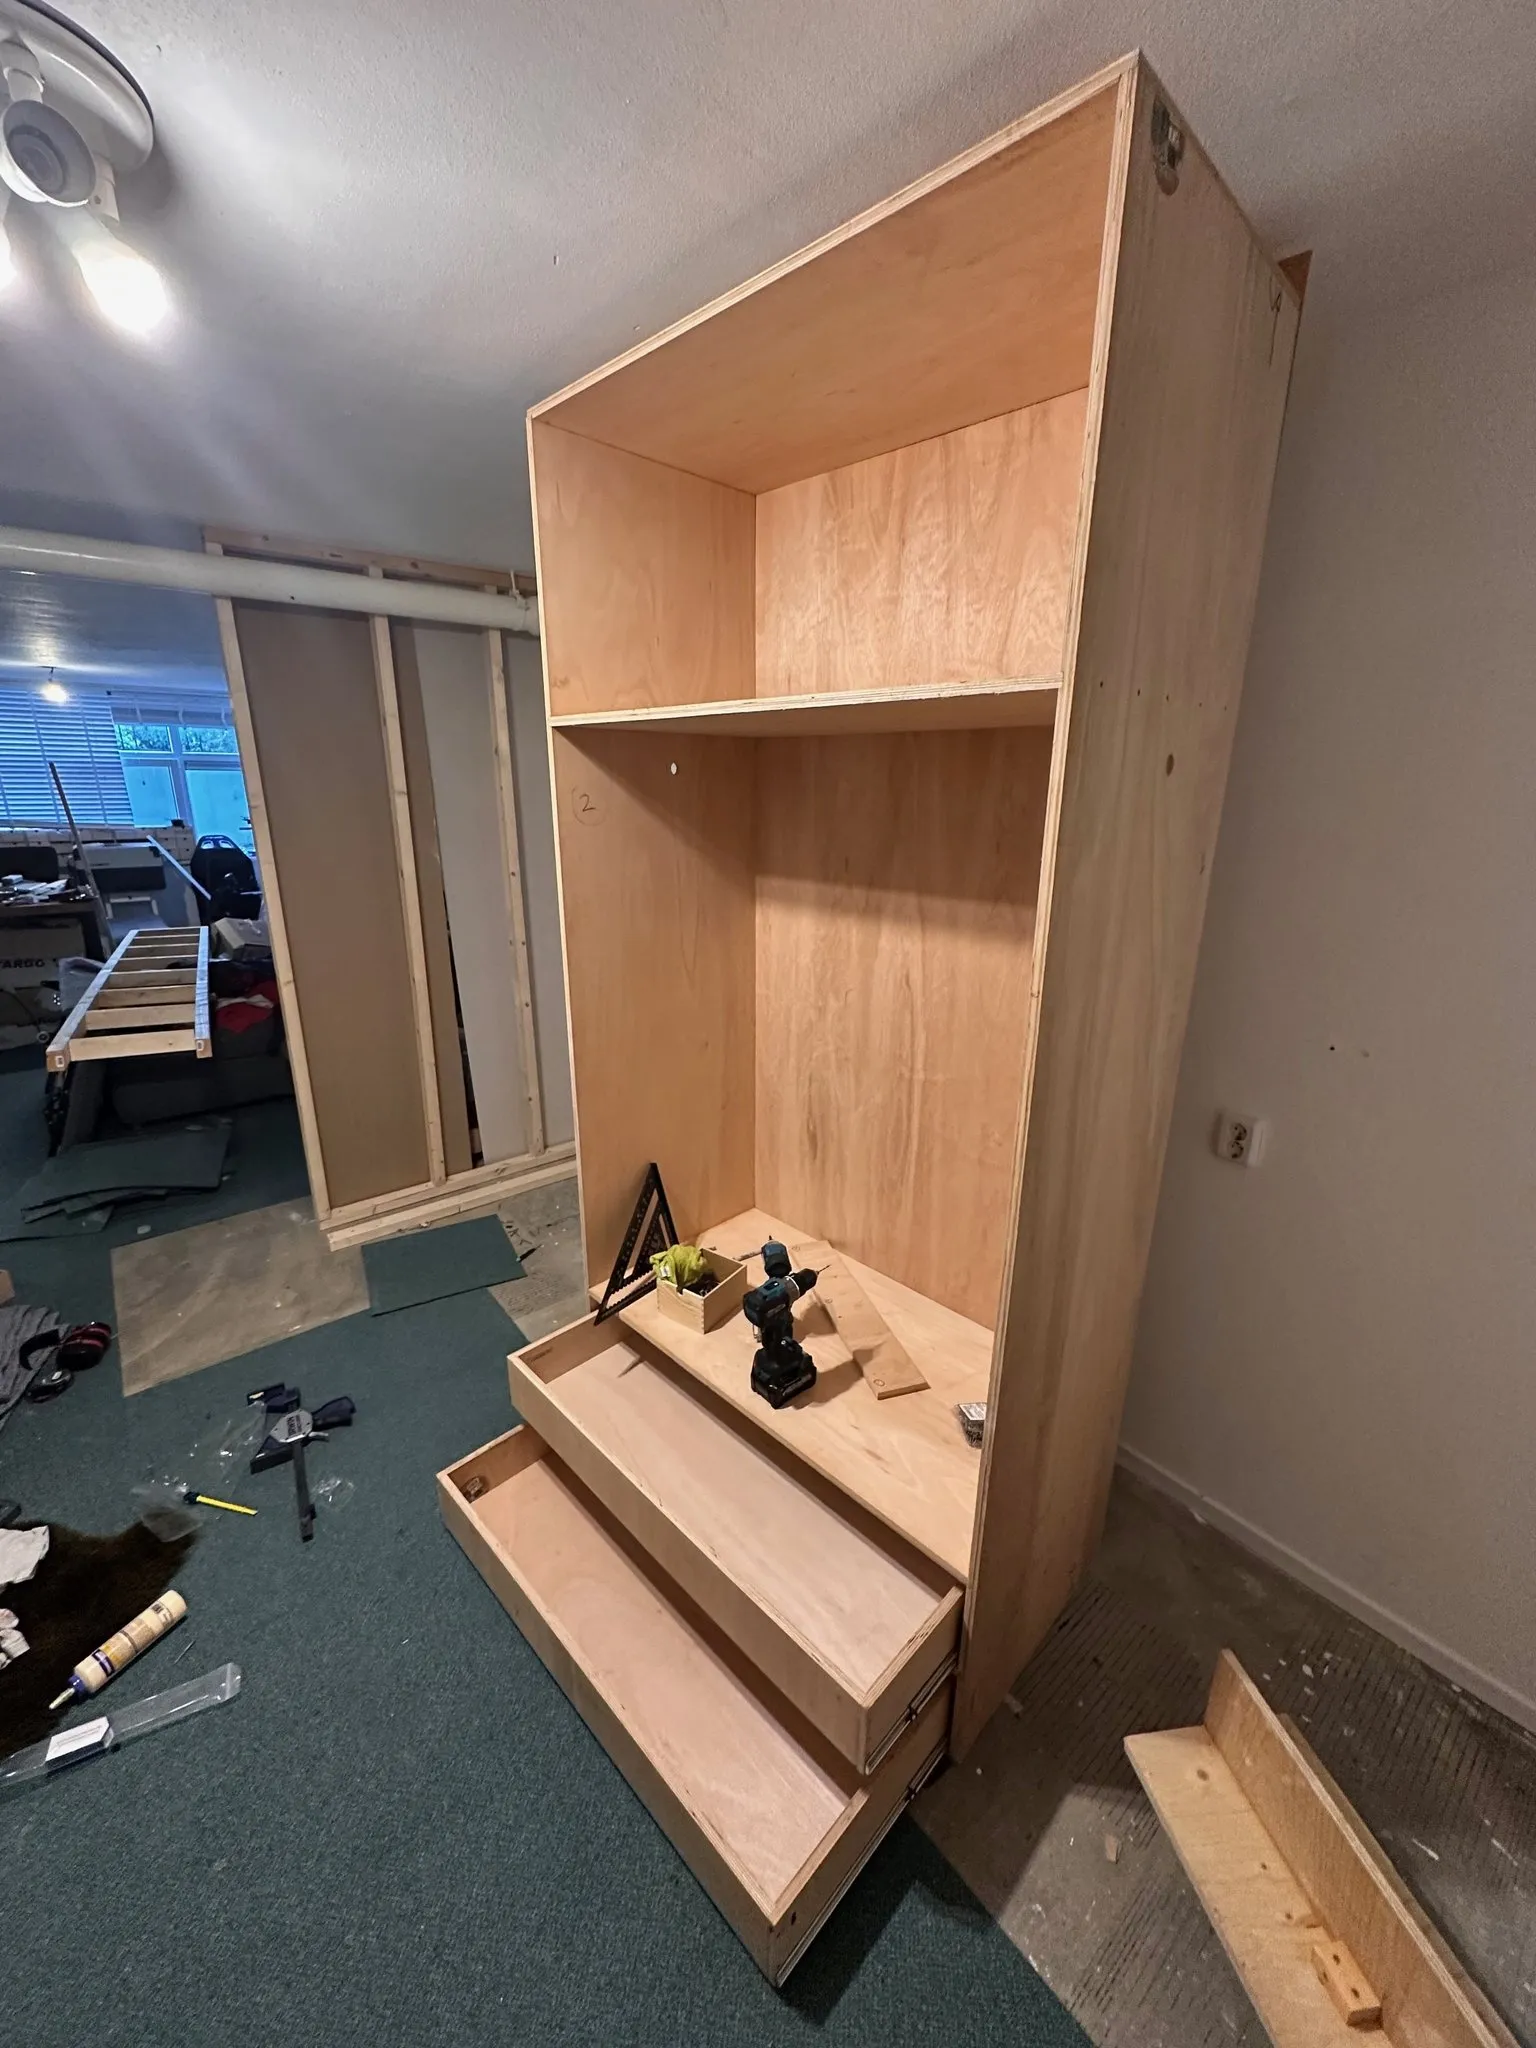
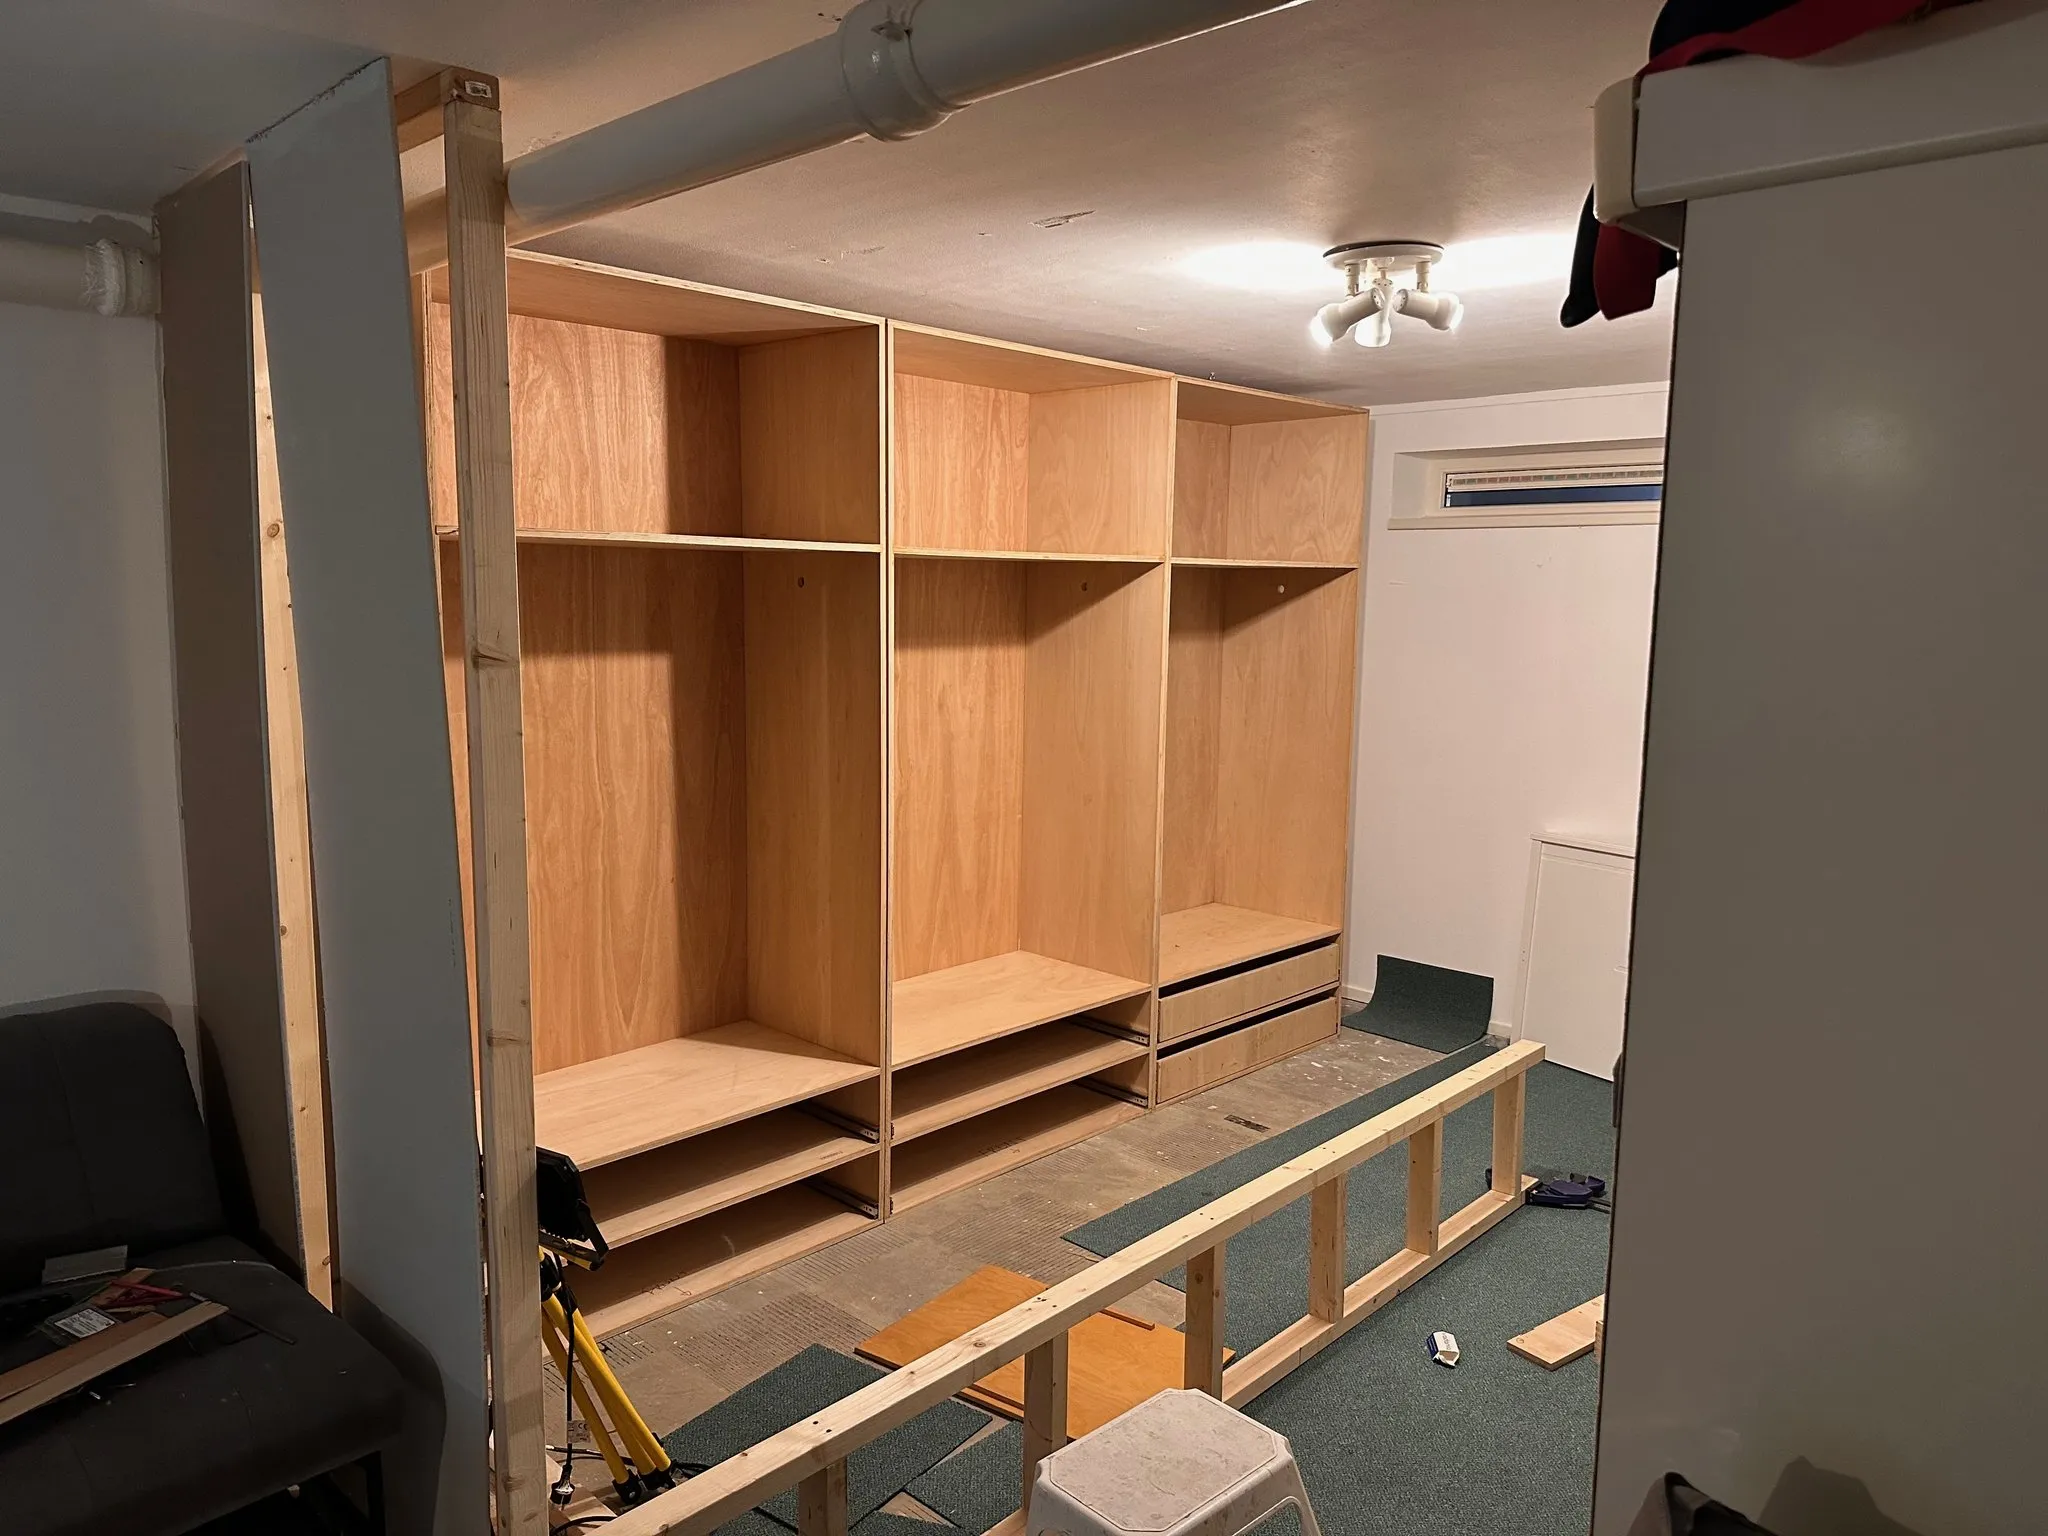
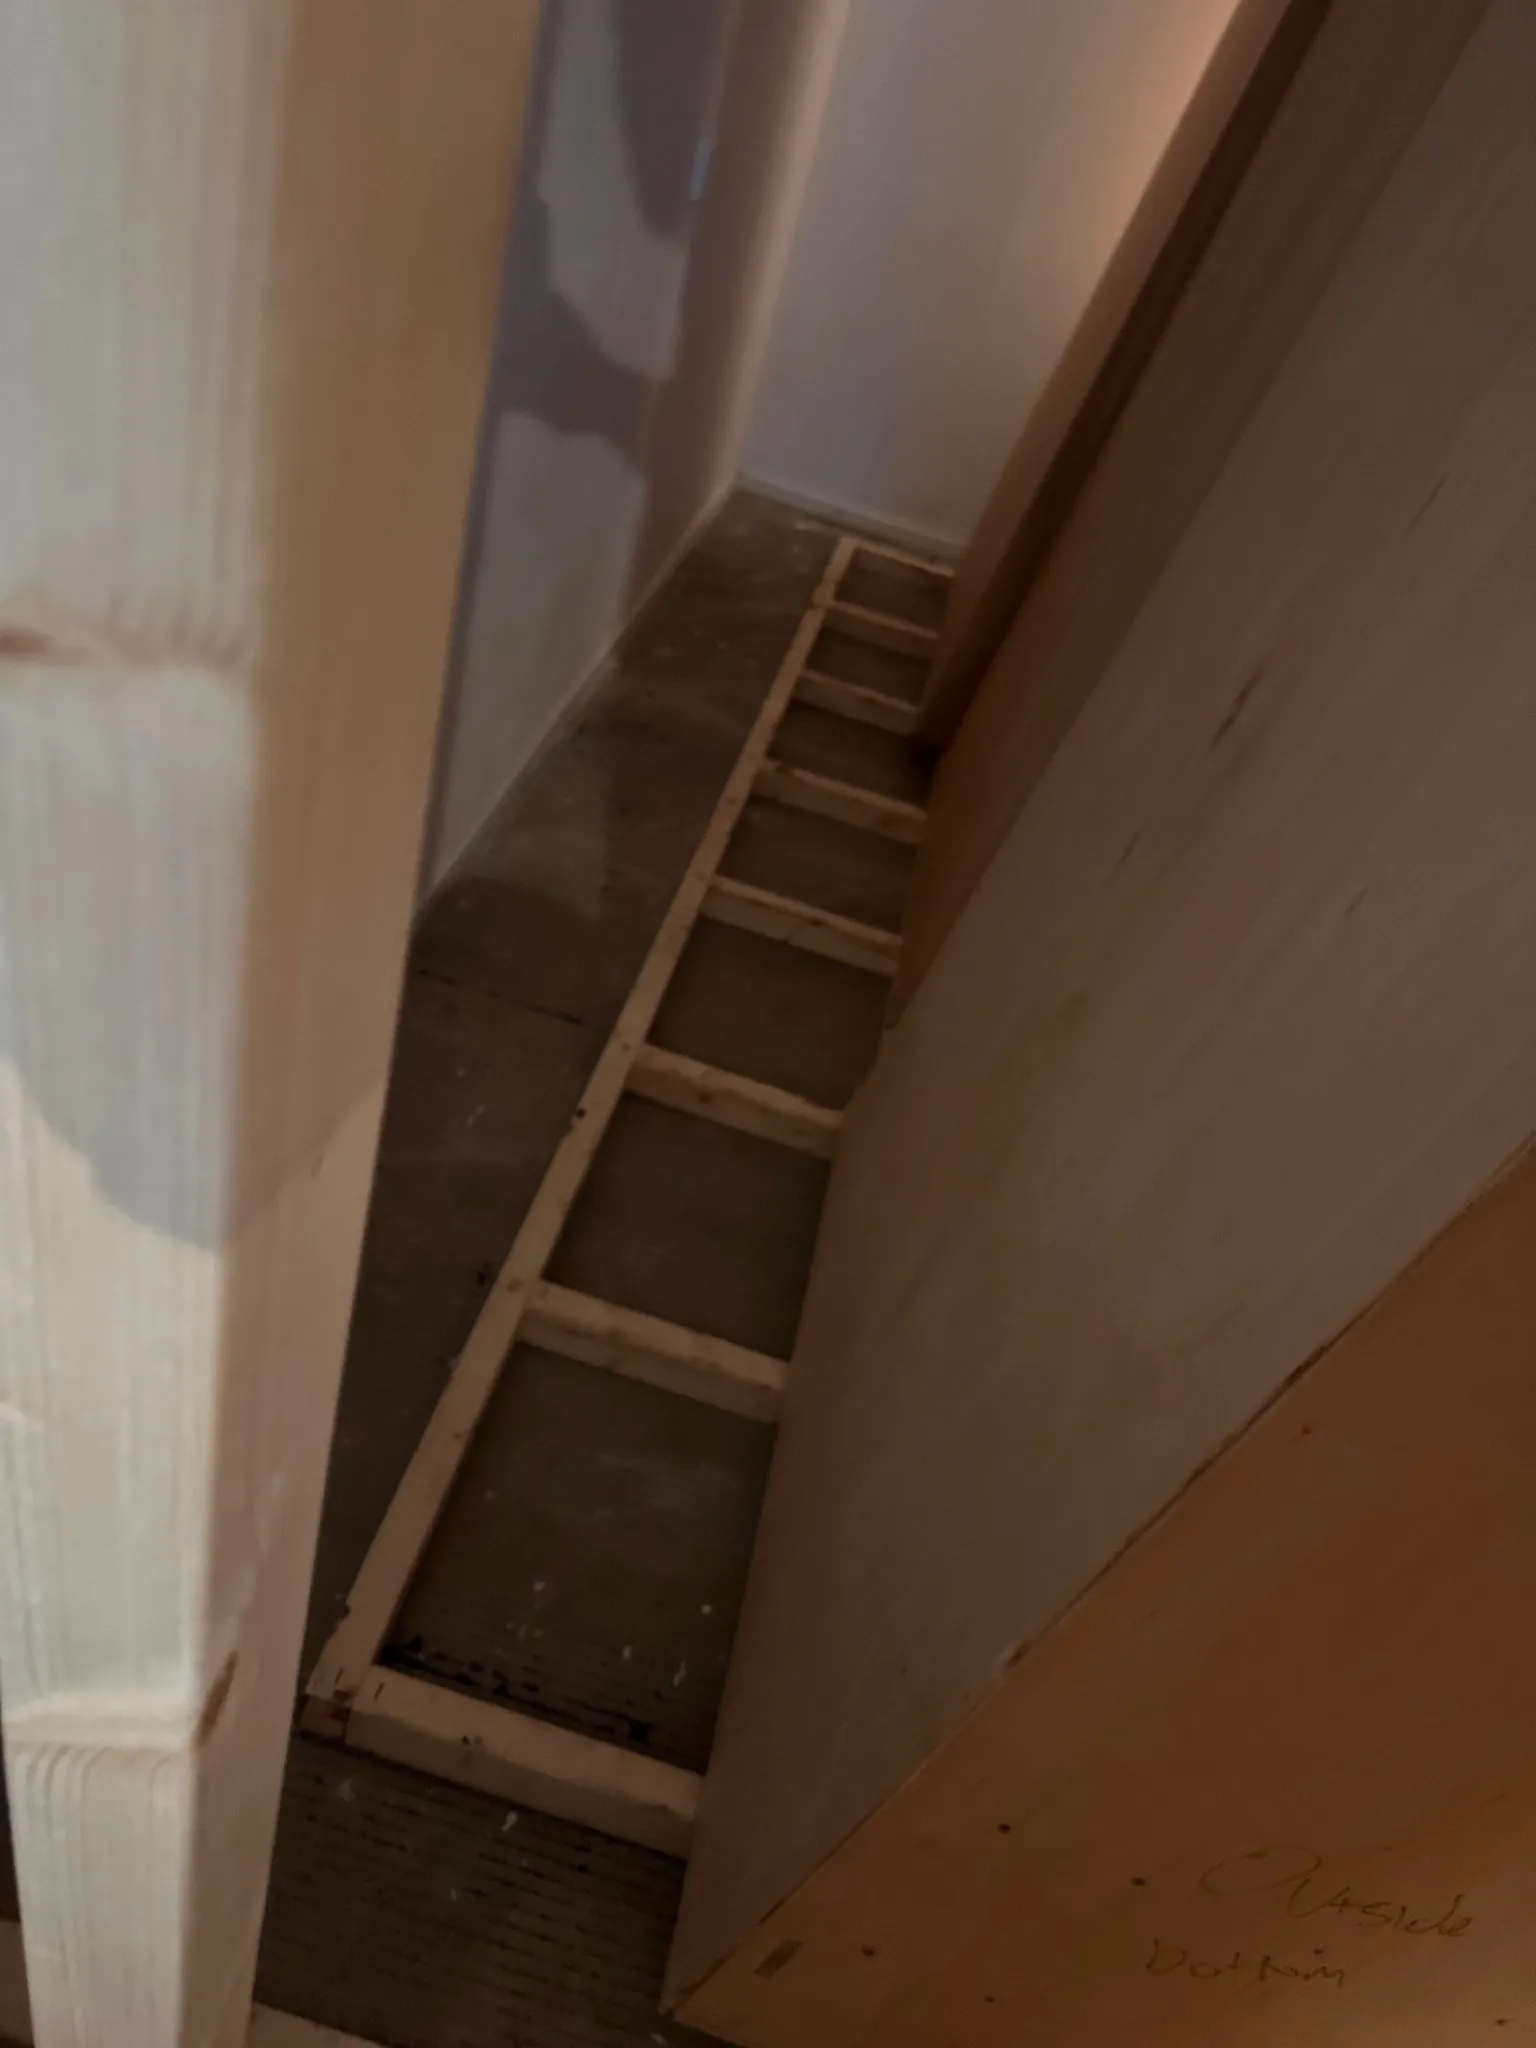
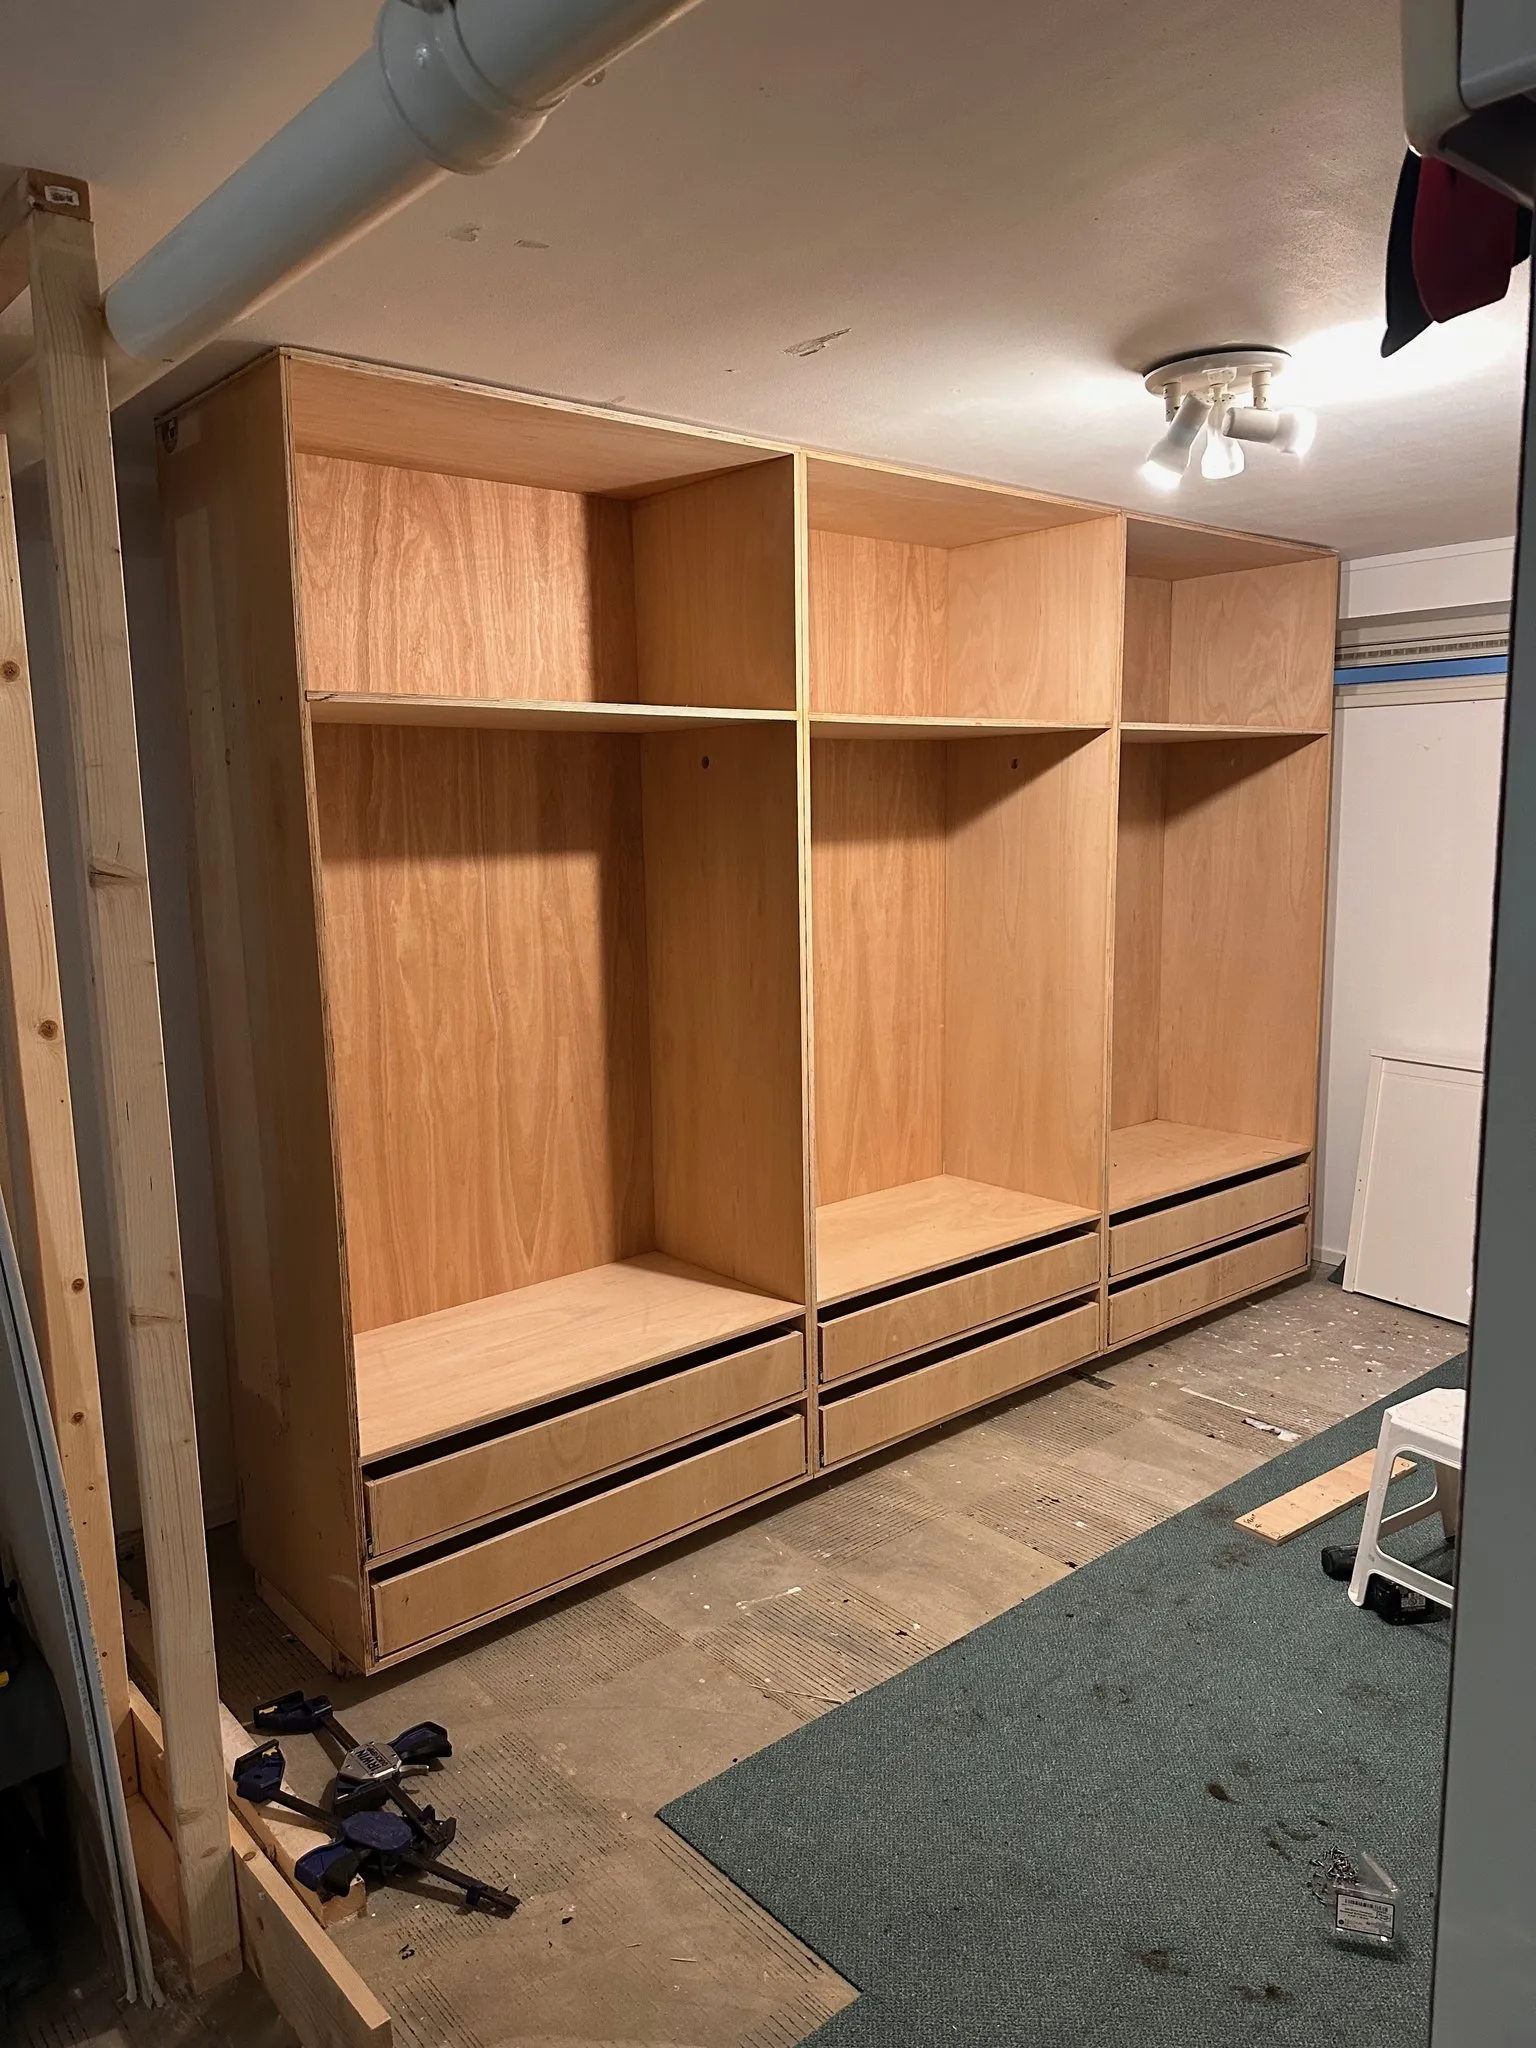
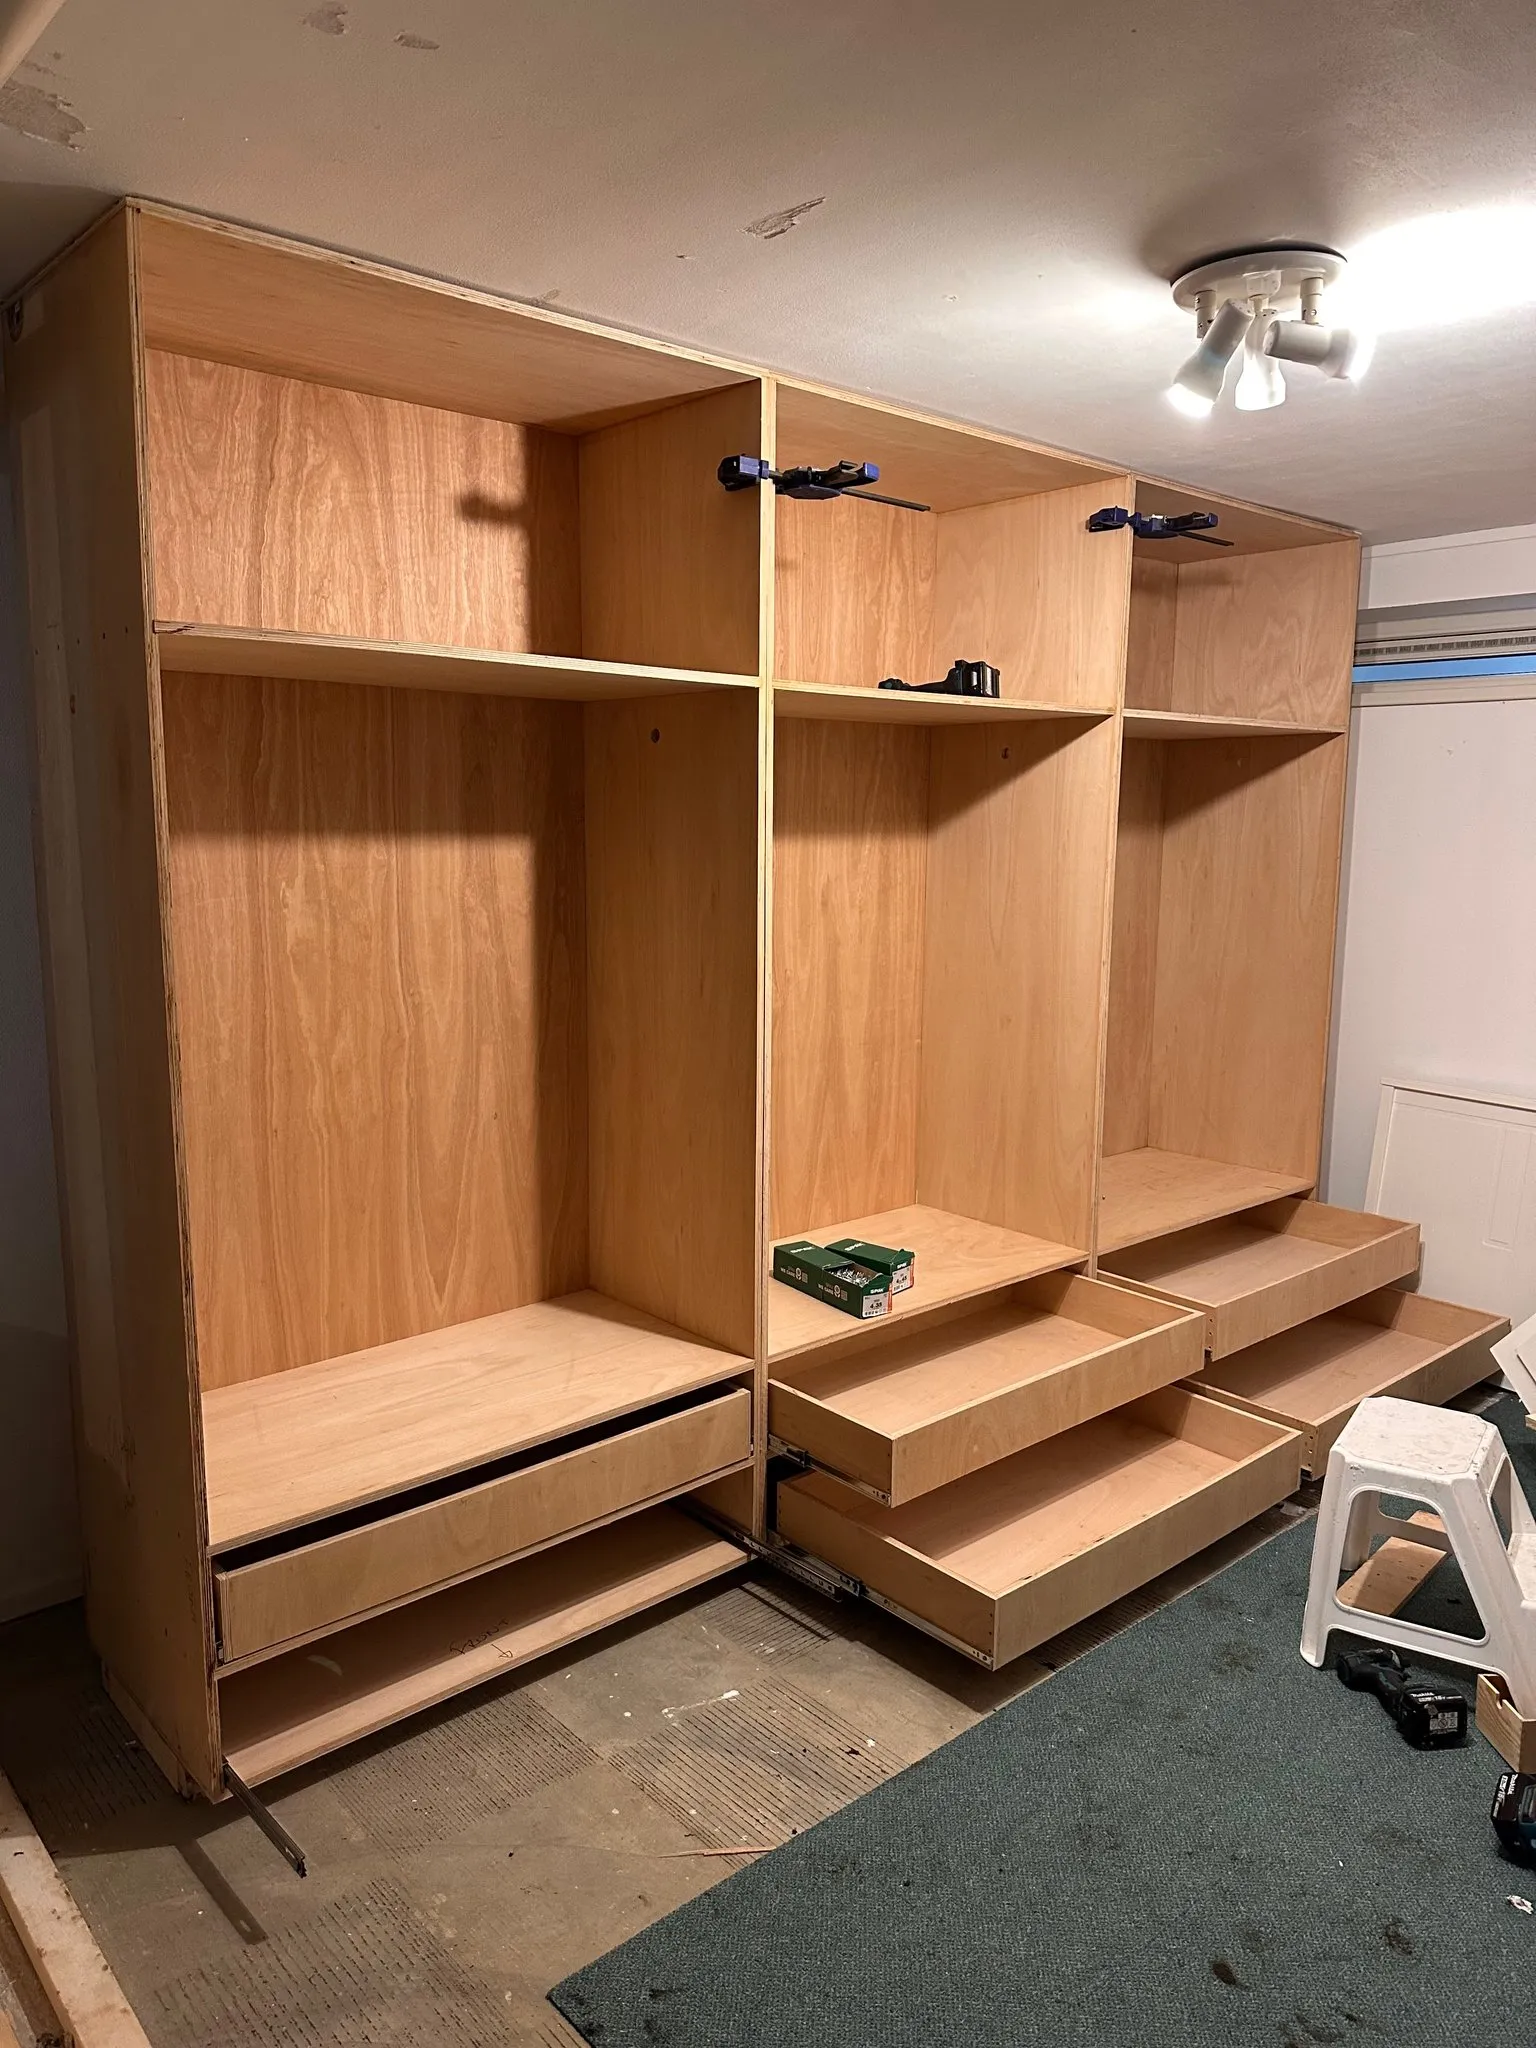
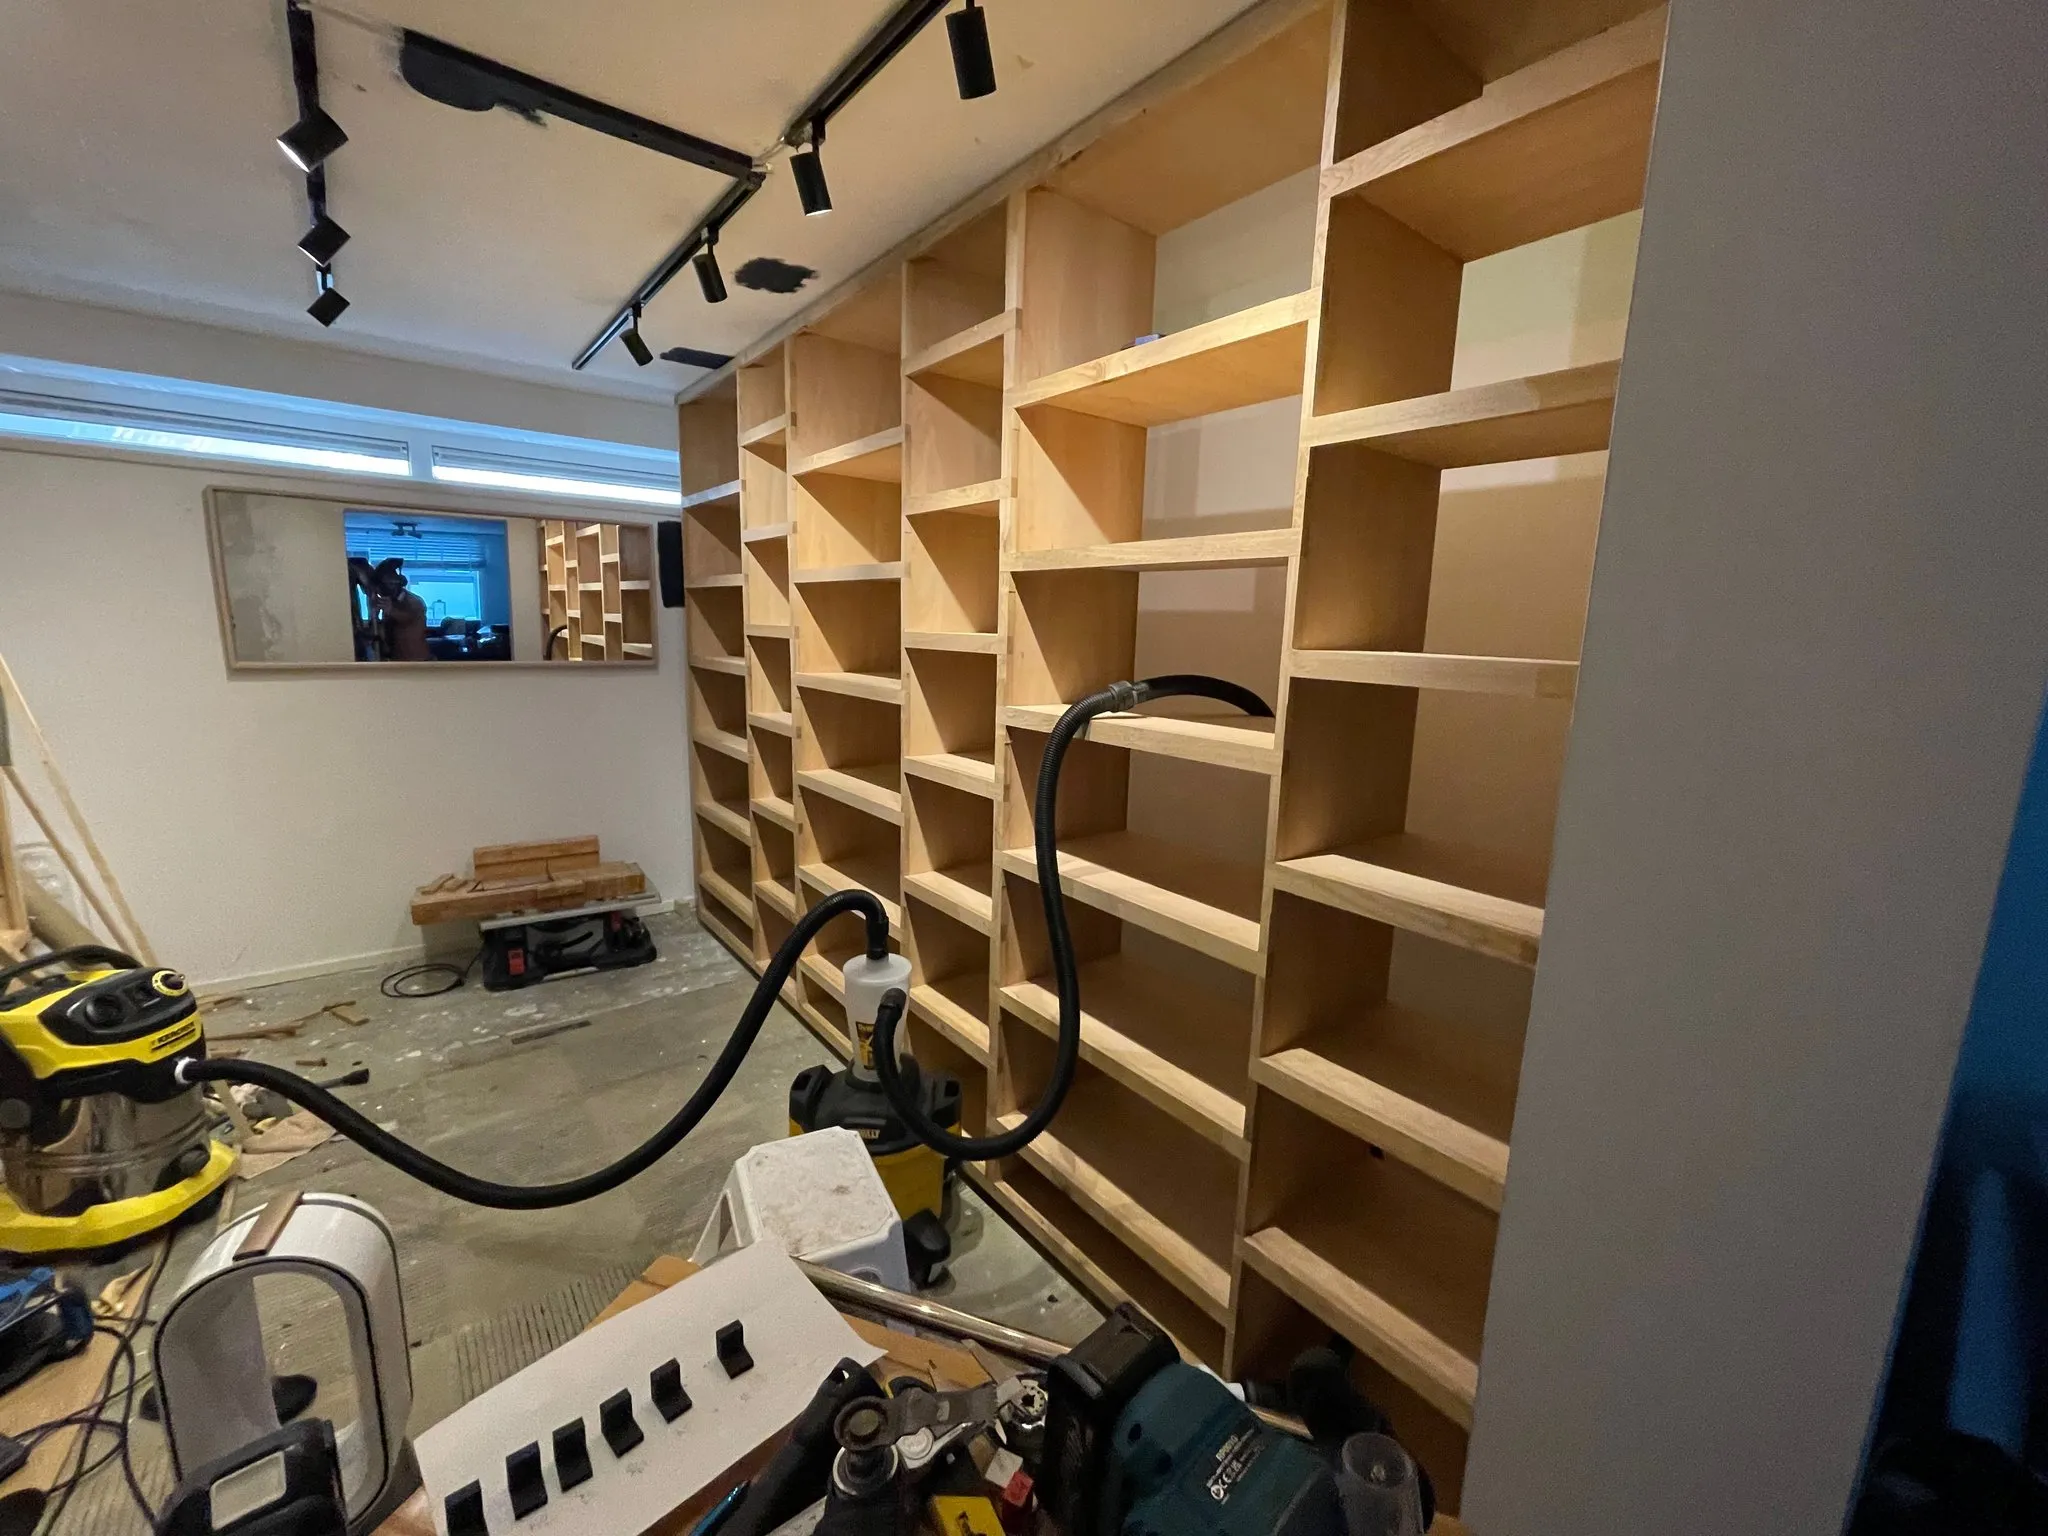
The concept was to build a stud wall that would also have a second added benefit of hiding a sewage pipe that runs along the ceiling of the basement. On the left side we would have space for hanging clothes and then also bigger spaces for storage of baby stuff, car seats, and skiing equipment. Then we would have a really large amount of space for some drawers. These drawers were specifically designed to be very big in terms of floor area but quite shallow so that you're encouraged to keep the amount of stuff thin. When you open the drawer, you have access to everything straight away rather than stacking stuff. These were really about making it so you can open the drawer and have access to everything straight away without having to dig for stuff.
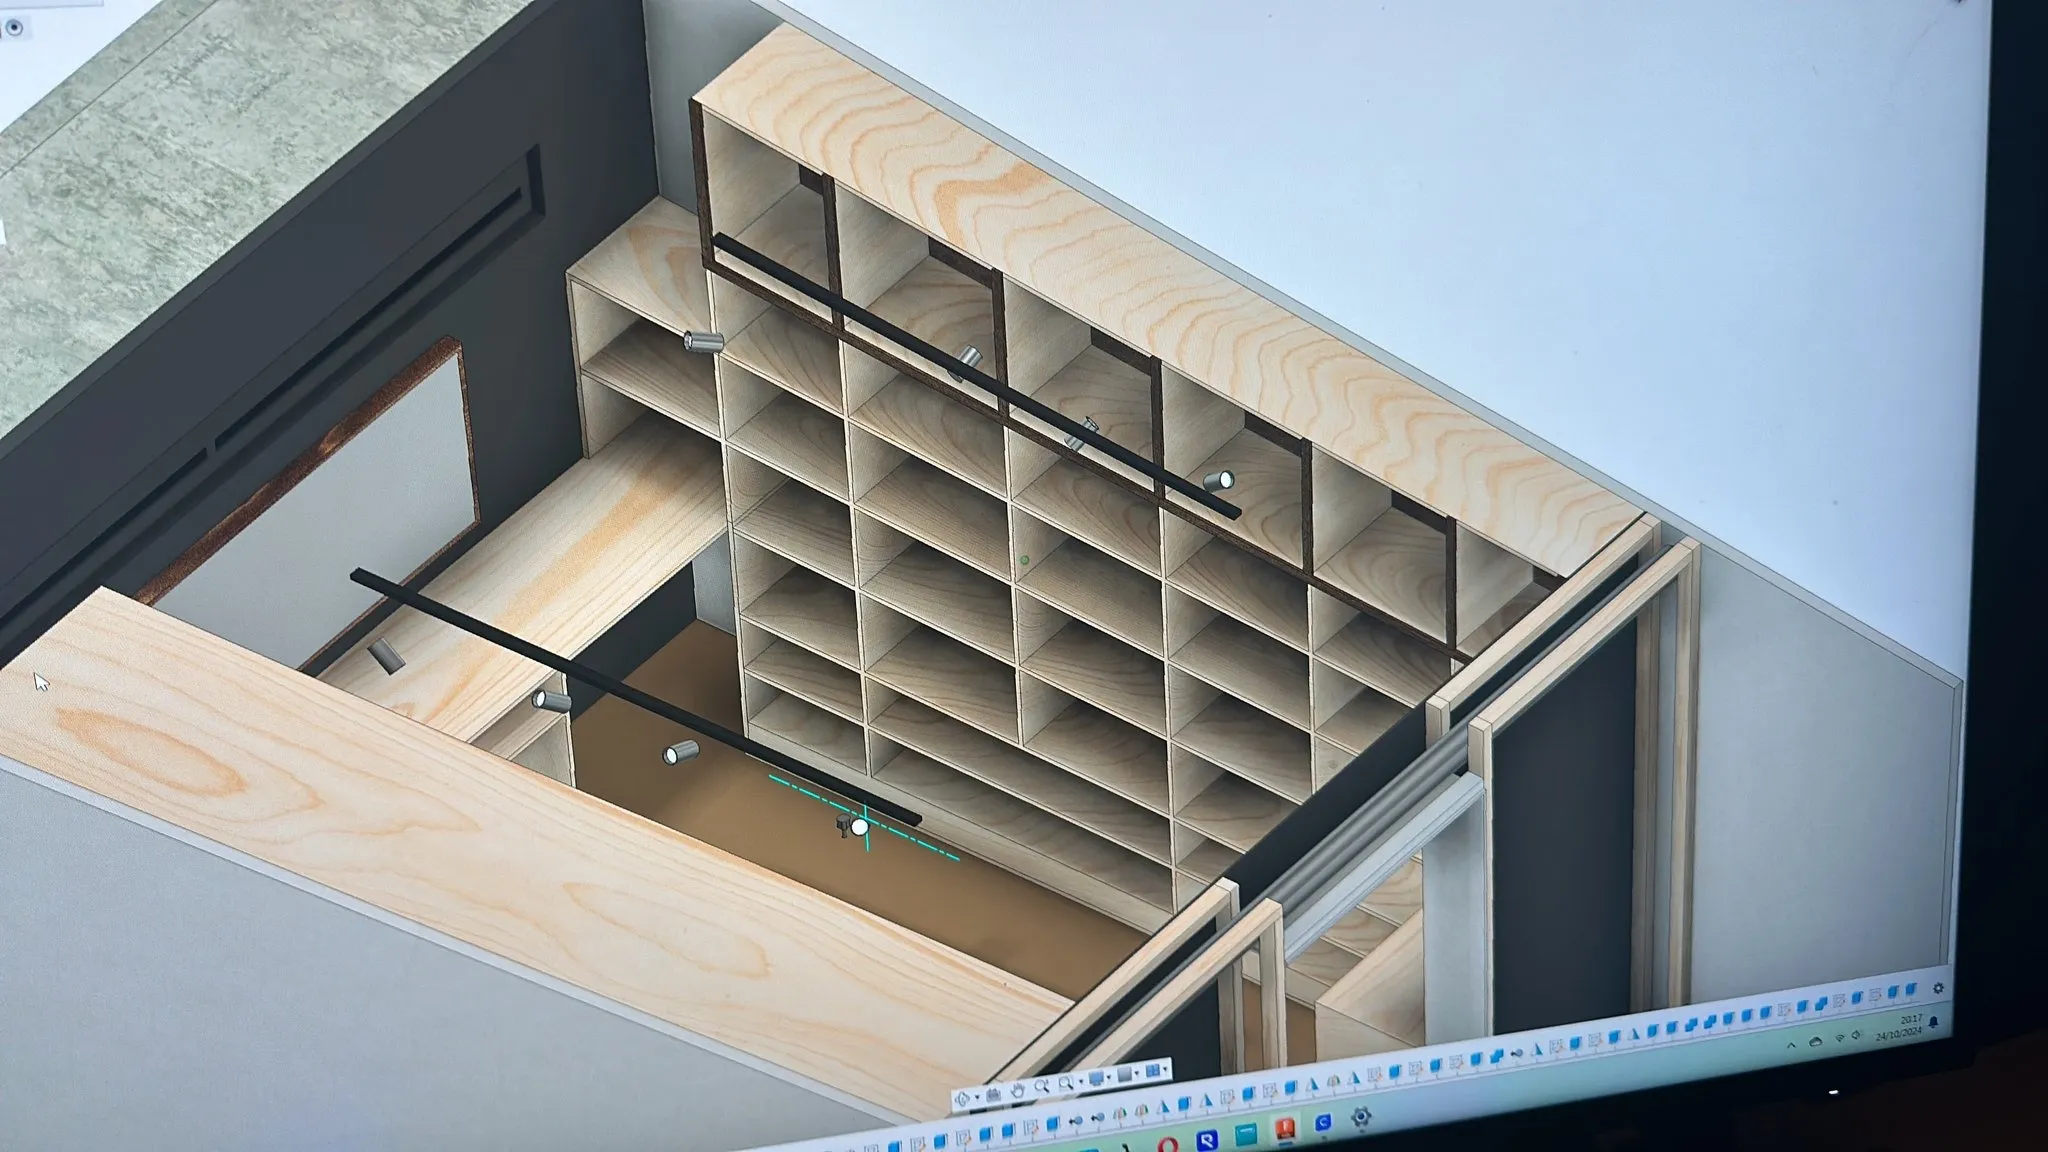
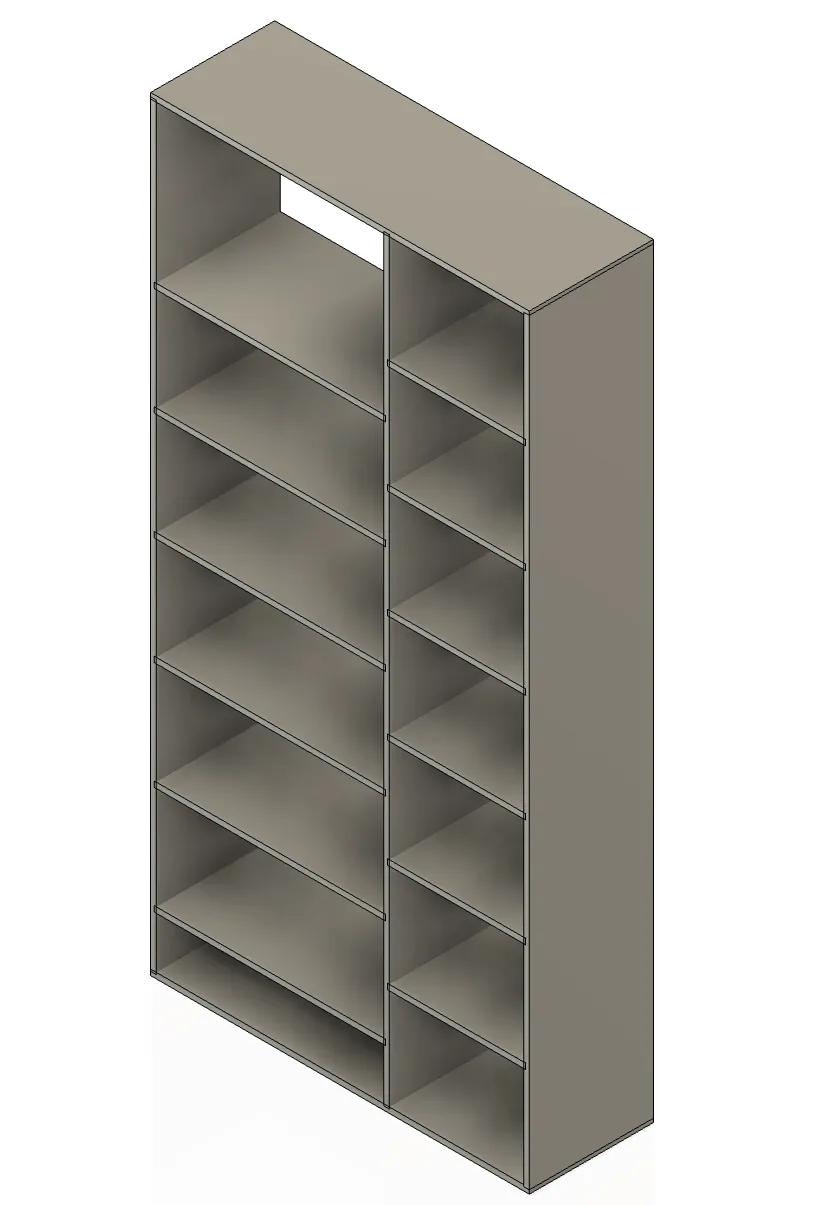
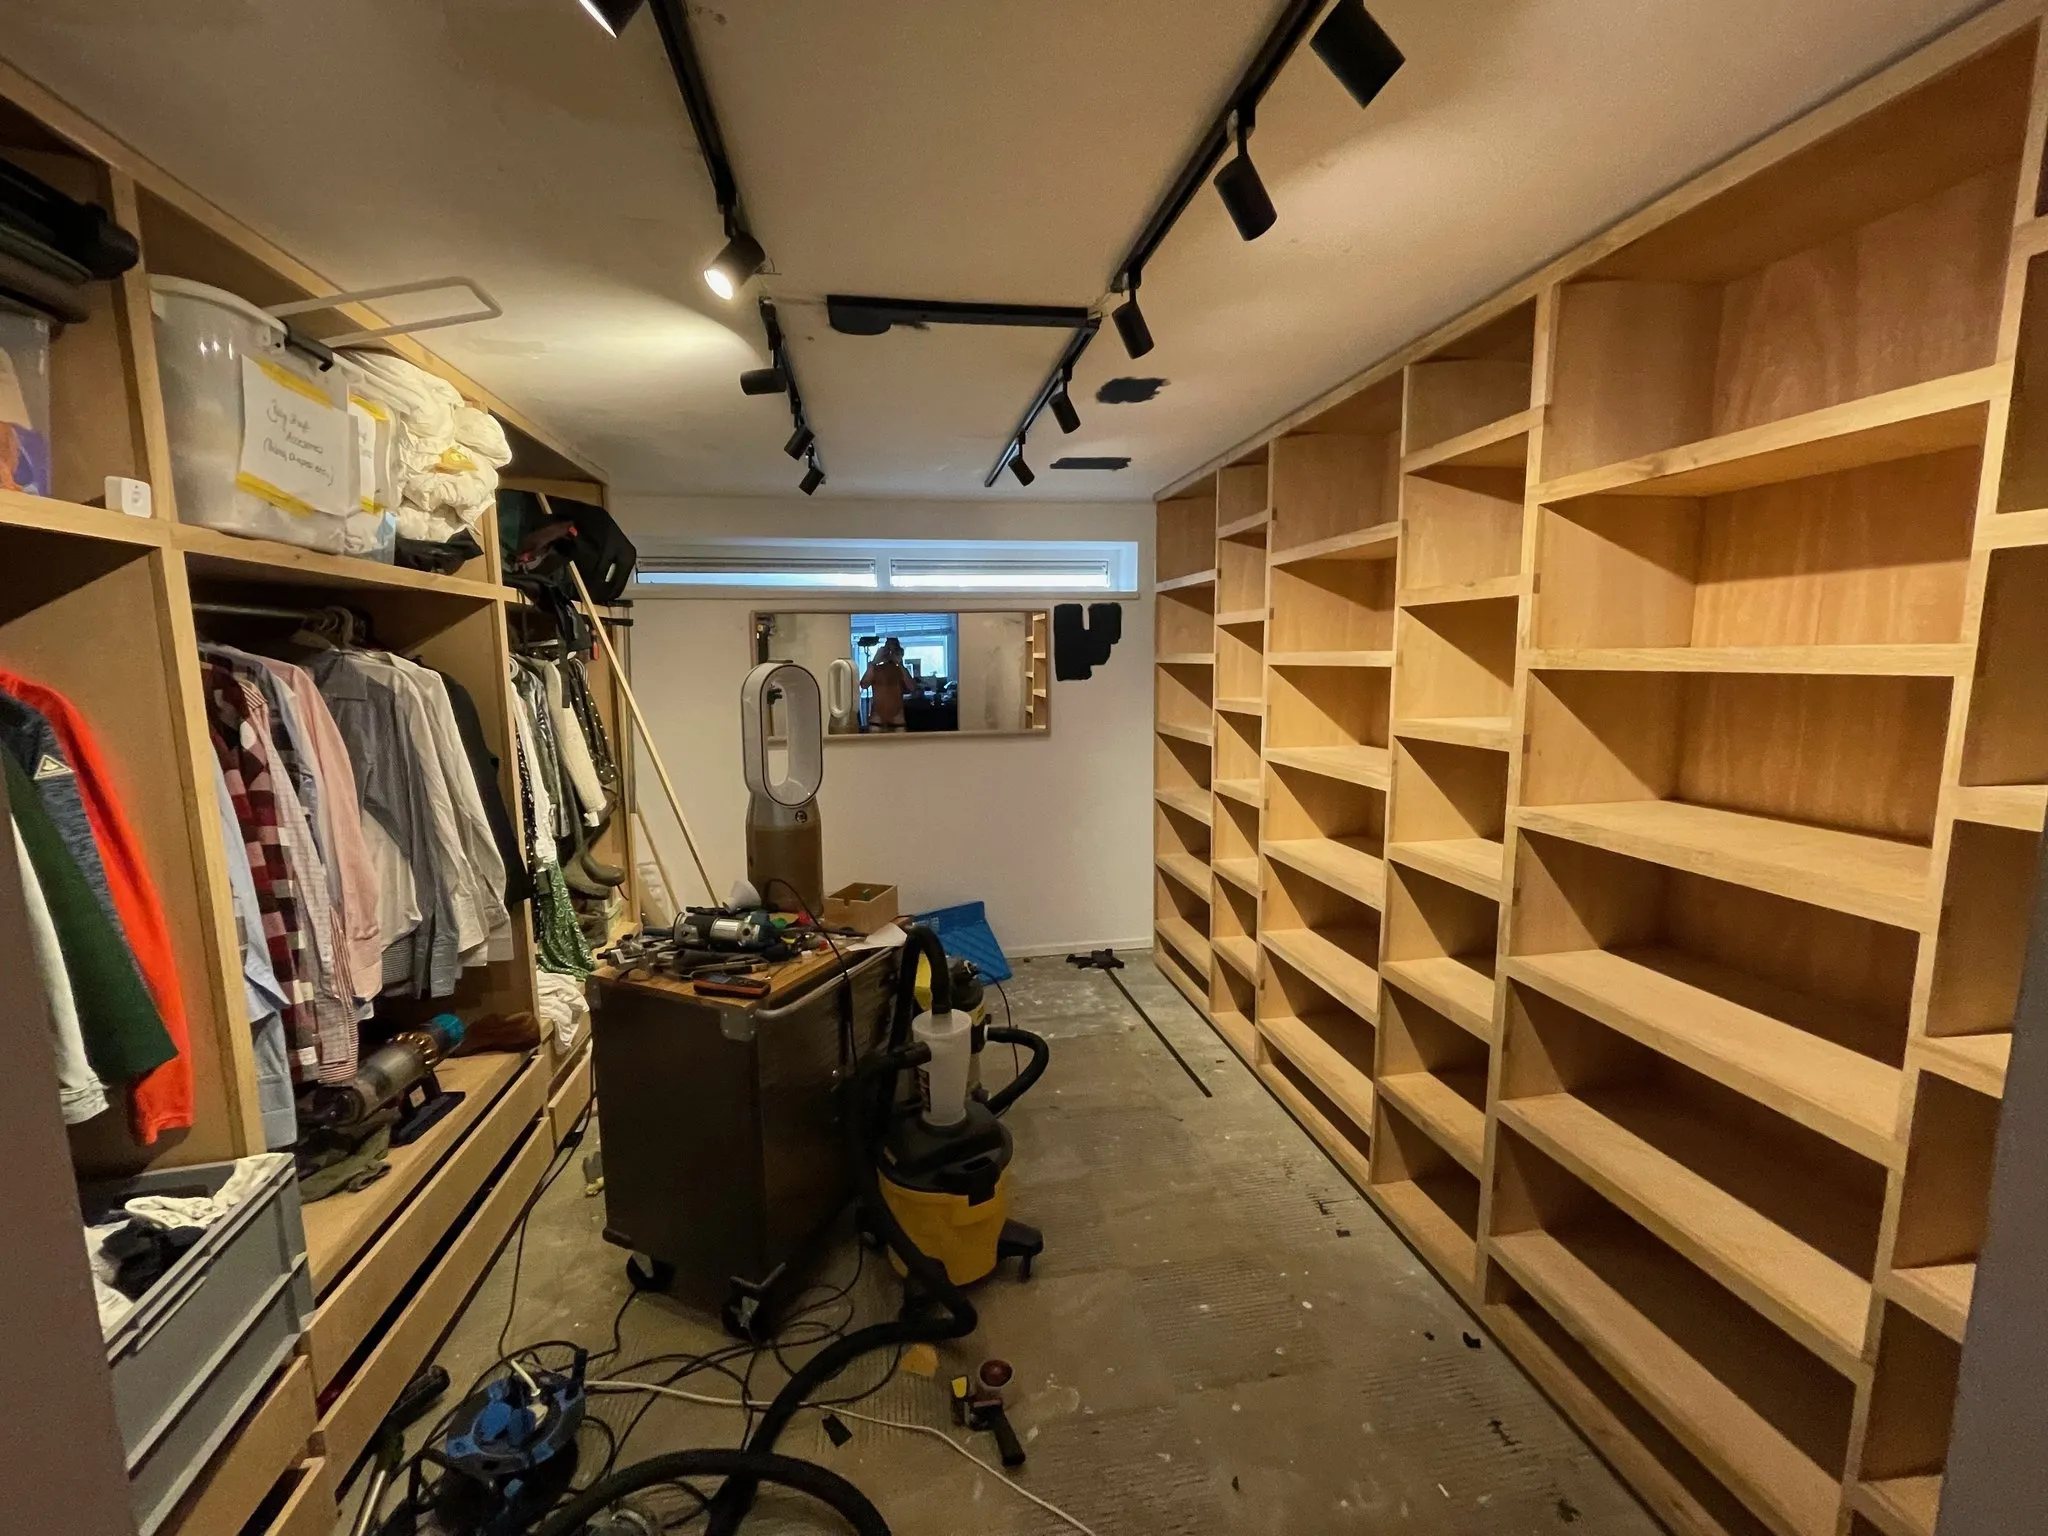
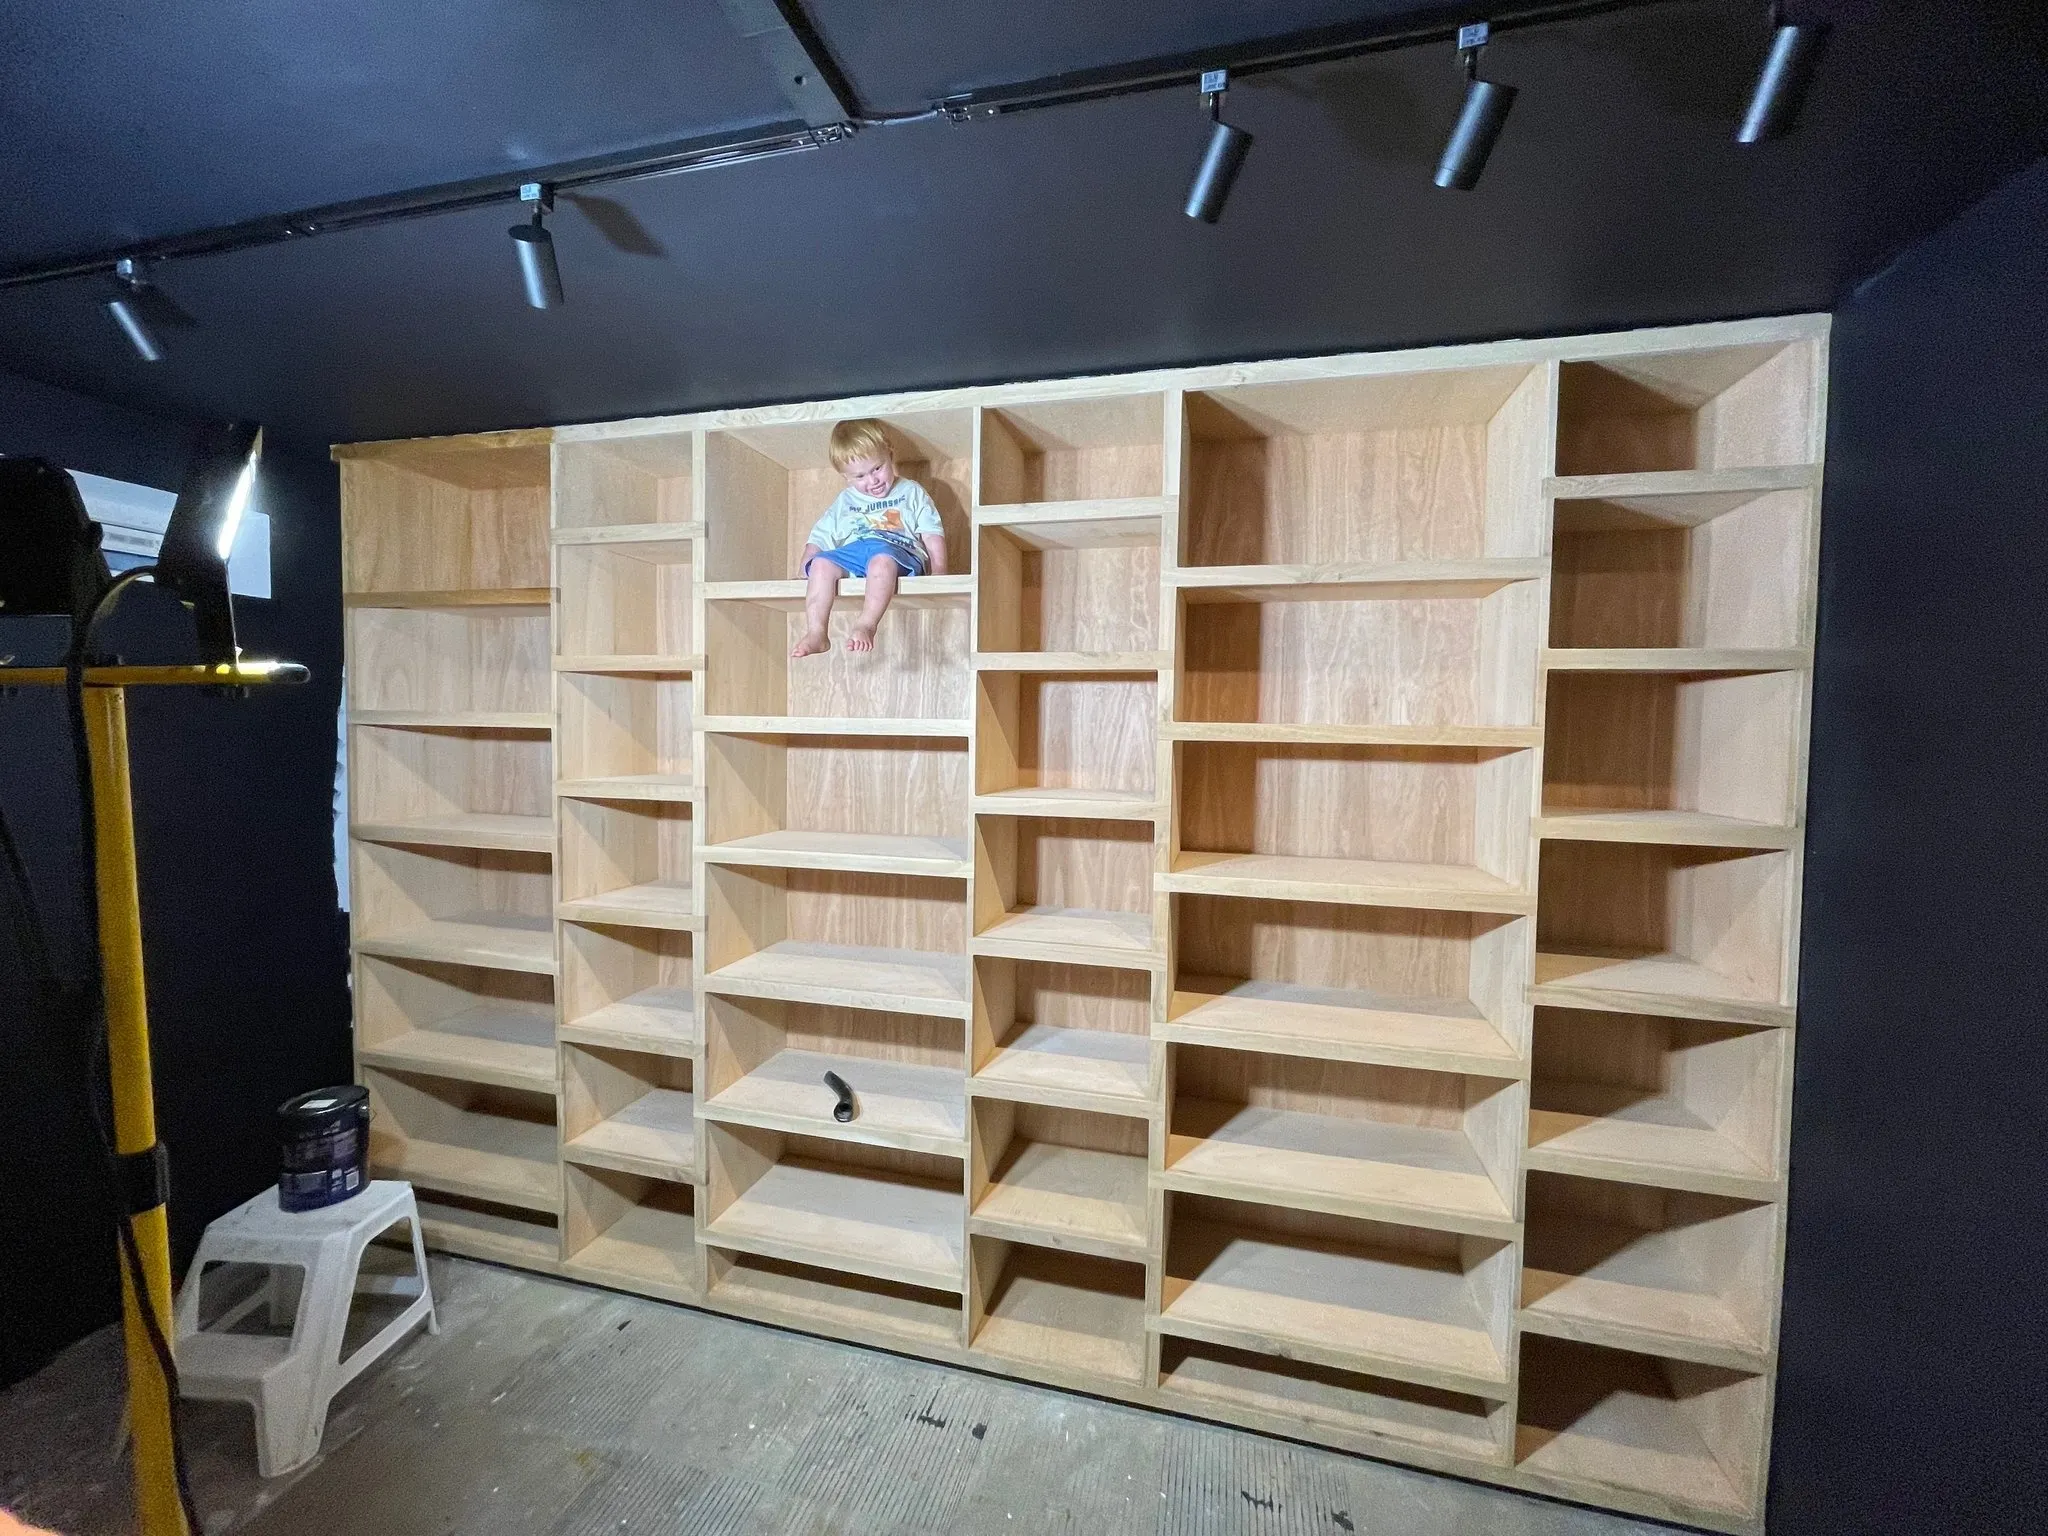
Then on the other side, it was really about maximizing shelf area and again being able to see all of your clothes instantly and being able to pick up exactly the thing that you want straight away. The plan was to not use any screws in a way that you would see any screws, and also I wanted it so that at any point of any of the design, you would be able to stand on it. If someone needed to reach one of the higher levels or higher shelves, they would be able to stand on a shelf and it wouldn't break, and there would be no kind of worries about the structural stability of it. That was specifically the thing that bugged me about the wardrobe that was there before—it looked terrible, but also it was super weak. Anything that I build, I wanted it to be as strong as possible.
It was also designed so that it filled up the whole space from floor to ceiling and obviously was built in a way where it would stay with the house. This was also considered to be a bit of an investment into the house and something that would also increase the value of the house.

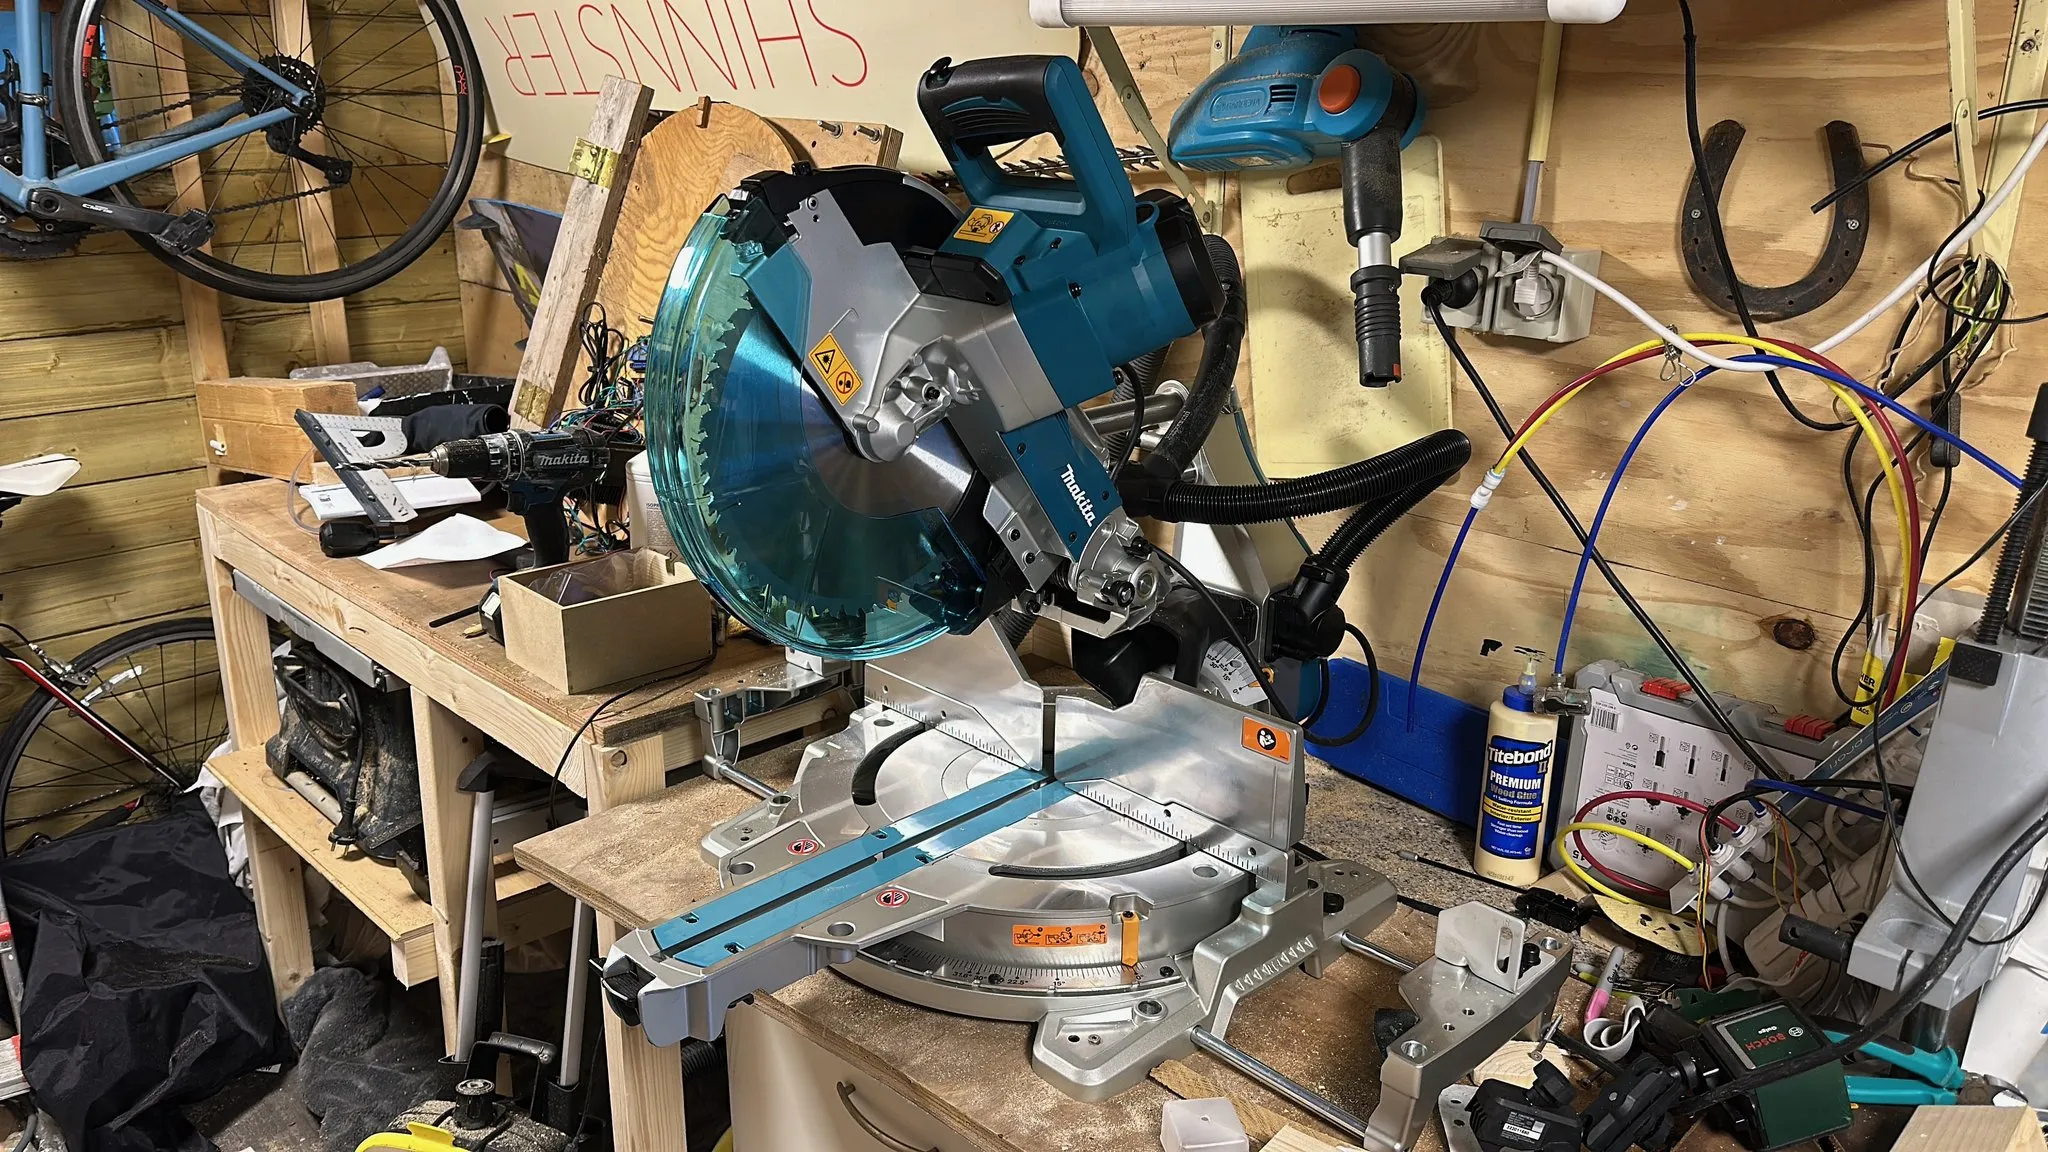
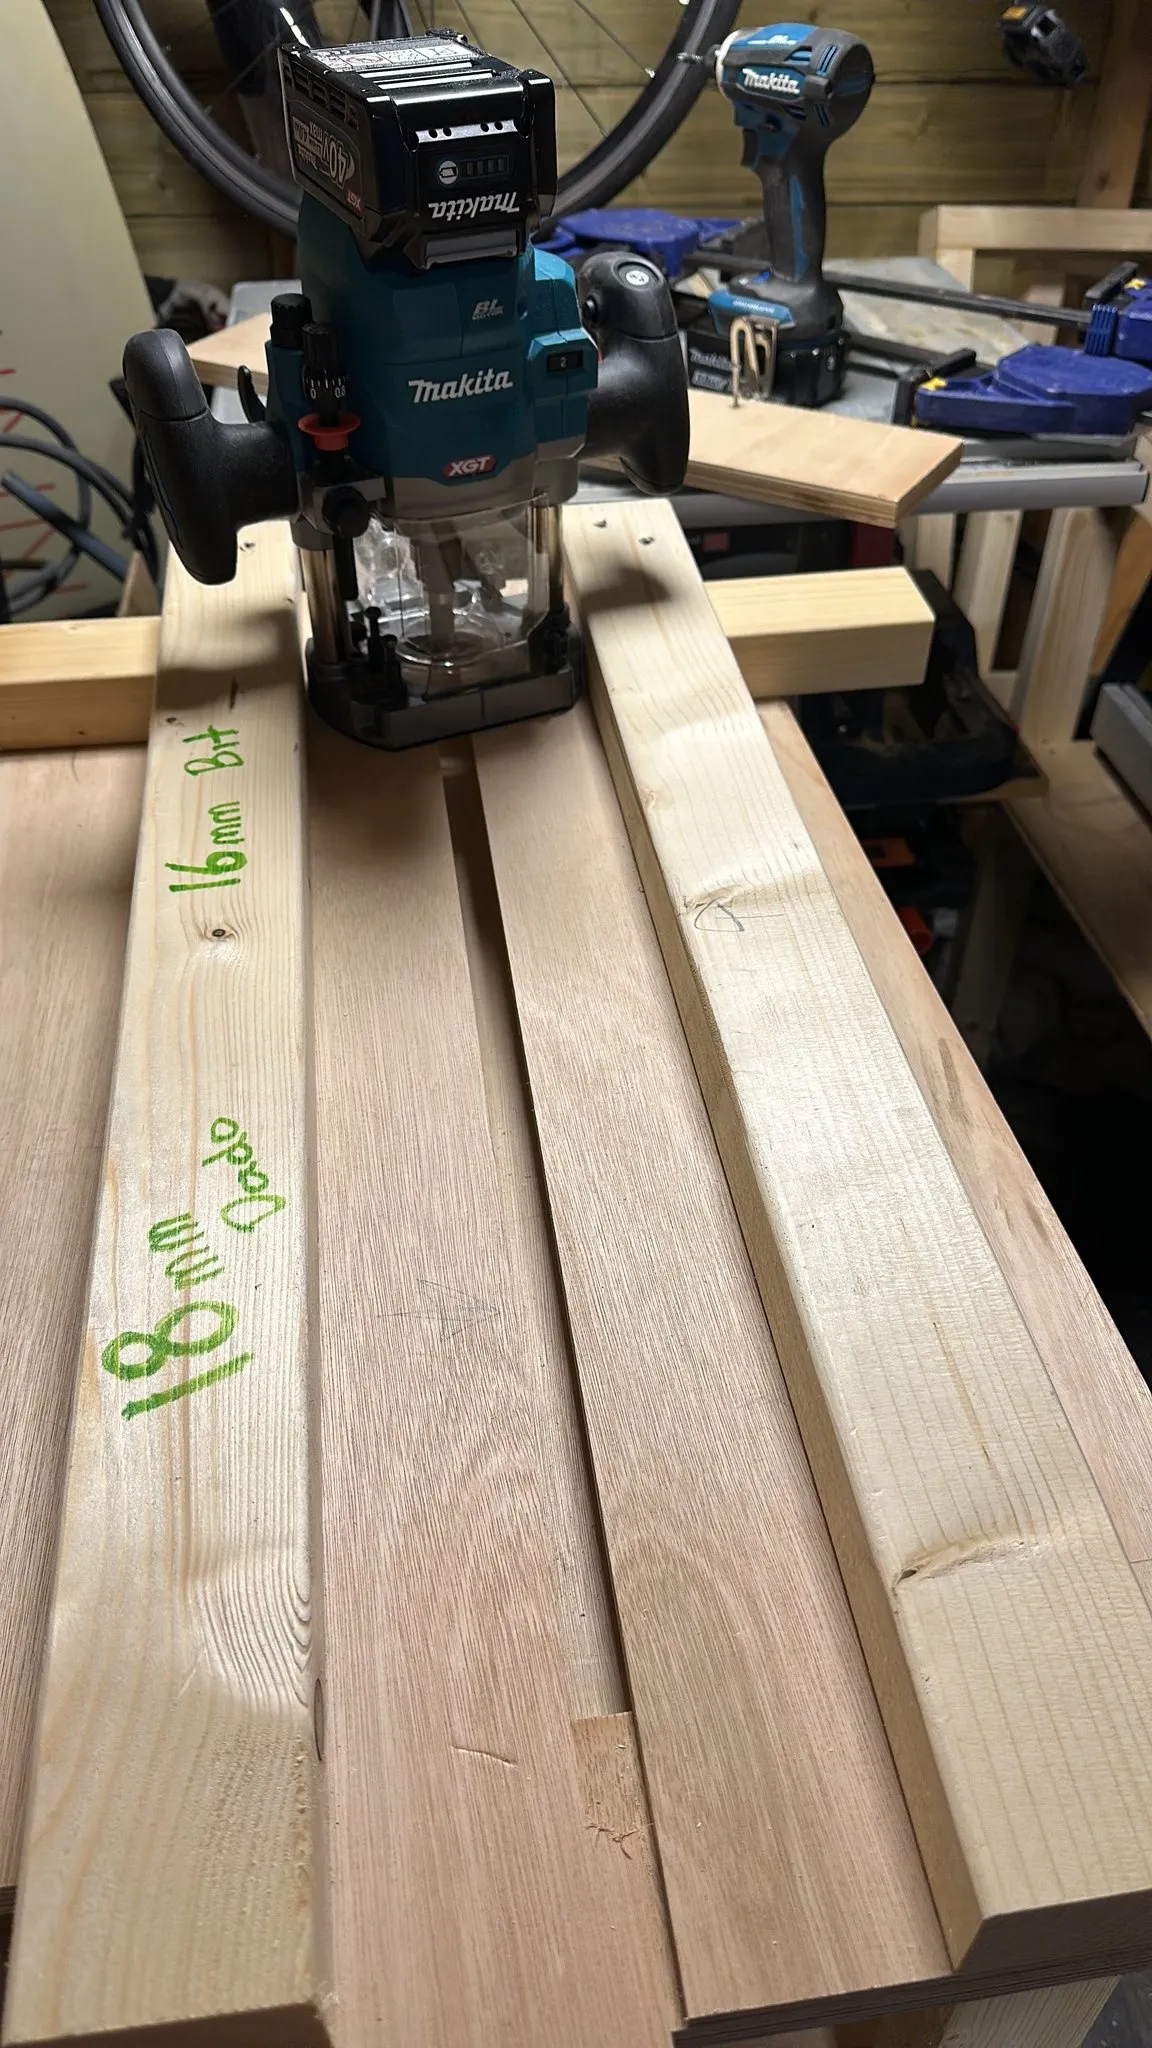
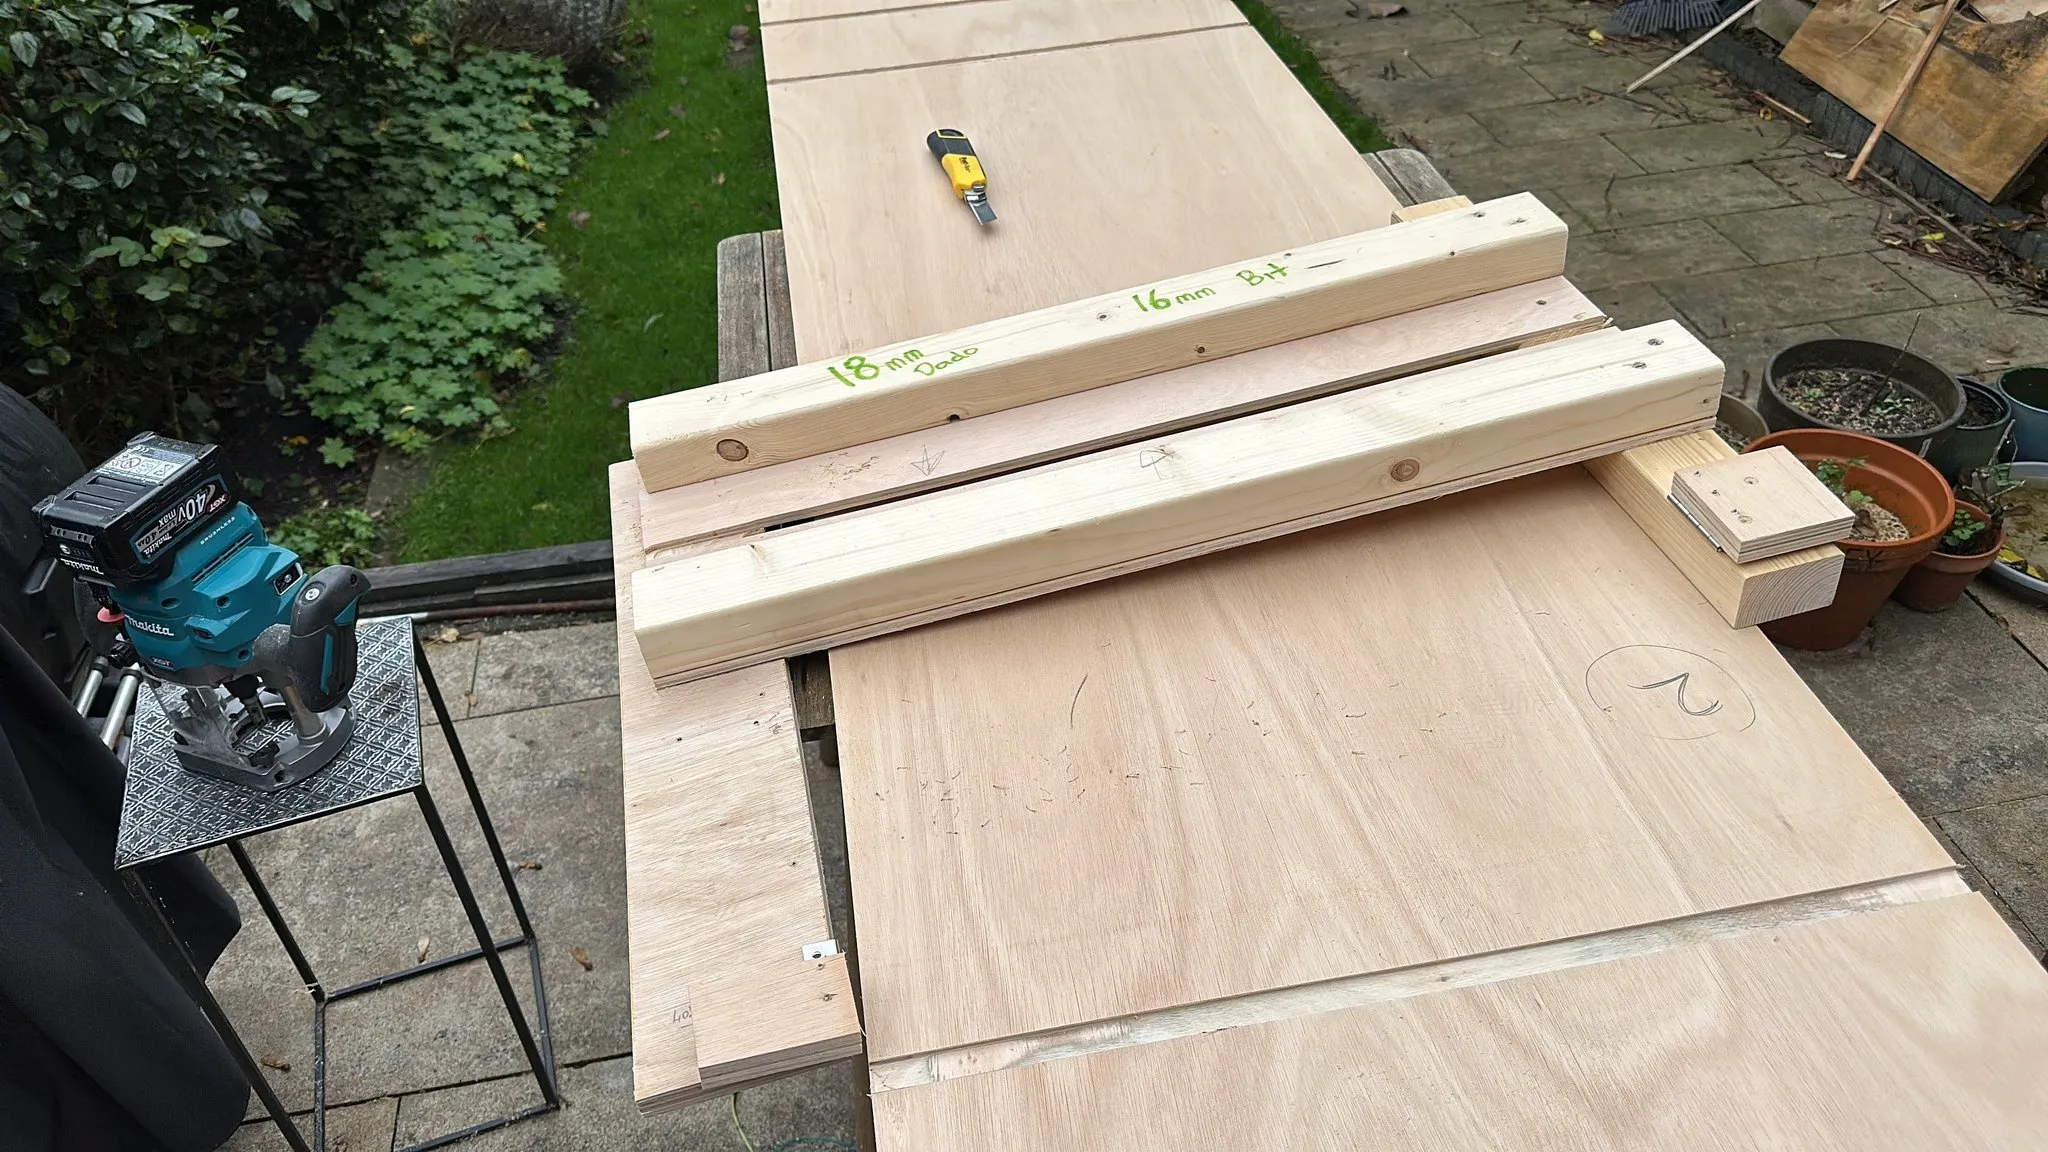
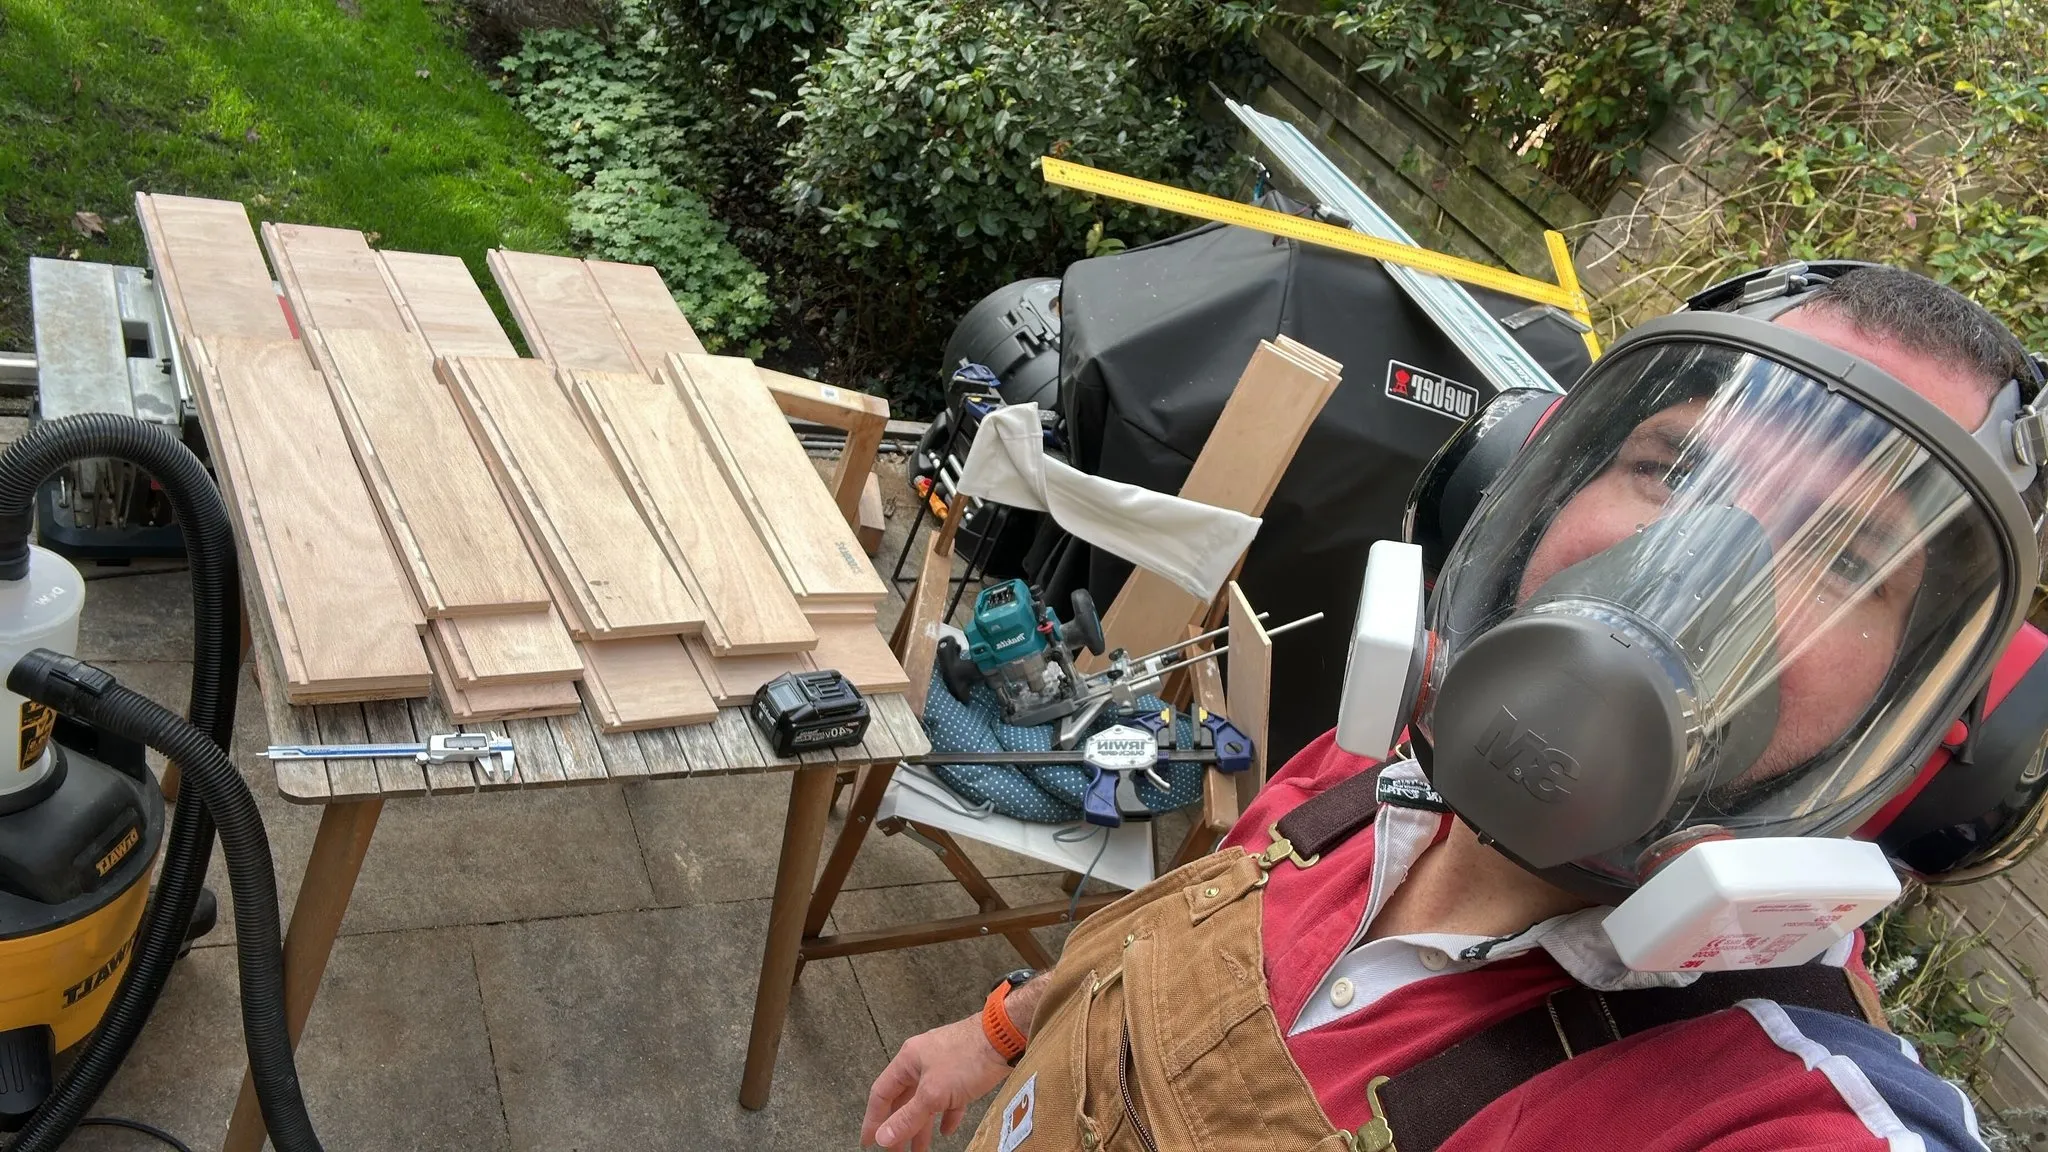
The general design idea was going to be largely based on using big sheets of plywood and ripping them to size. One of the first things that I knew I would need to buy is a track saw. I ended up going for the Makita 40V track saw, which effectively has the same power as an AC unit but without the hassle of the cable. Makita was doing a deal where you could get the battery for free, which is often a big expense when buying cordless tools. I also knew that I was going to be needing to do a lot of routing, so I also bought a 40V Makita router.
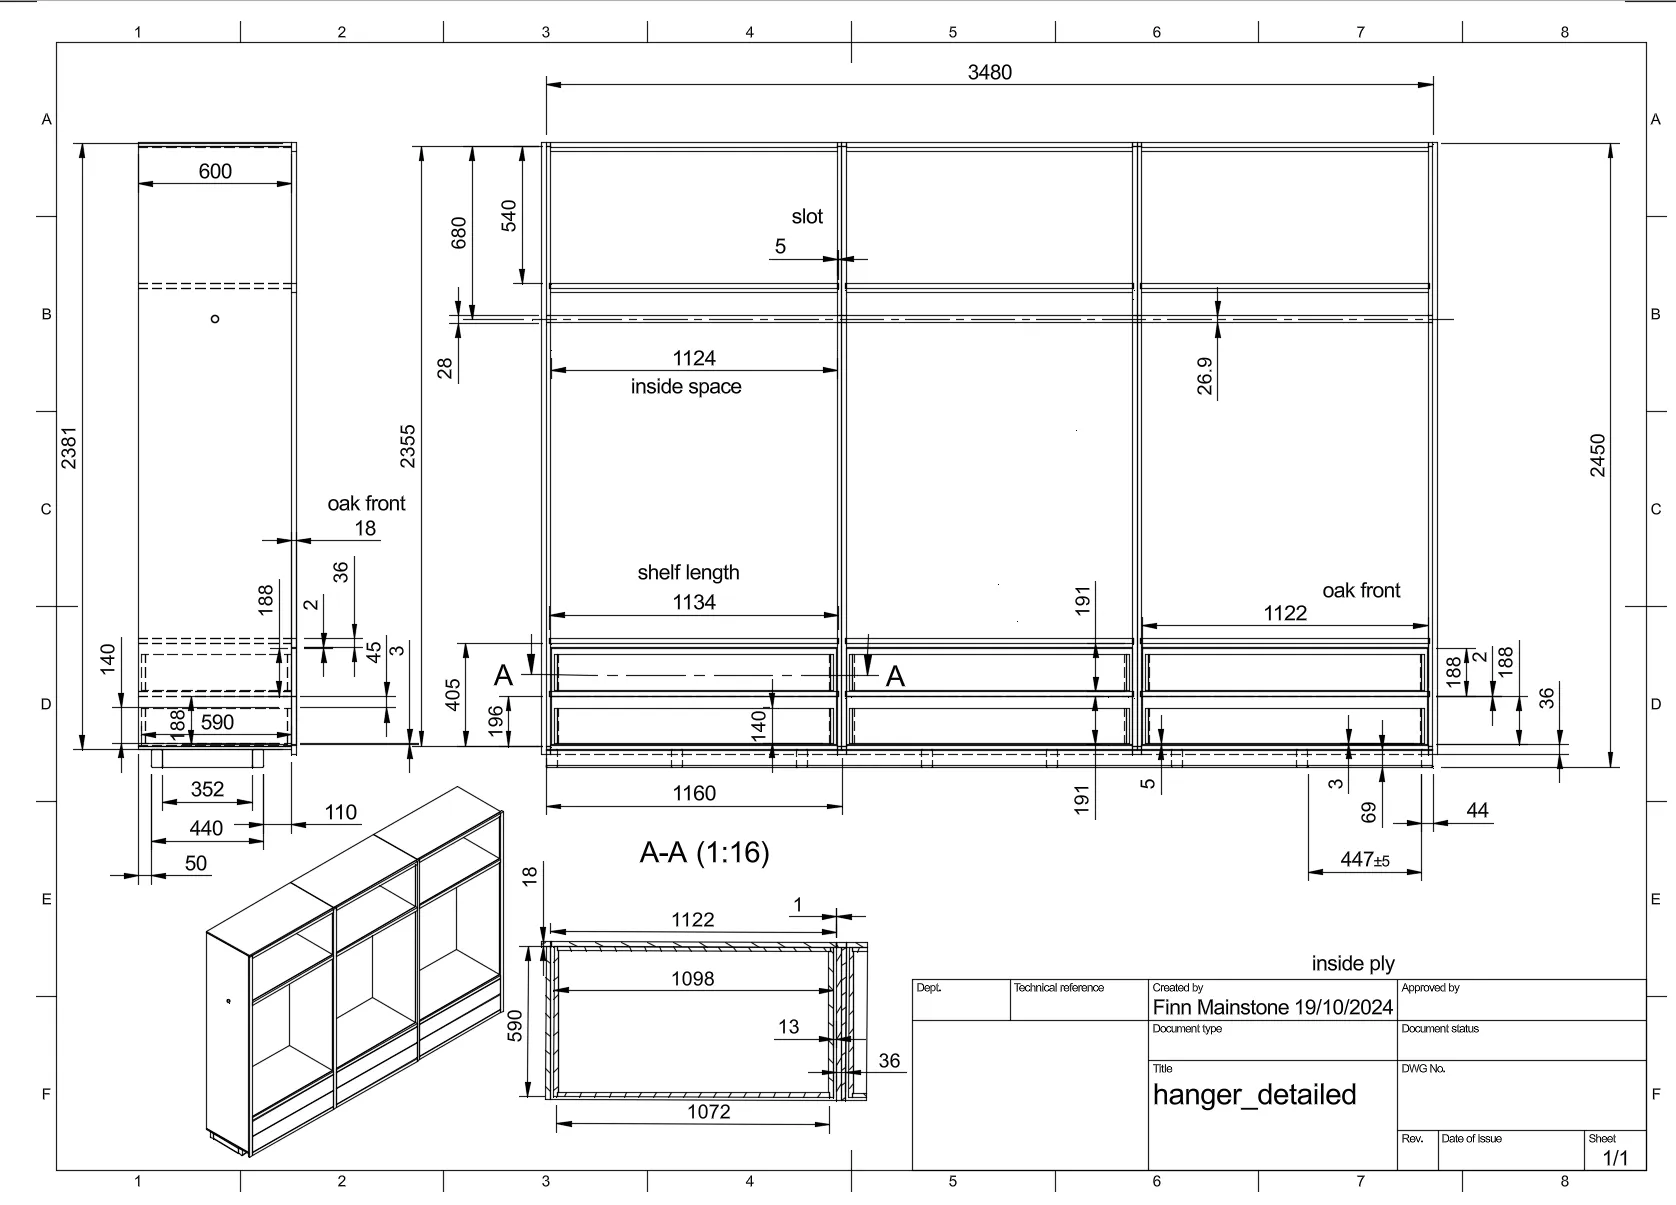
The design was that the side that would have the hanging clothes would be quite a bit deeper, and the shelf unit on the other side would be quite a bit shallow so that you didn't have to go digging at the back for clothes. The general sort of concept was that everything should sort of be accessible really easily—you don't have to go digging for anything ever. Originally the plan was to have drawers on the shelf side as well at the bottom, but for simplicity and also after seeing how much space we had with the drawers on the hanging side, we decided not to do drawers on the shelf side.
I did the hanging clothes side first and then did the shelf side second. The hanging side was done sort of summer to autumn, and the shelves side was done in the spring.
Track Saw
Makita 40V track saw for precise plywood cutting, with free battery promotion
Router
Makita 40V router for extensive slot routing work required for shelf system
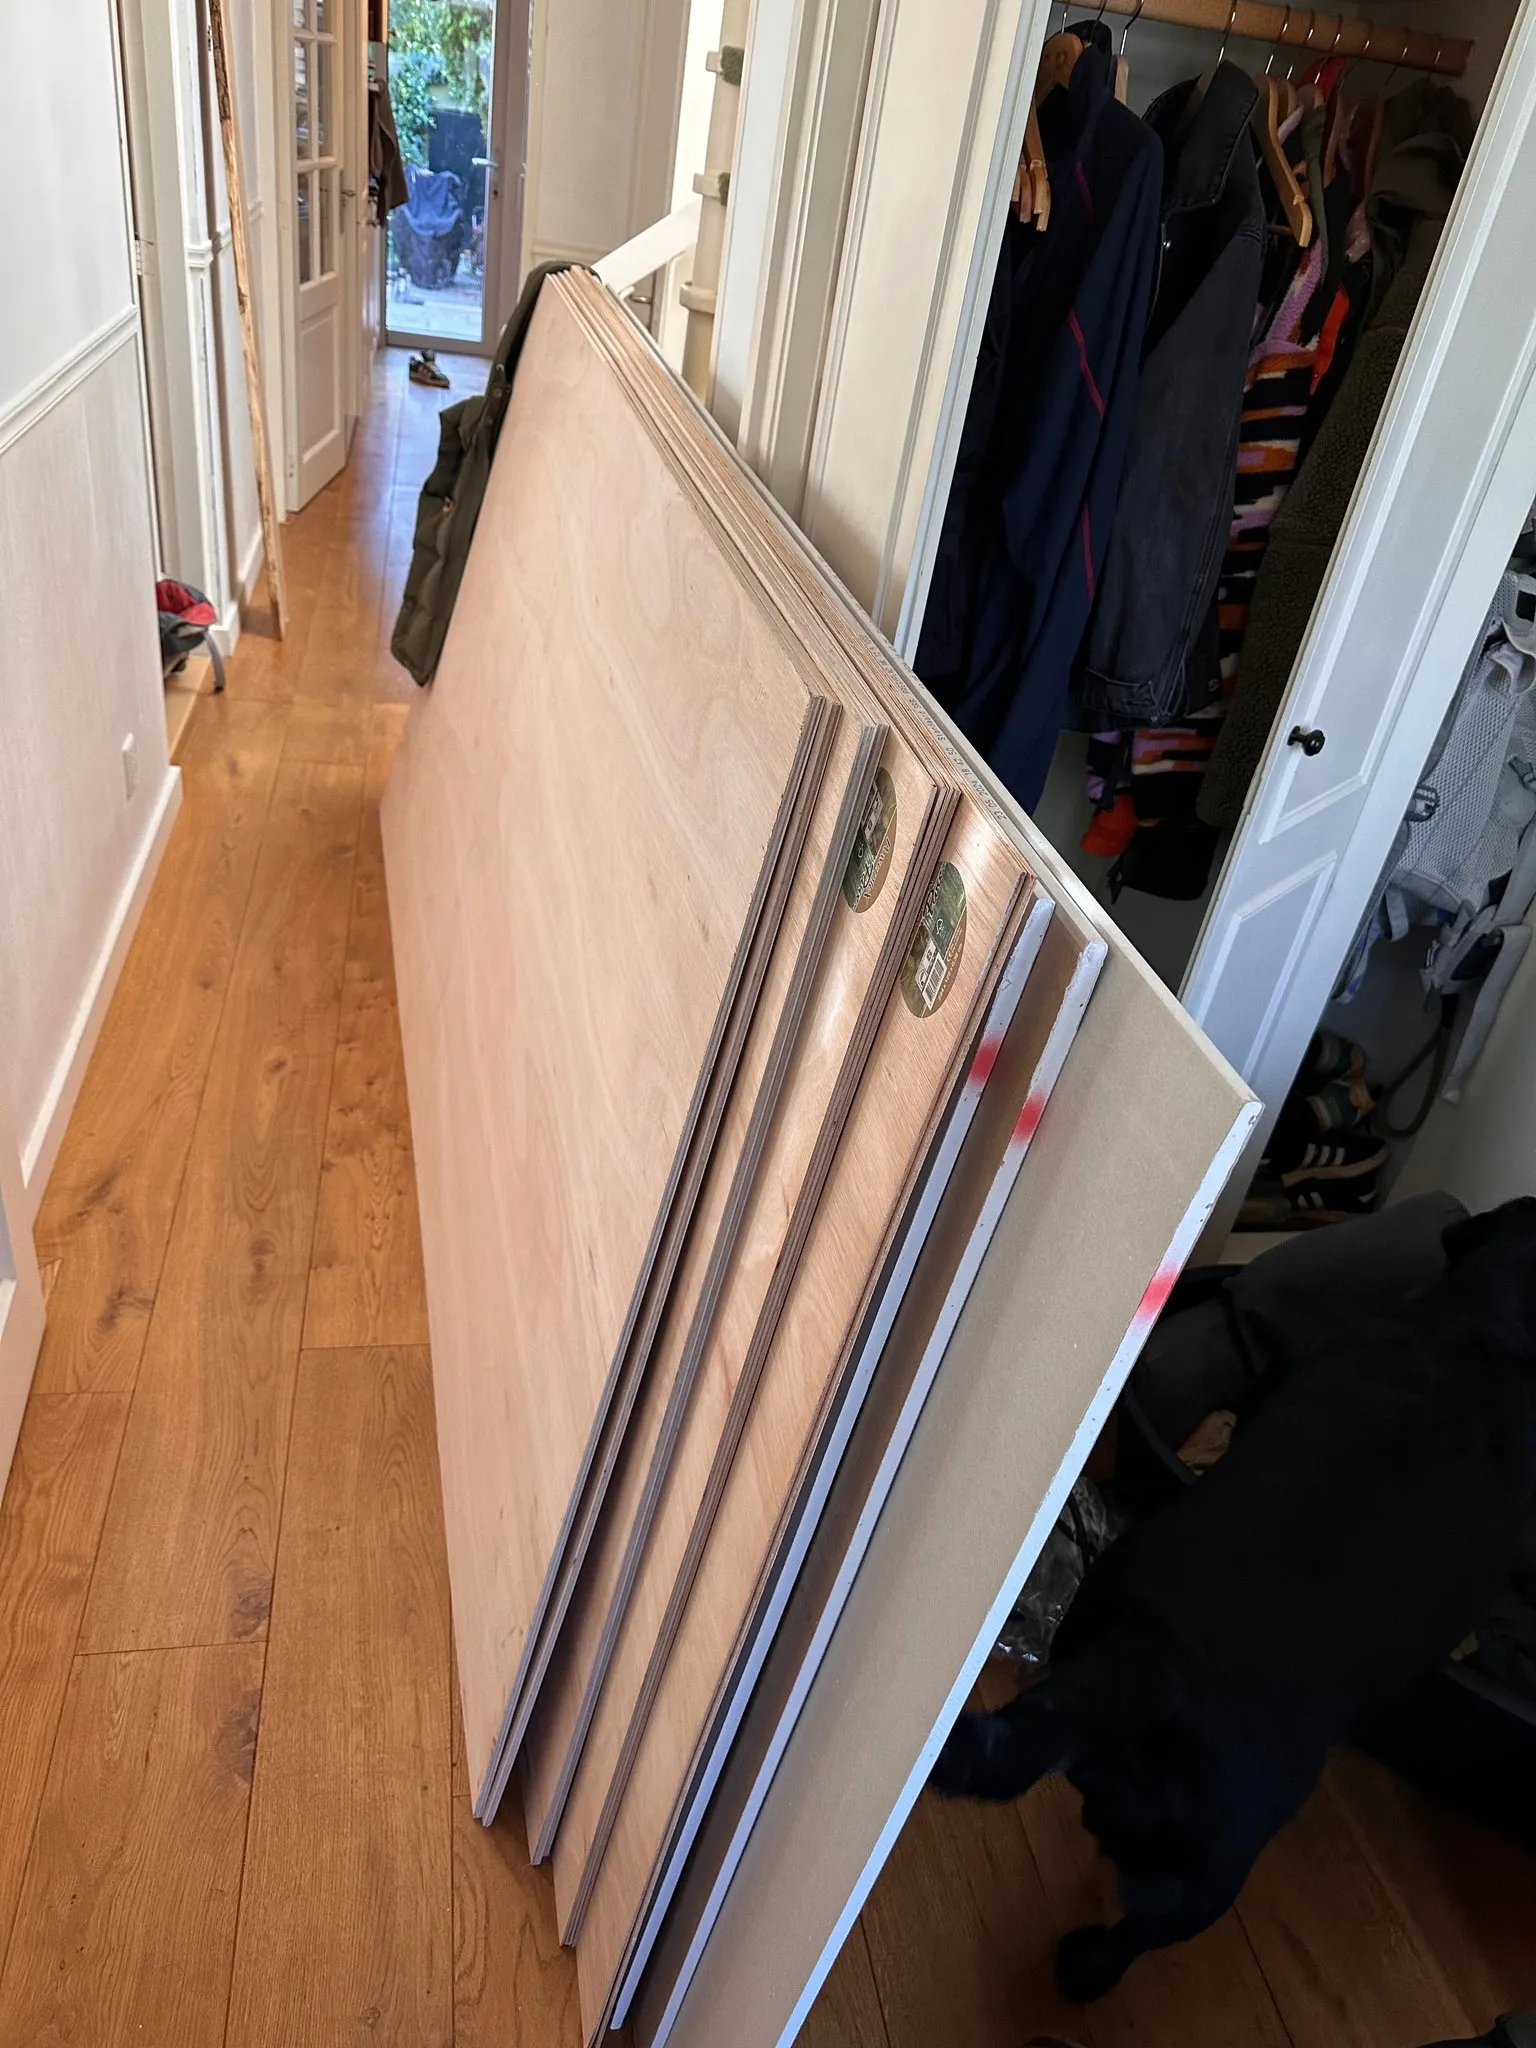
Plywood
18mm thick plywood used throughout for structural integrity
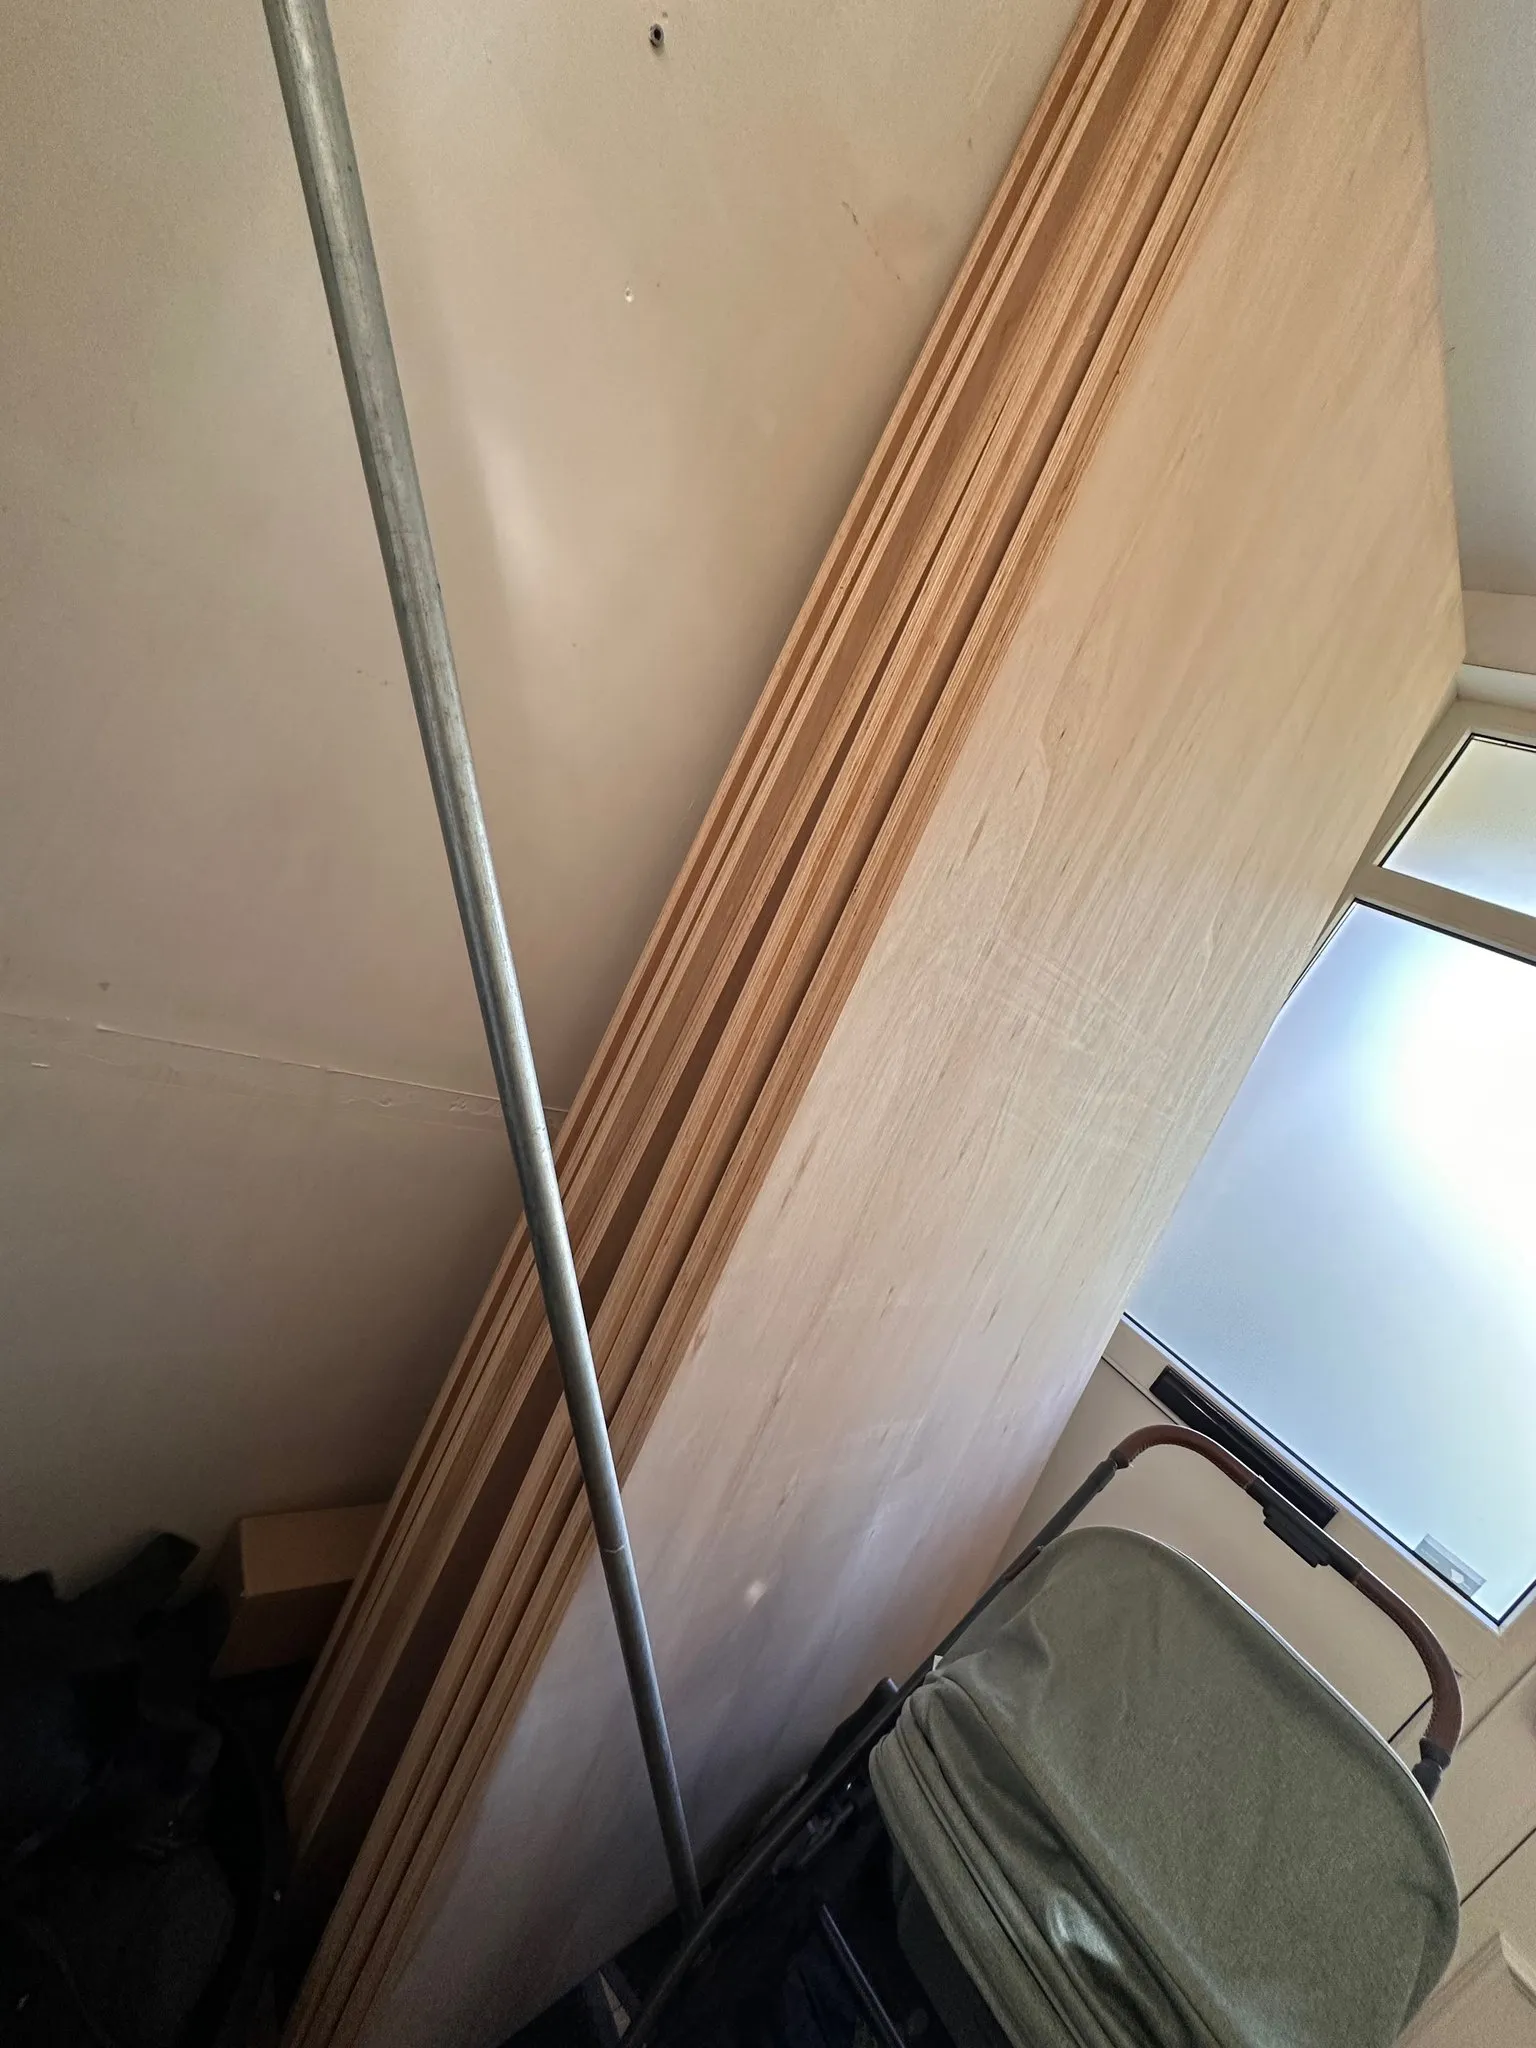
Oak Fronting
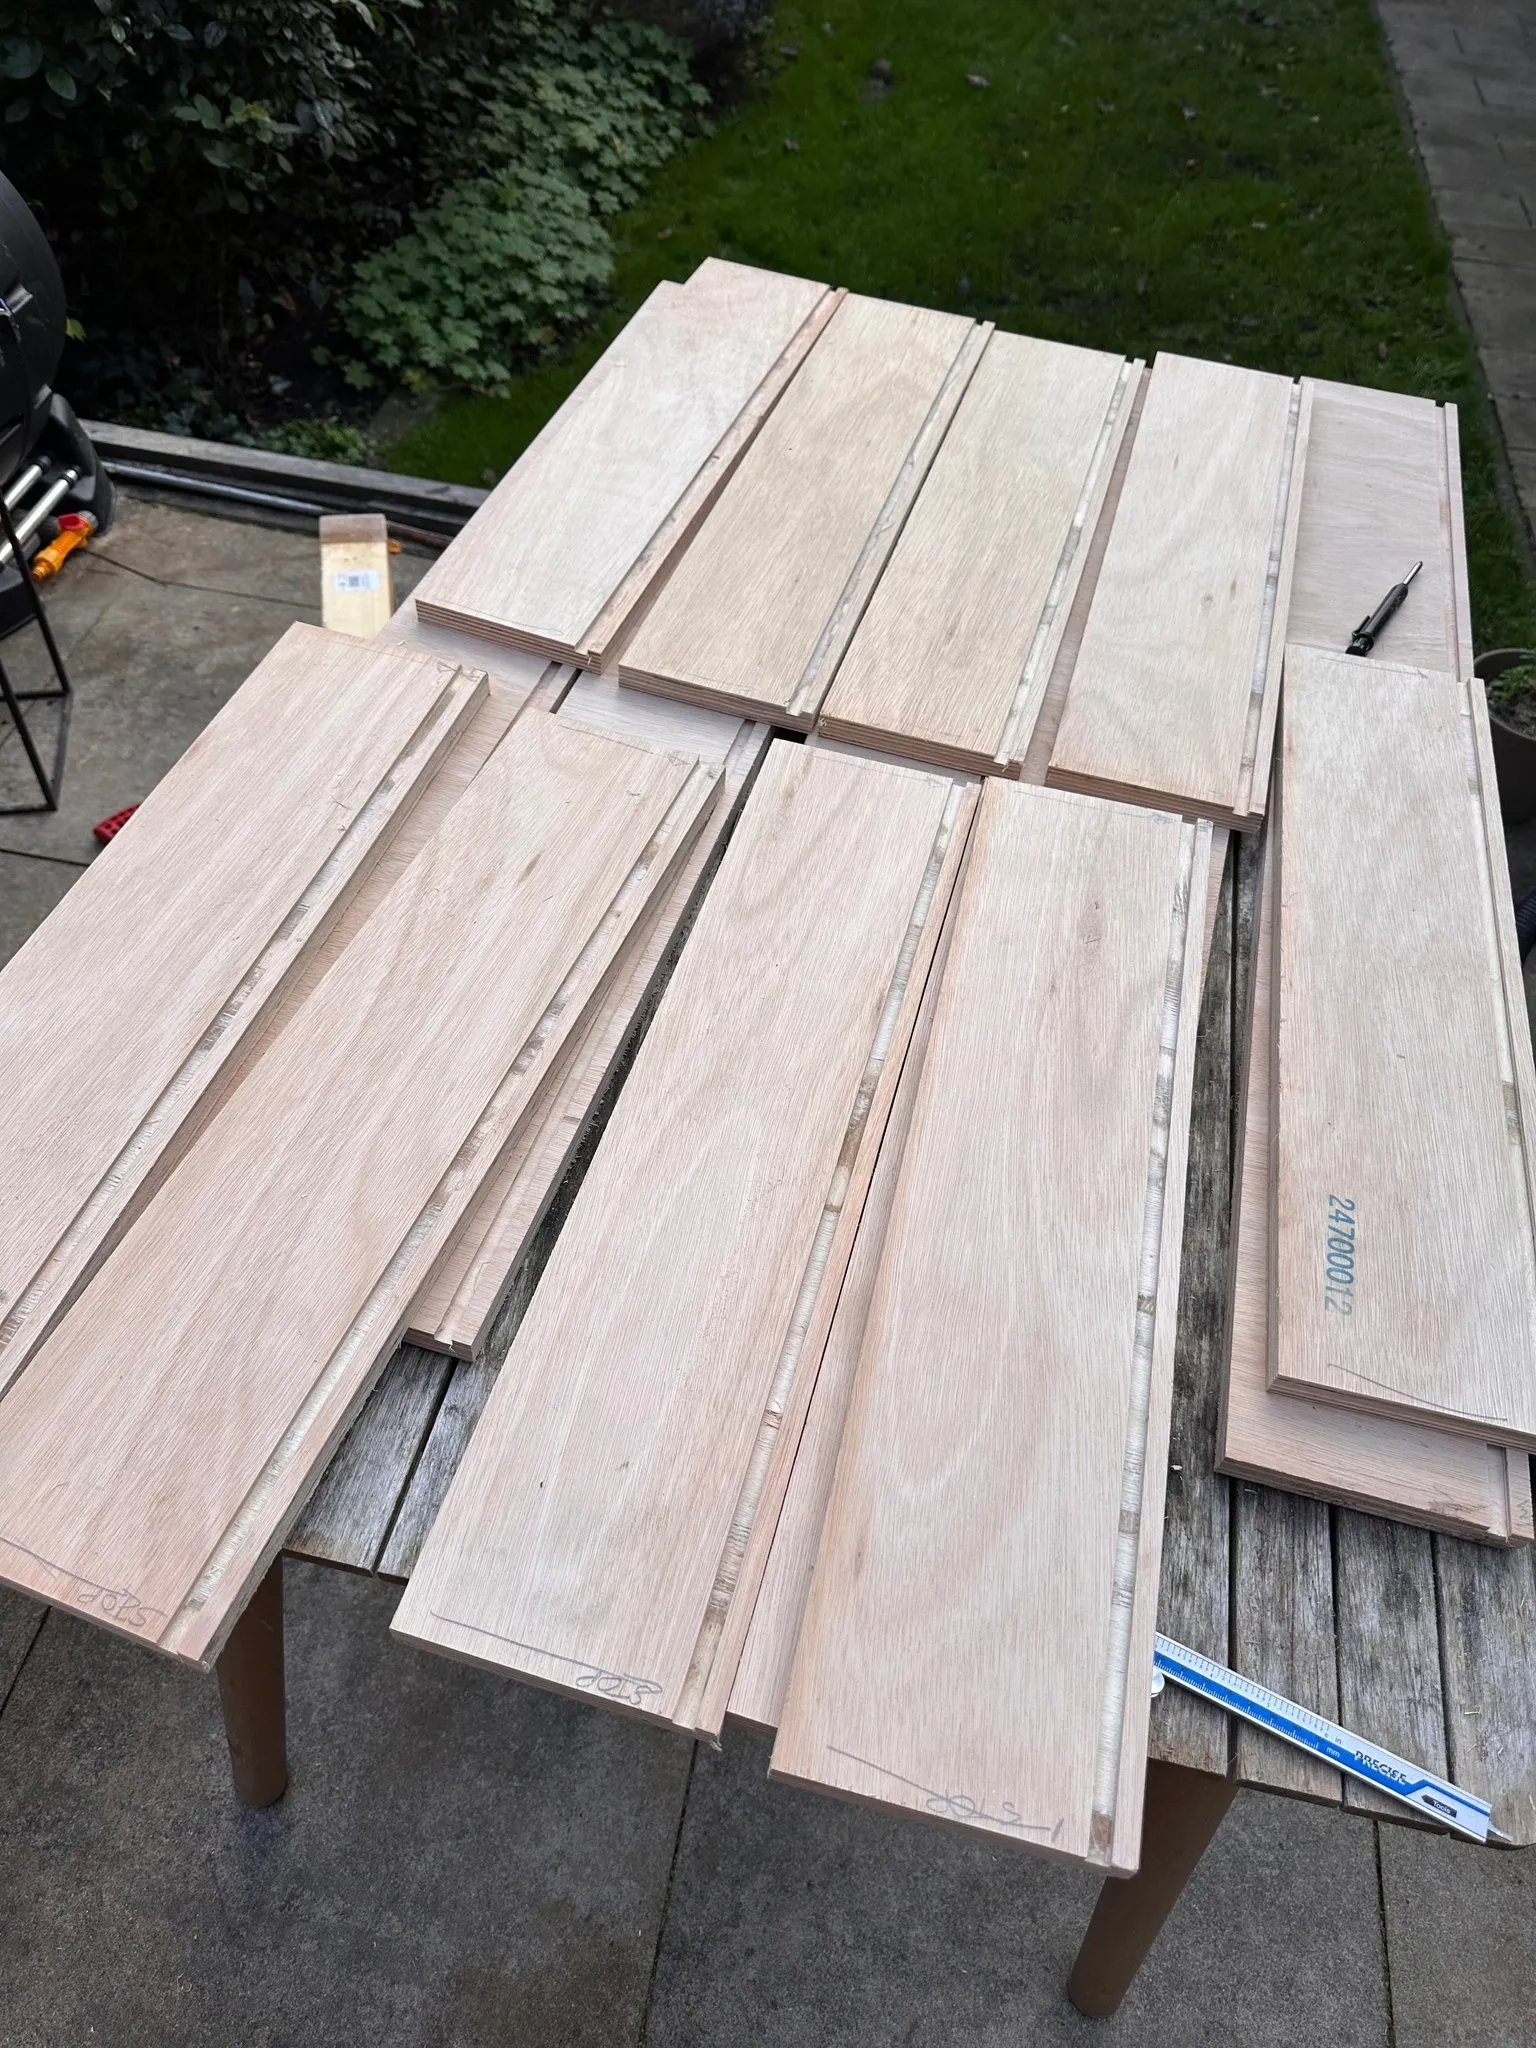
Semi-finished oak planks from Bauhaus, ripped to size and finished to 40mm width
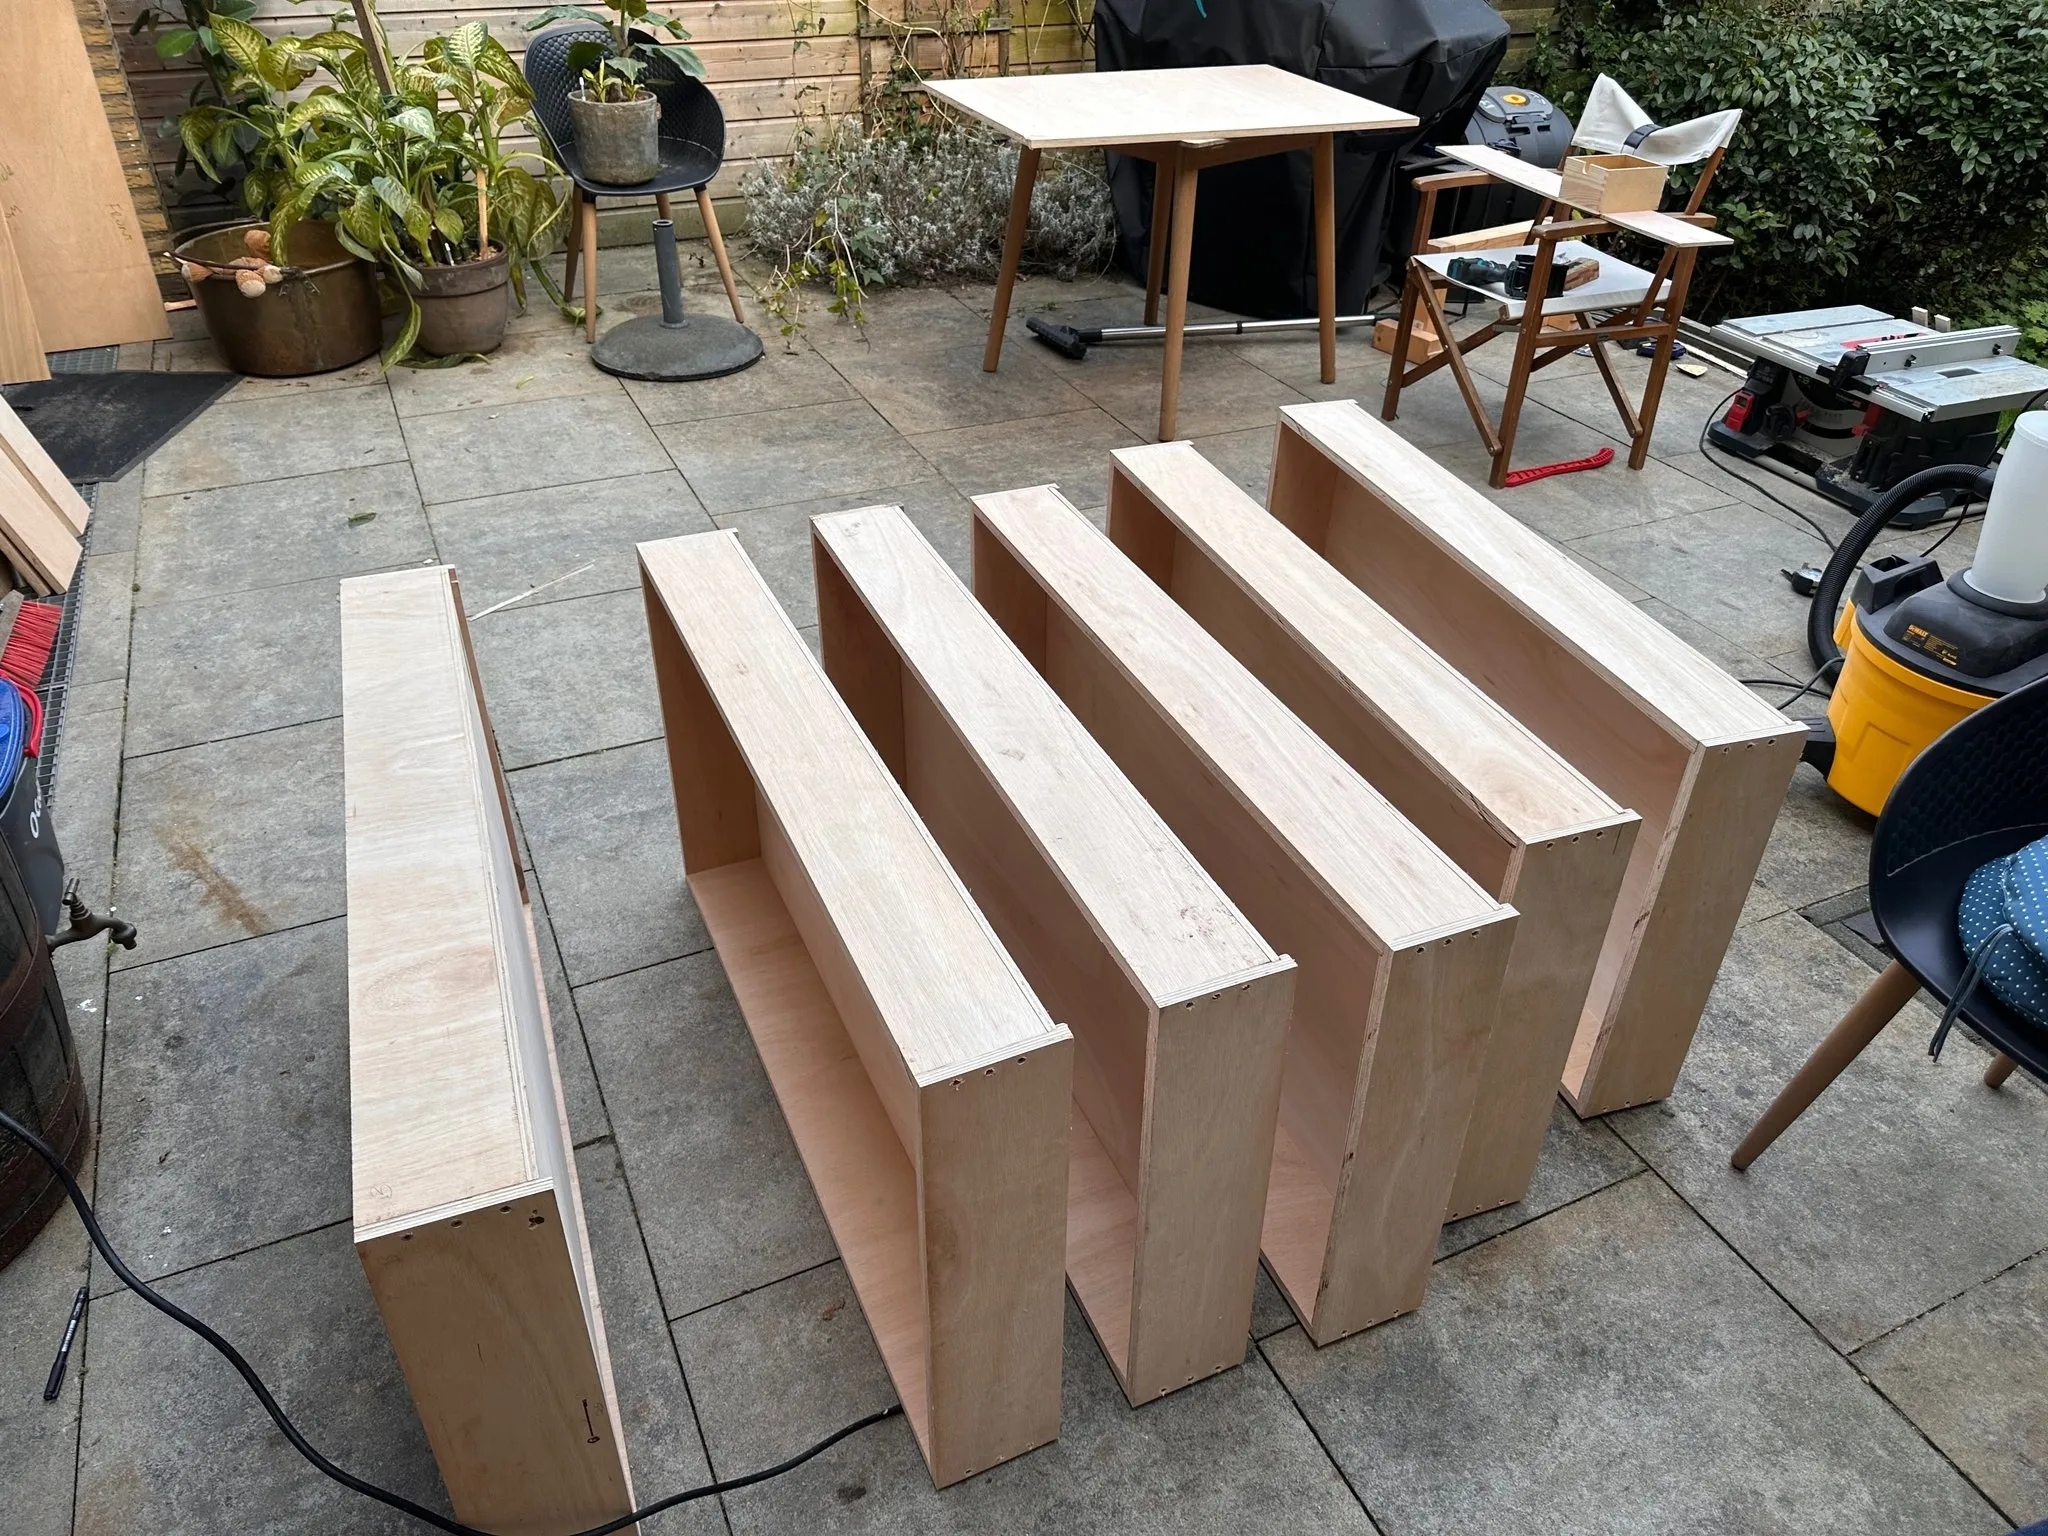
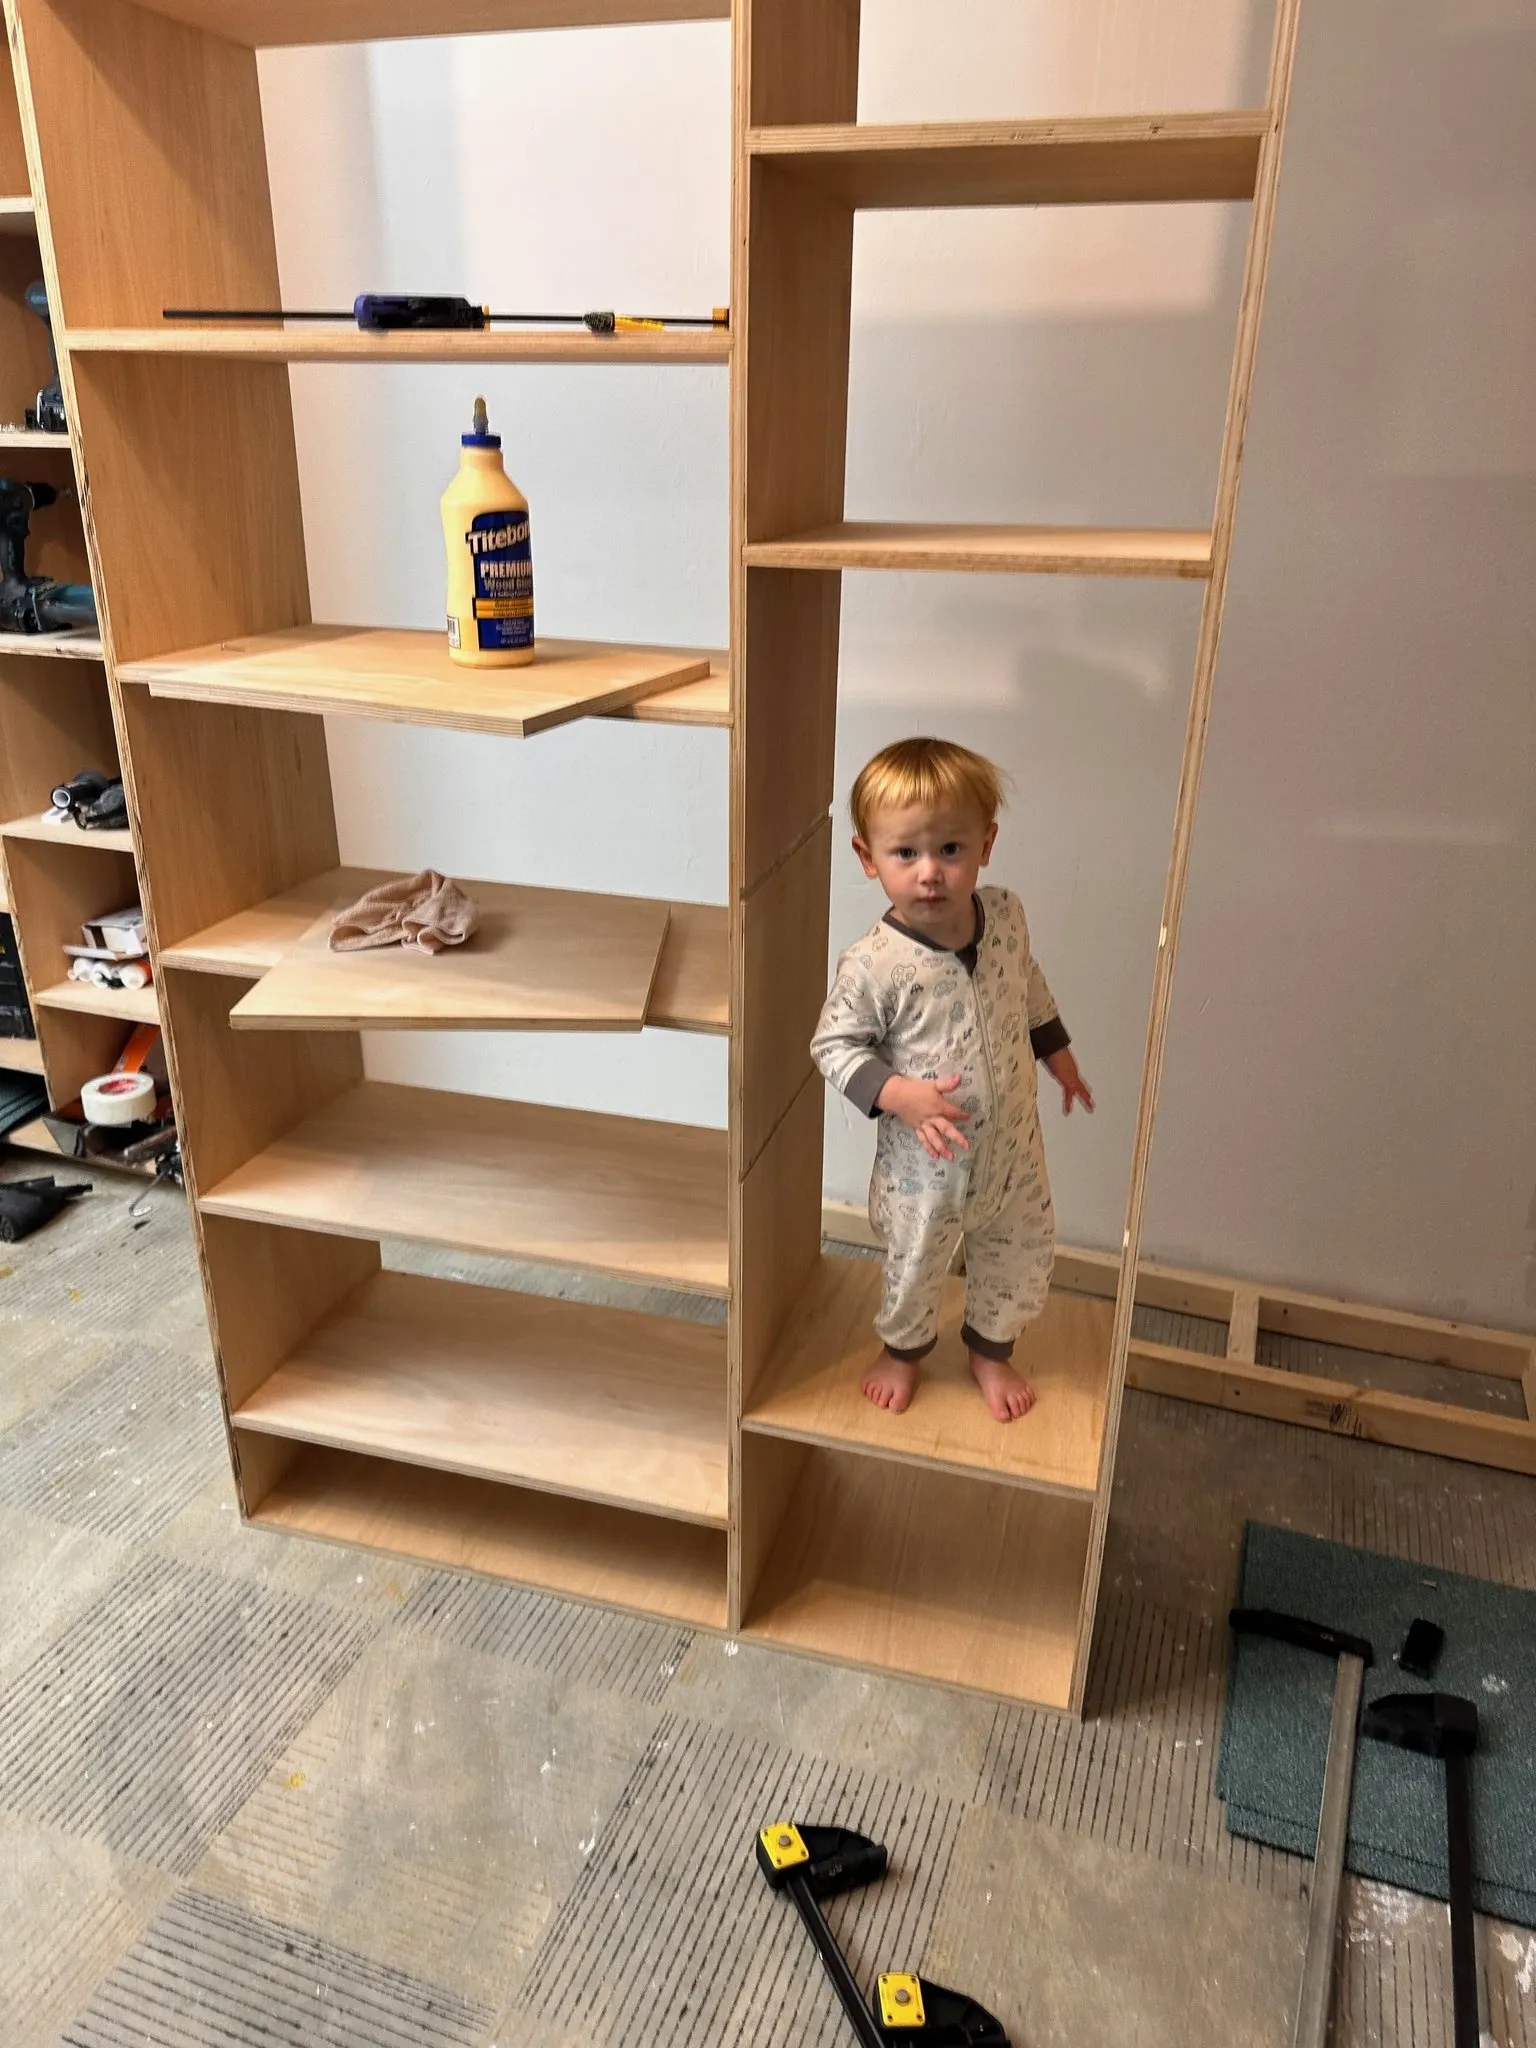
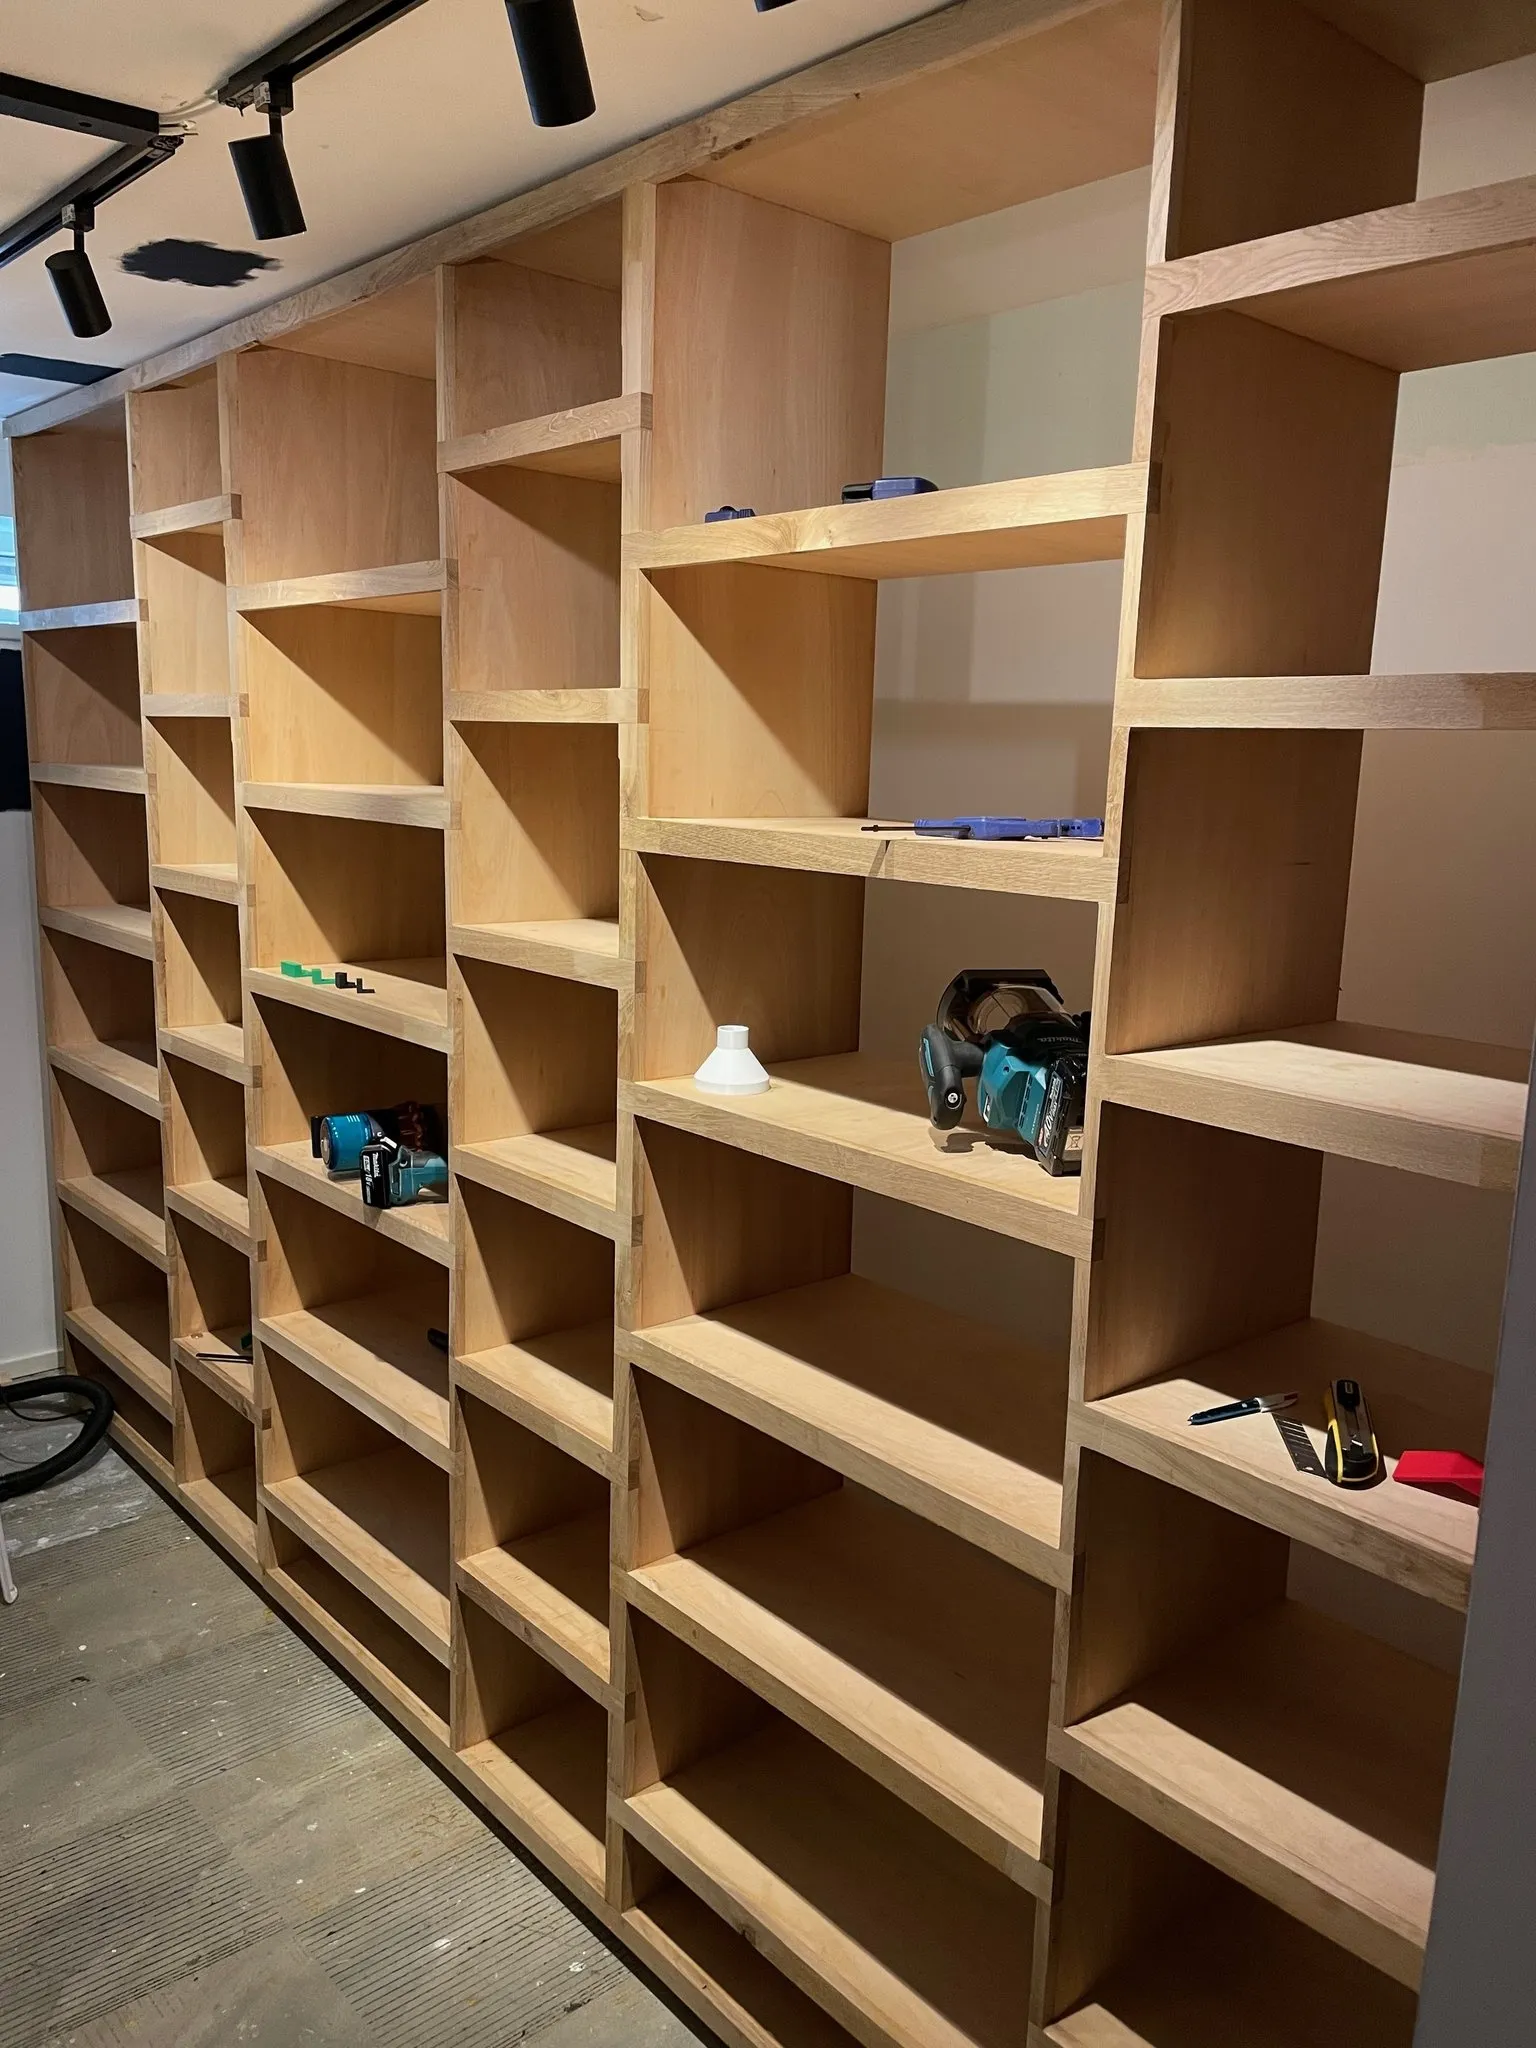
I knew that there was going to be a lot of repetition in this build, so I put quite a bit of focus into building very precise templates that I could then use to replicate cuts. If the slots made for the shelves were a slightly different spacing, then the shelf would be tilted forward or back or left or right—it would look bad and it would make all of the following steps much more complicated. So it was very important at every stage that everything was done as precisely as possible.
The templates needed to be made, and there were quite a few to make. Also, each one needed to be made and sort of tested to make sure it was completely precise. This investment in precision upfront saved countless hours later and ensured that every shelf fit perfectly.
To make it easier to have access to the area, I didn't build the wall first. I built the hanging clothes side first, then started building the wall, and then built the shelf side later. This was also to get clarity on the dimensions of the space because you can design things in CAD as much as you like, but when you actually start building it, then the complexities of the little nuances of the building and how the floor is slightly sloped or however all of those things start to matter more than the design because you're actually building in real space.
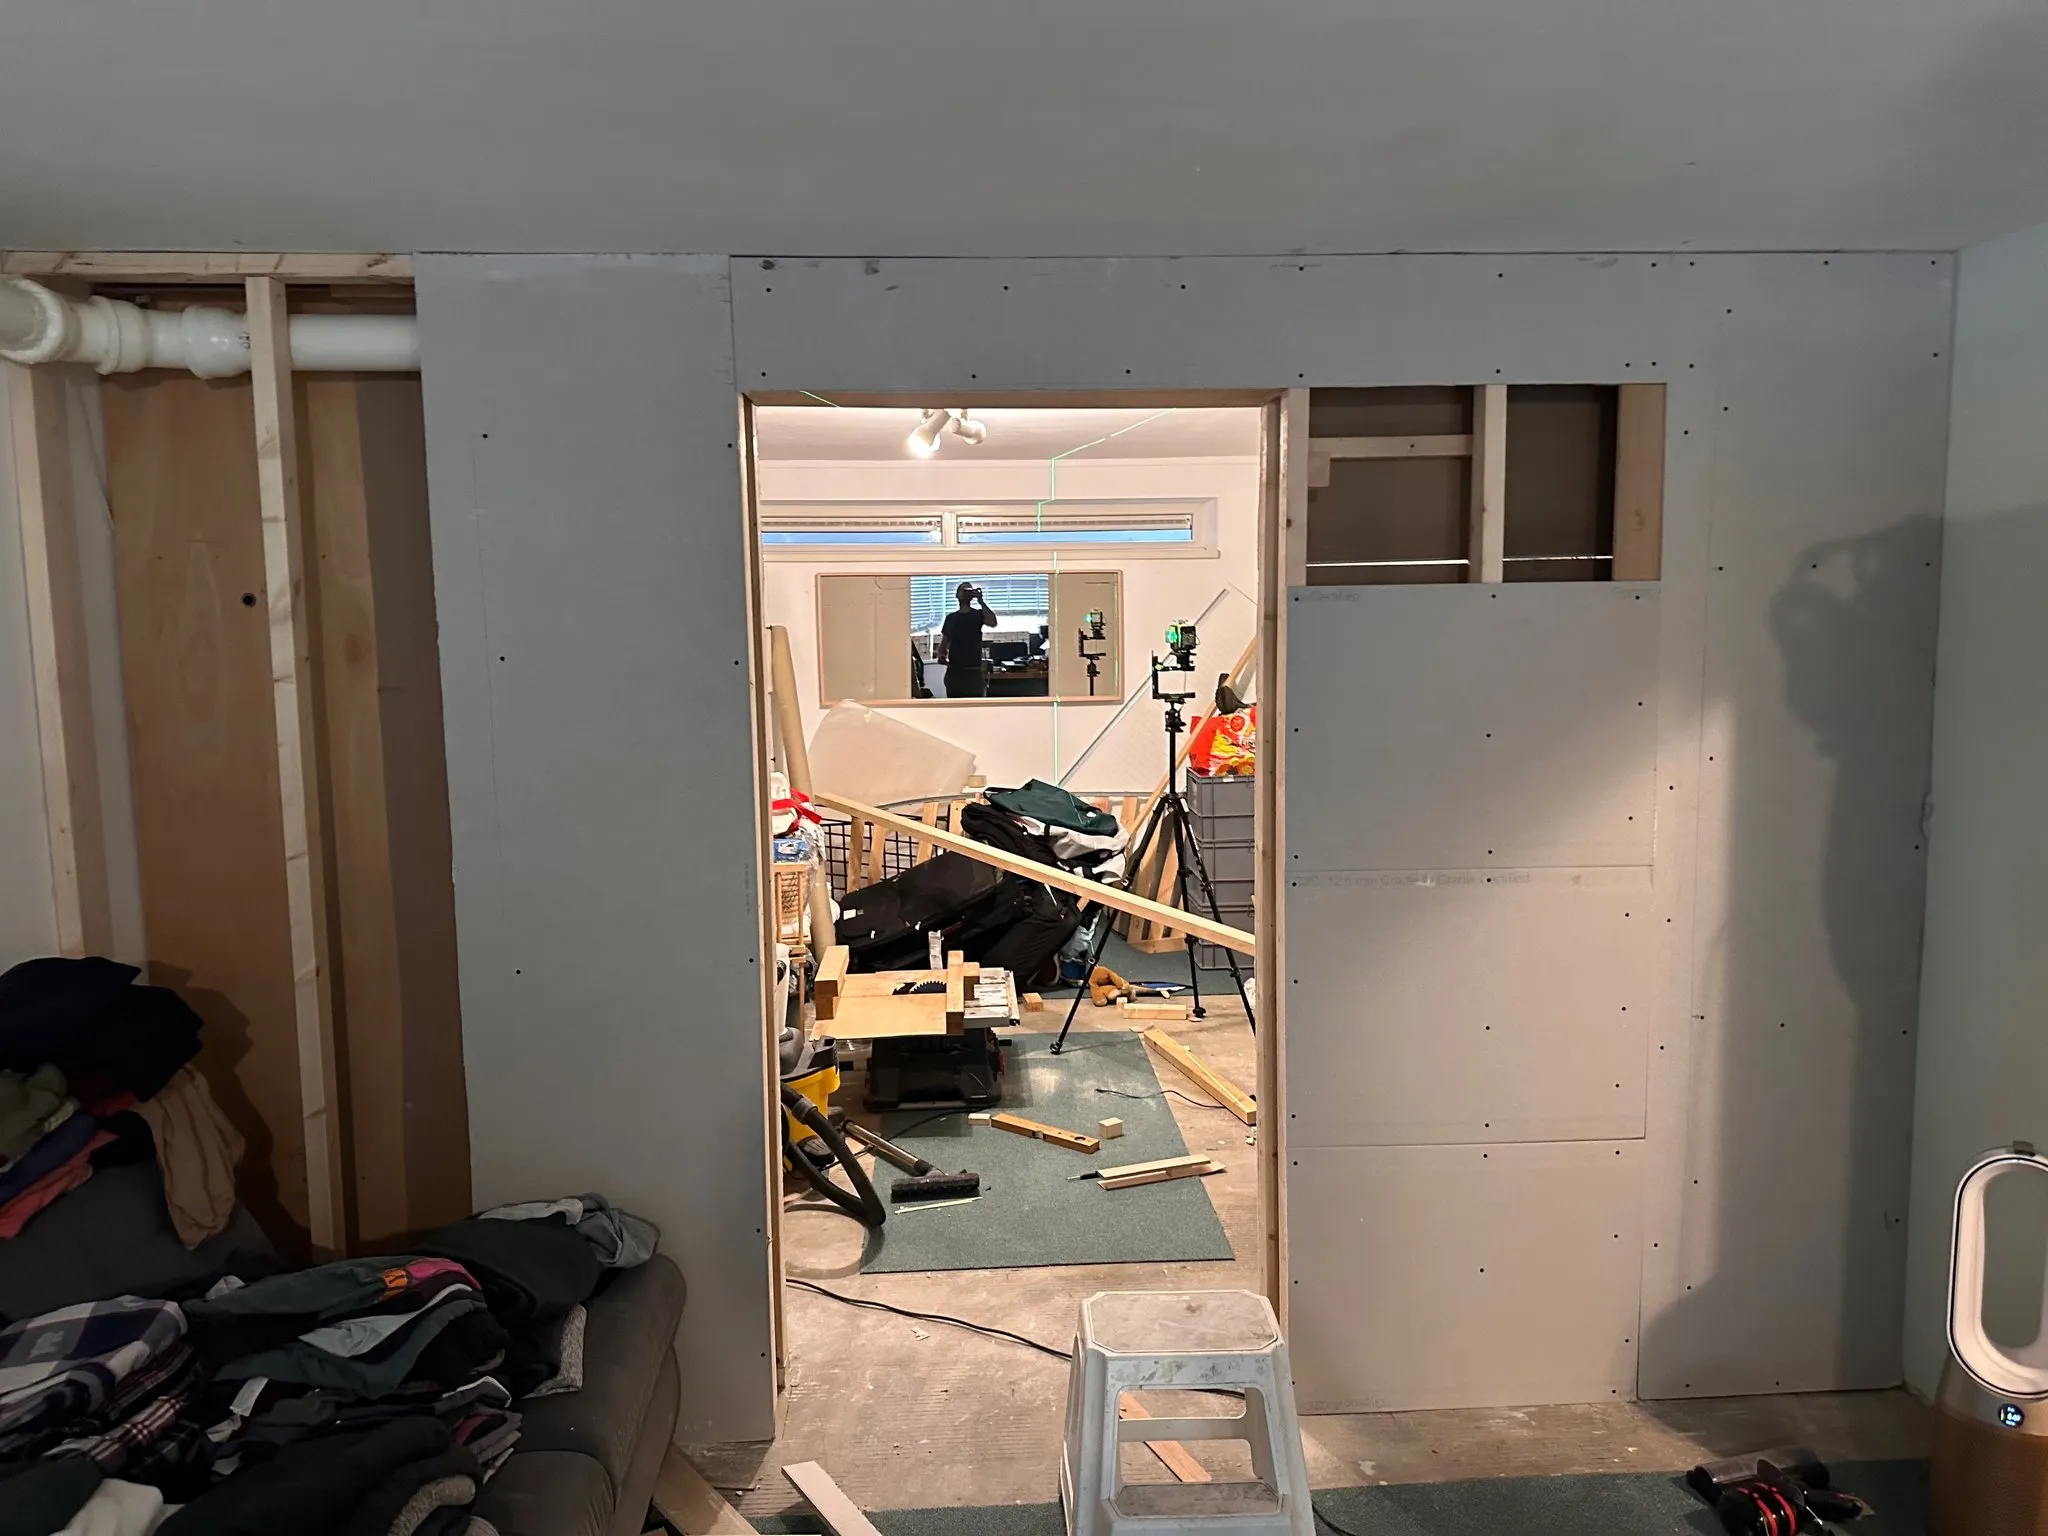
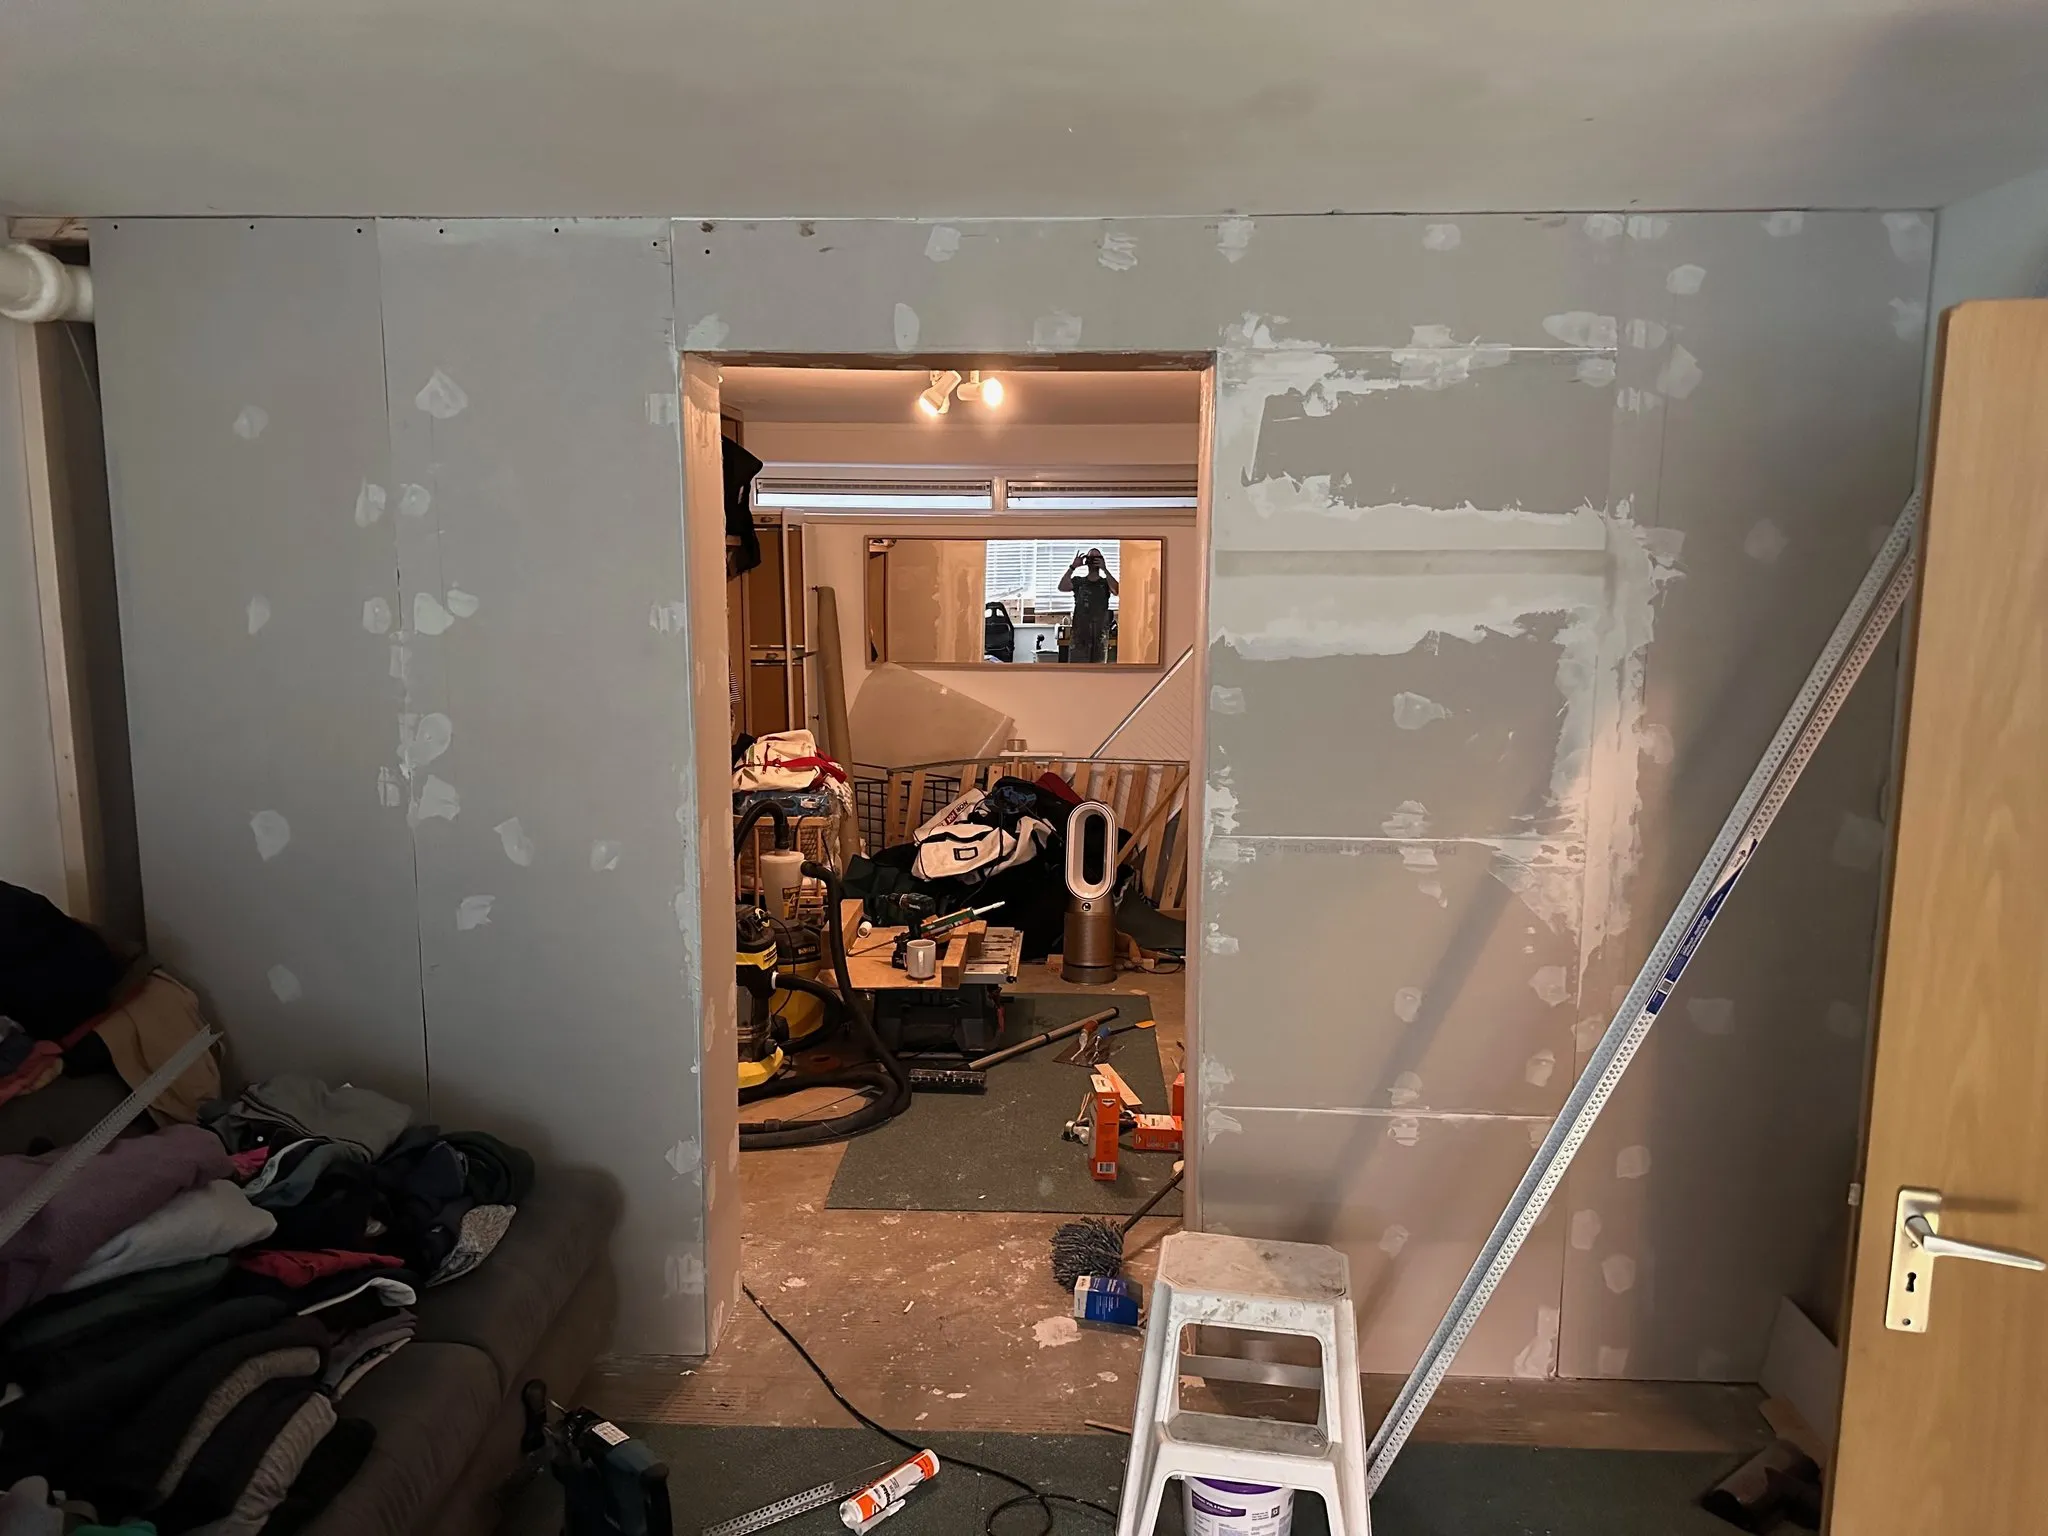
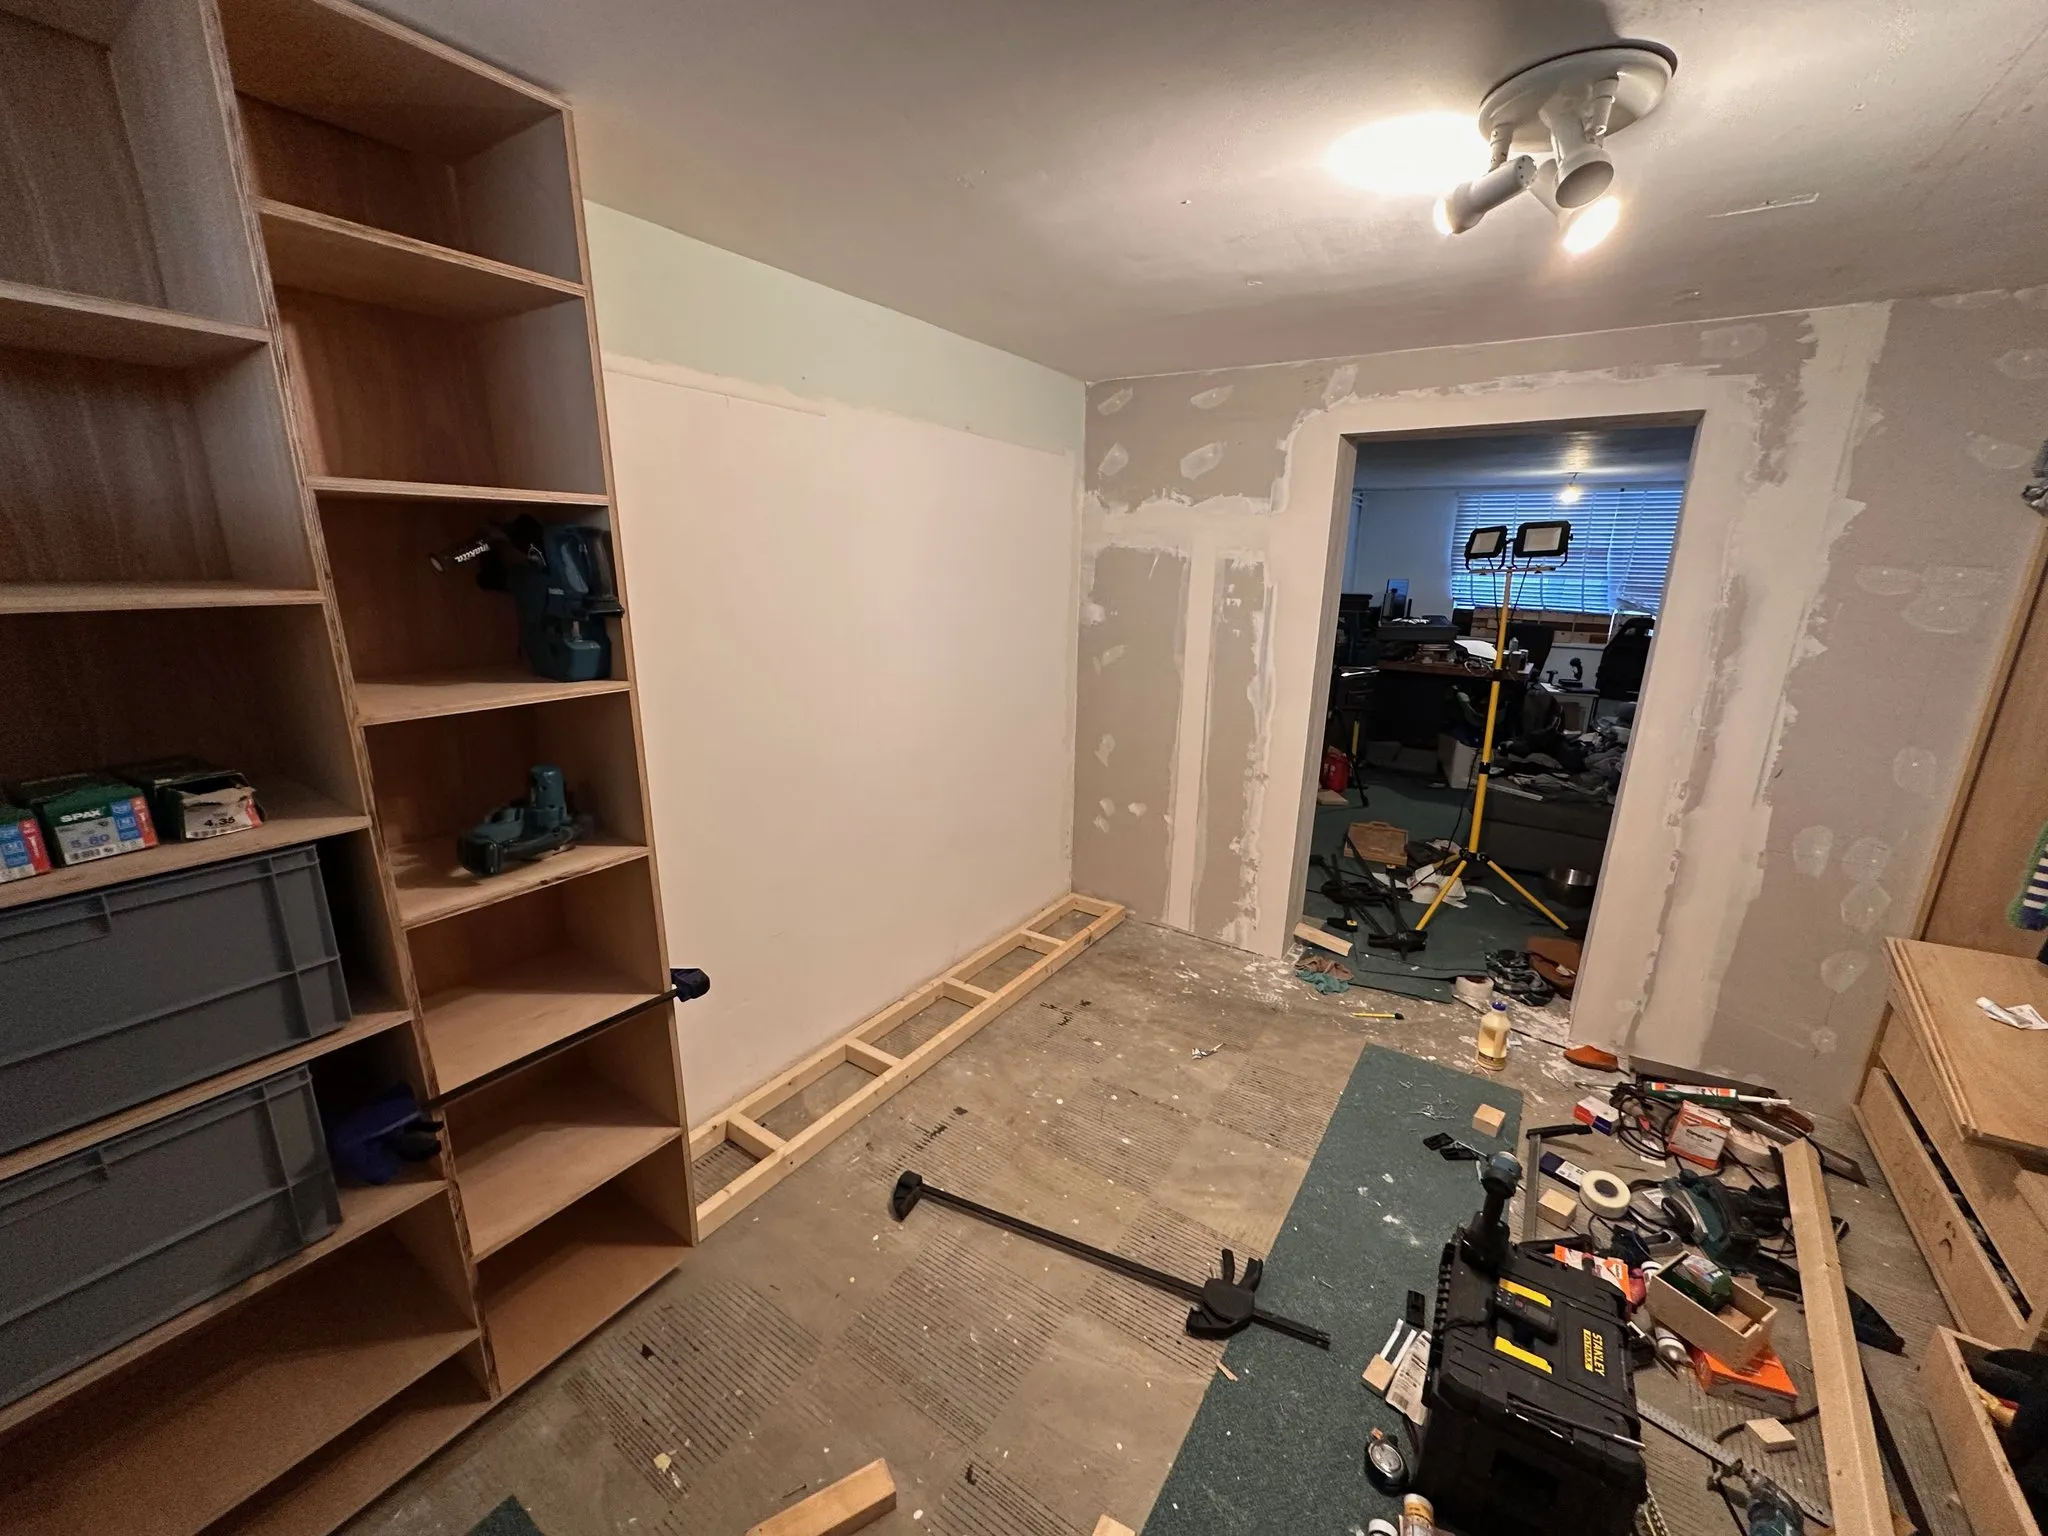
The basement of our house is also mostly one big room which serves as my office, general storage at the moment, and then also where we kept our clothes. It felt weird being such a big single room, so the idea was to put a wall up to separate the two rooms.
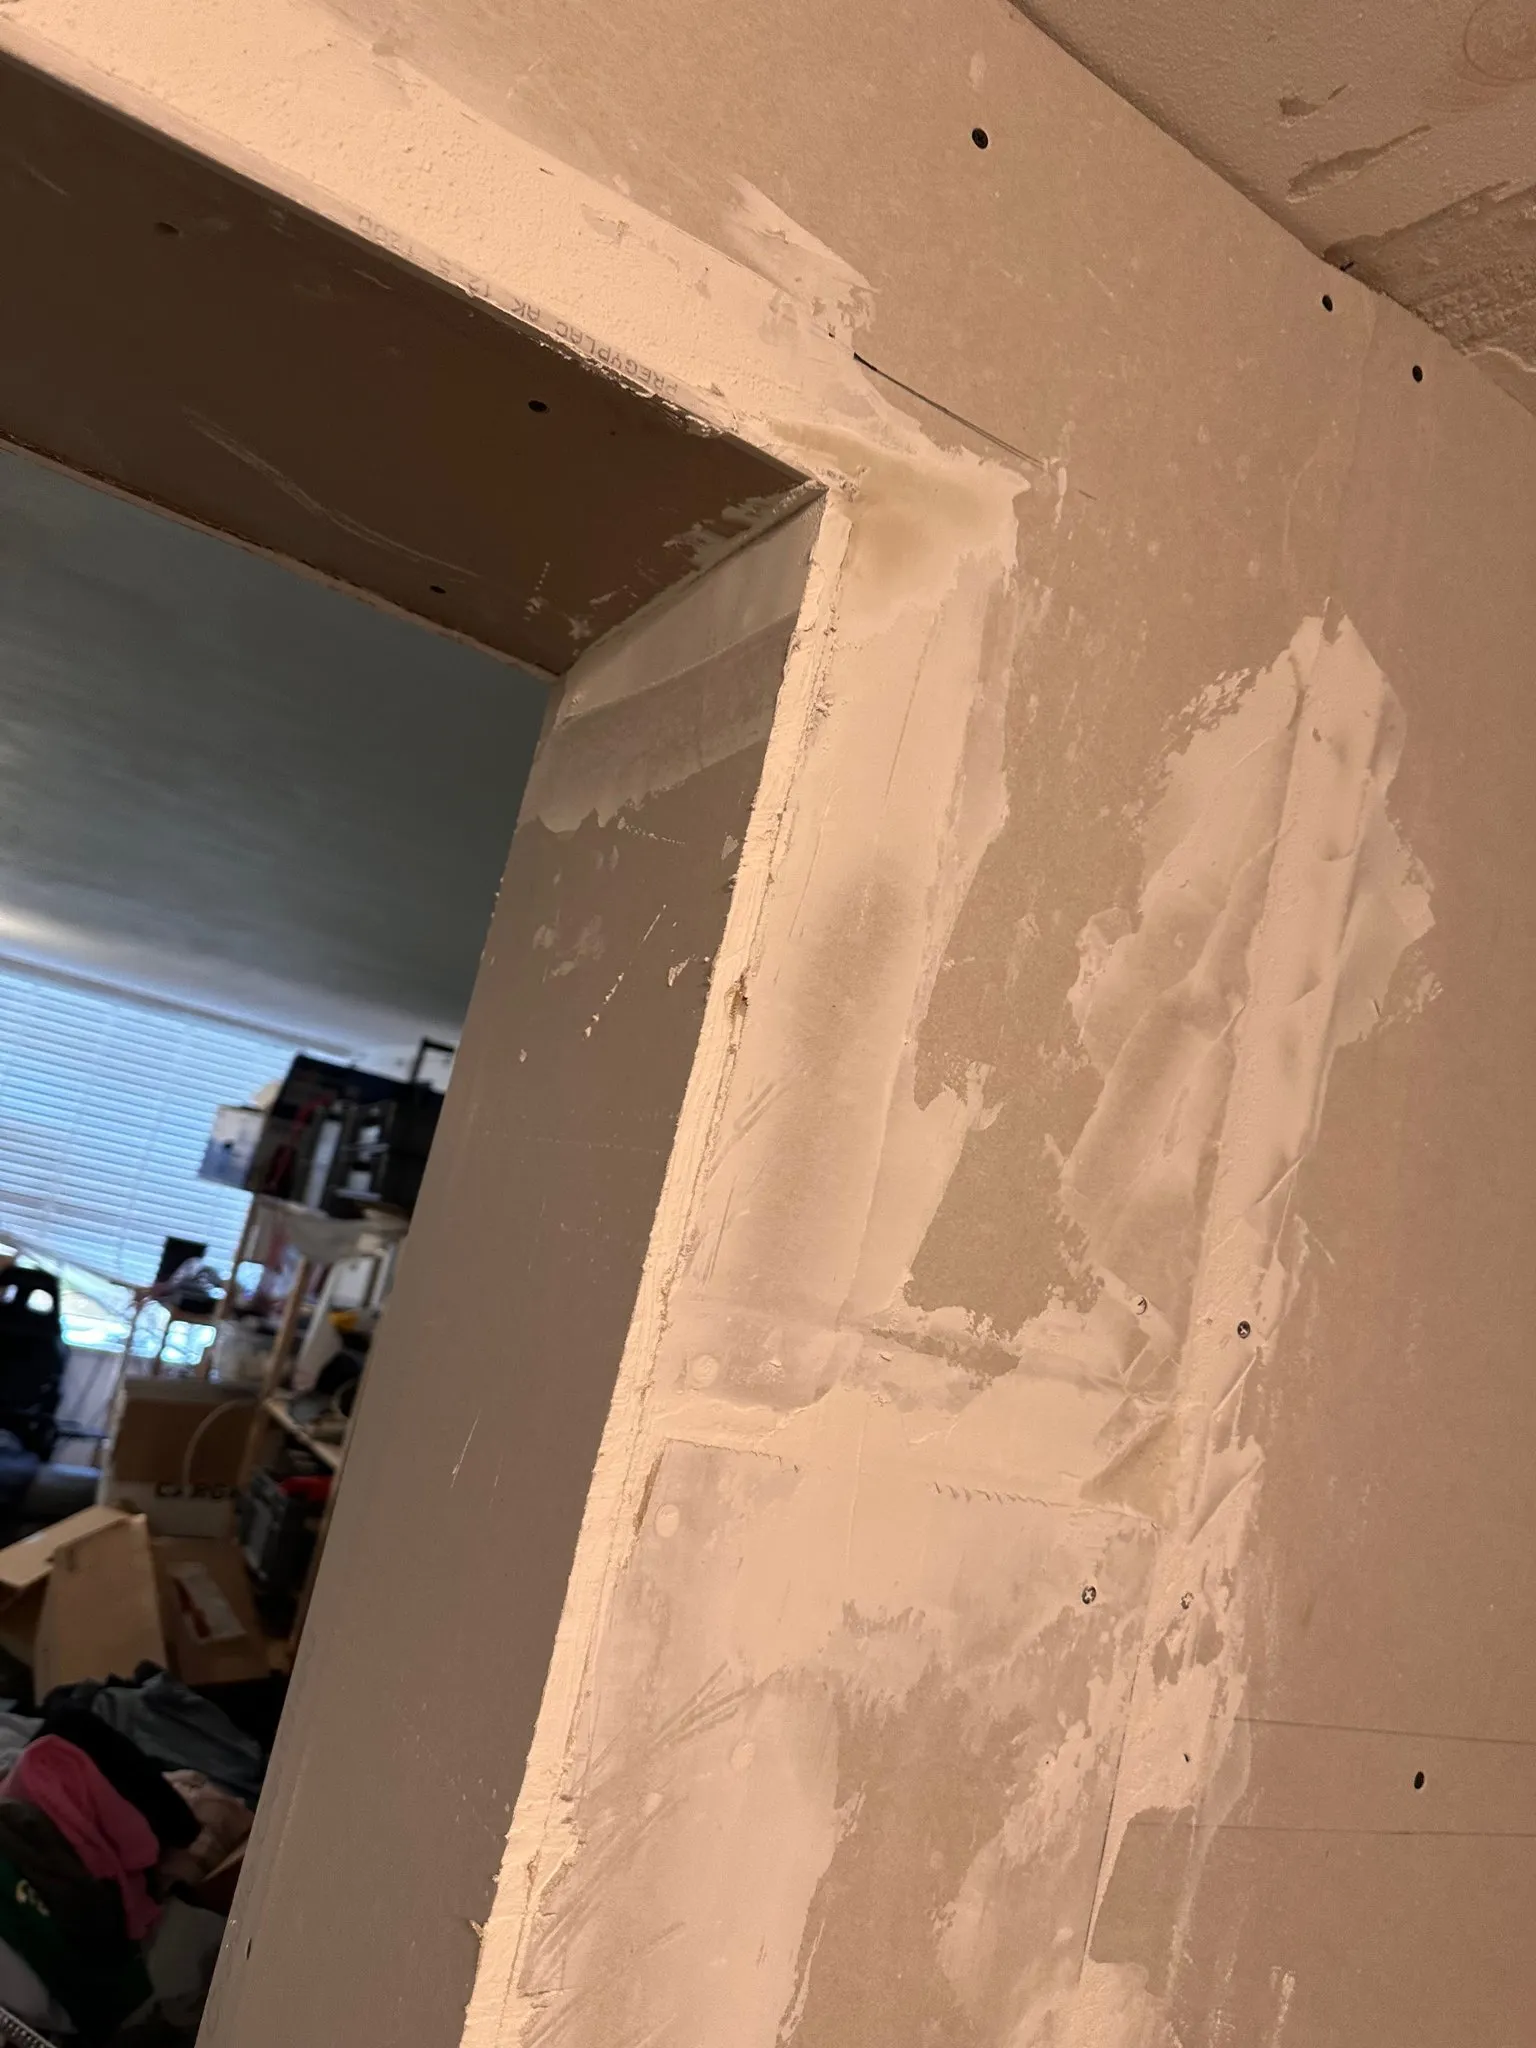
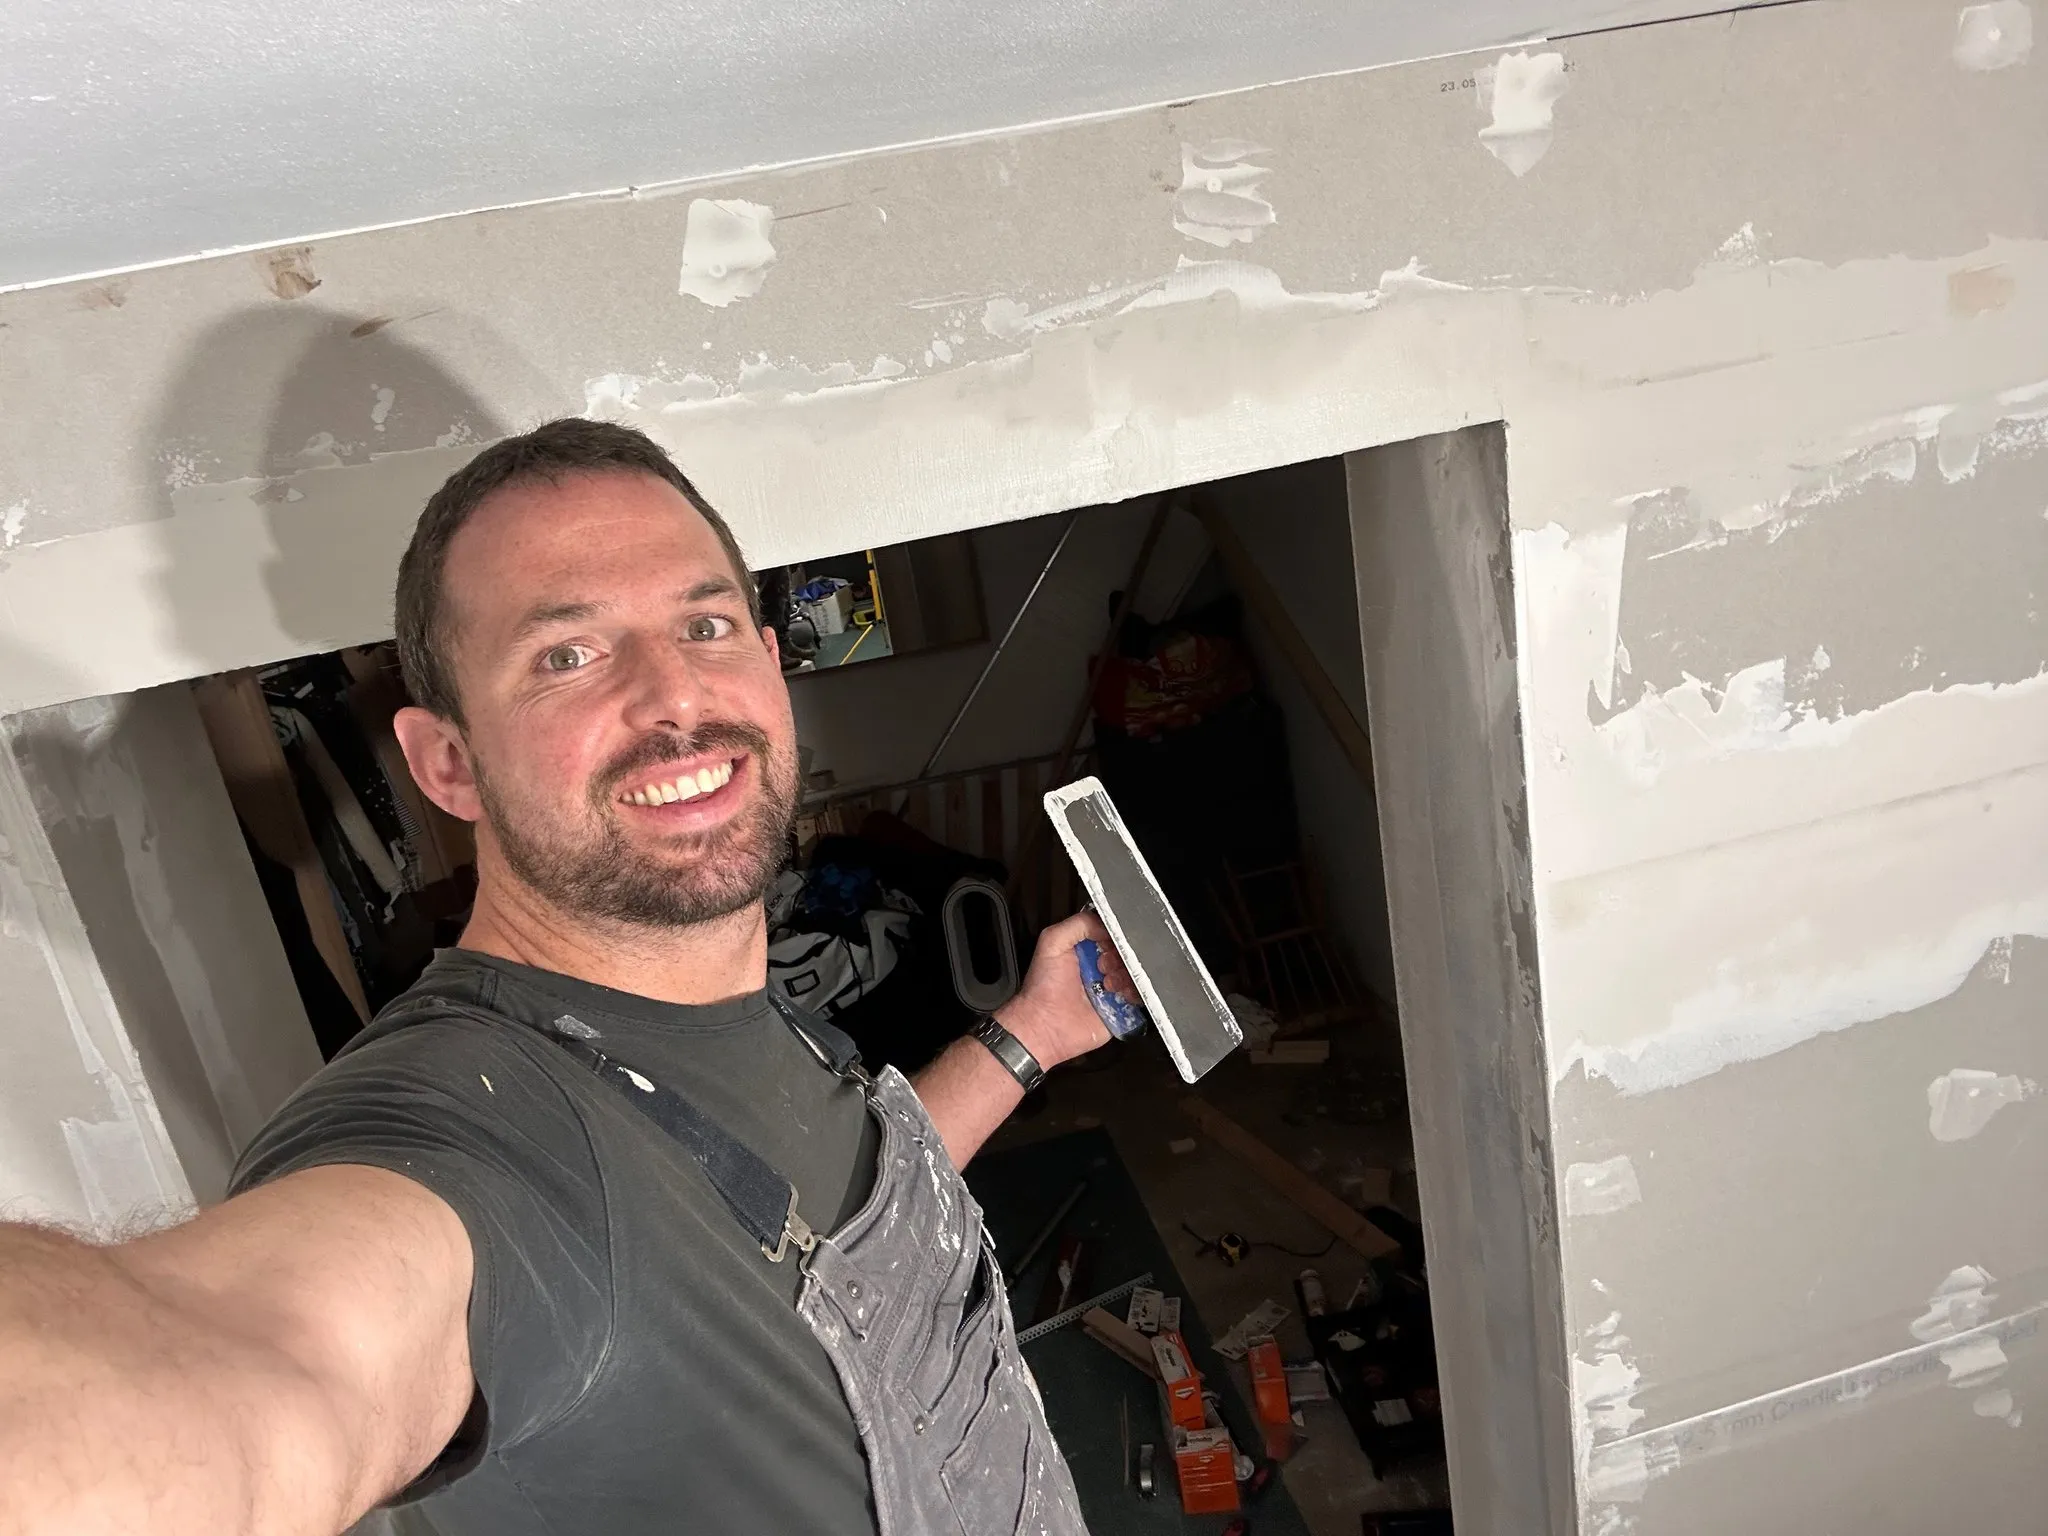
Putting the wall up took about a week—getting all of the stud wood and putting the drywall up, taping between the drywall, and doing the finish plastering also quite a while and a big learning. There was that—sketching pre-mixed finishing plaster is arguably just the same price and way easier than mixing your own plaster.
The hanging side was the first major component to be built. This side needed to accommodate hanging clothes with sufficient depth, plus larger storage spaces for baby equipment, car seats, and skiing gear. The drawers were integrated into this side, designed to be wide but shallow to encourage organization and easy access.
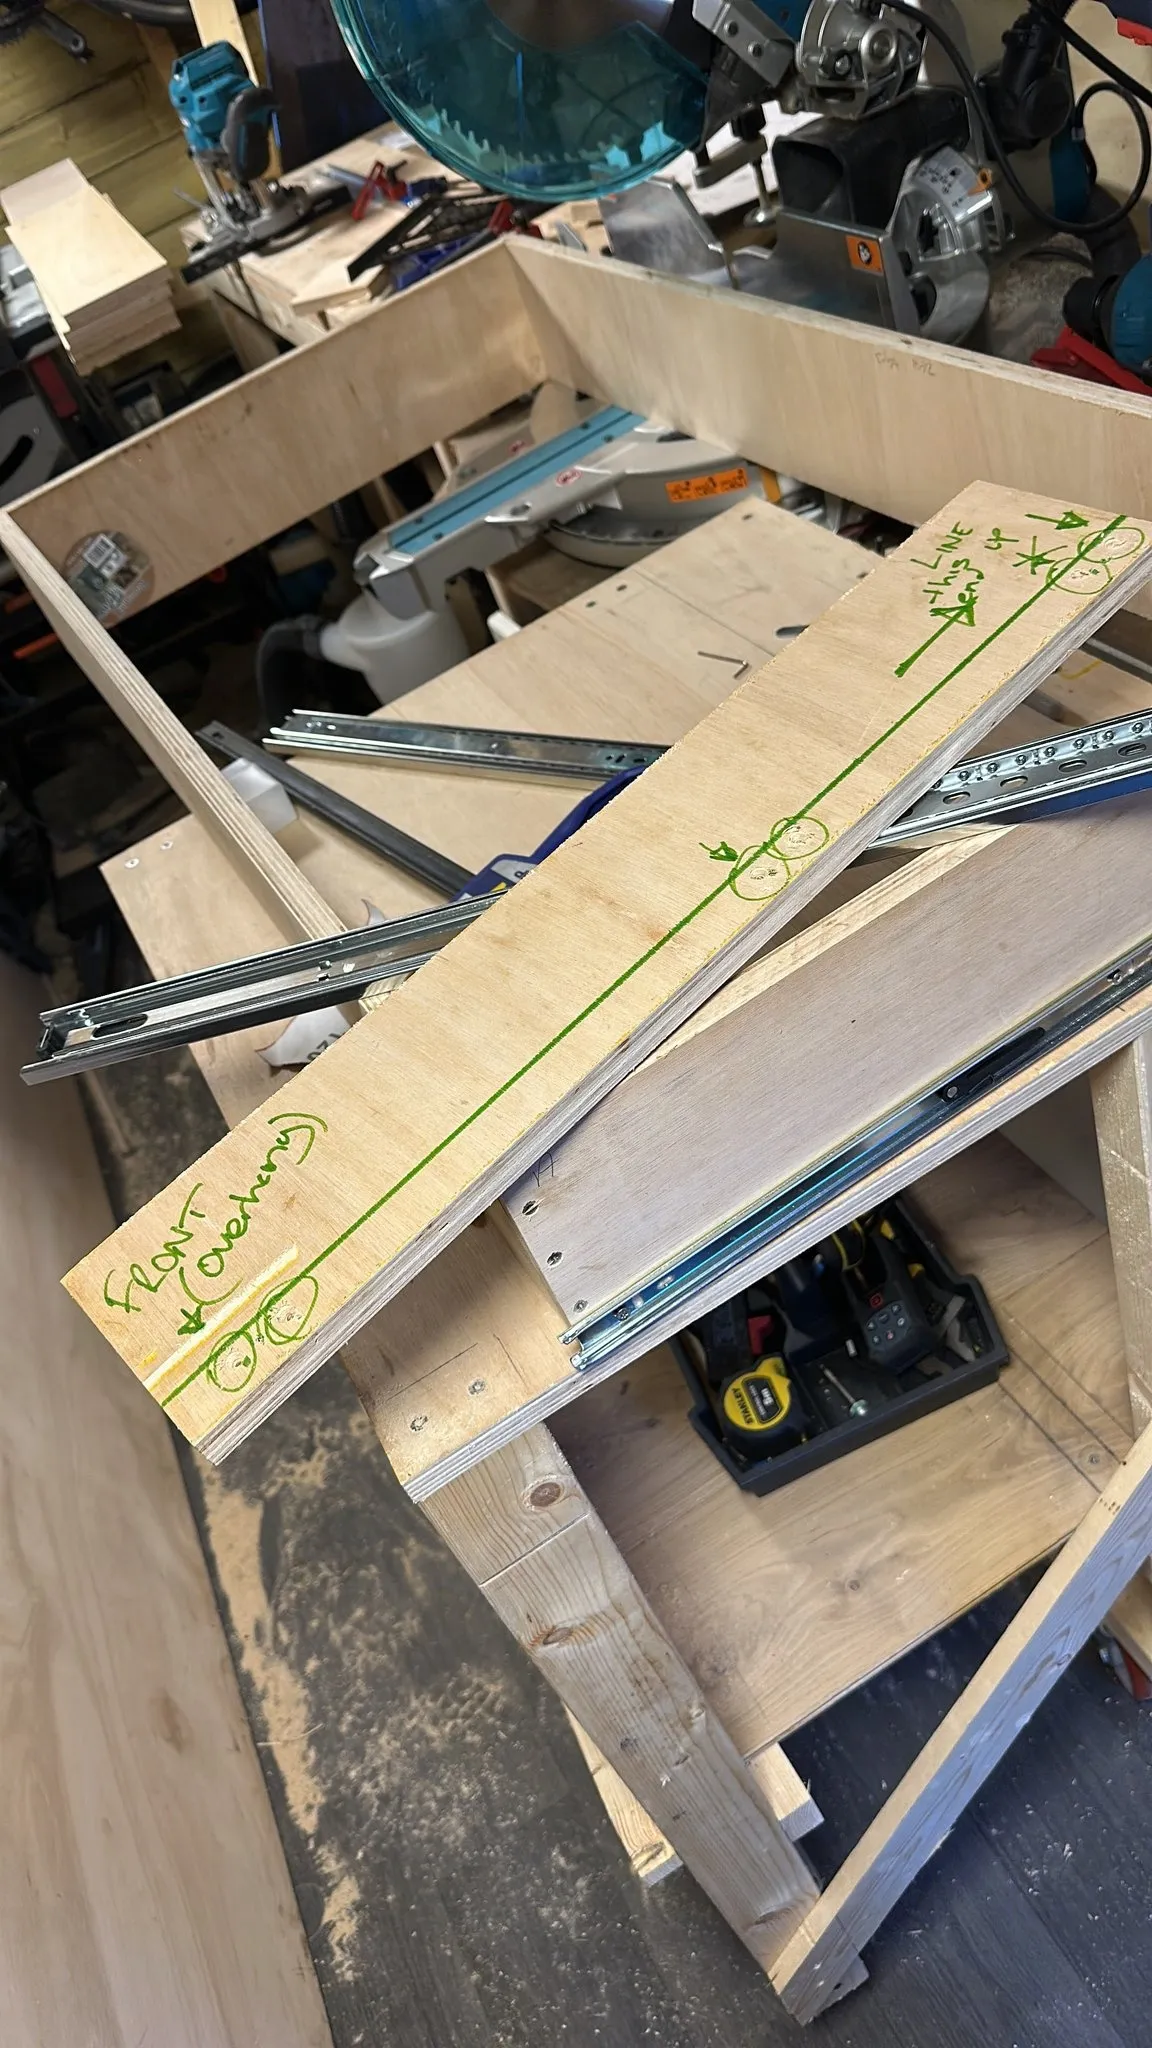
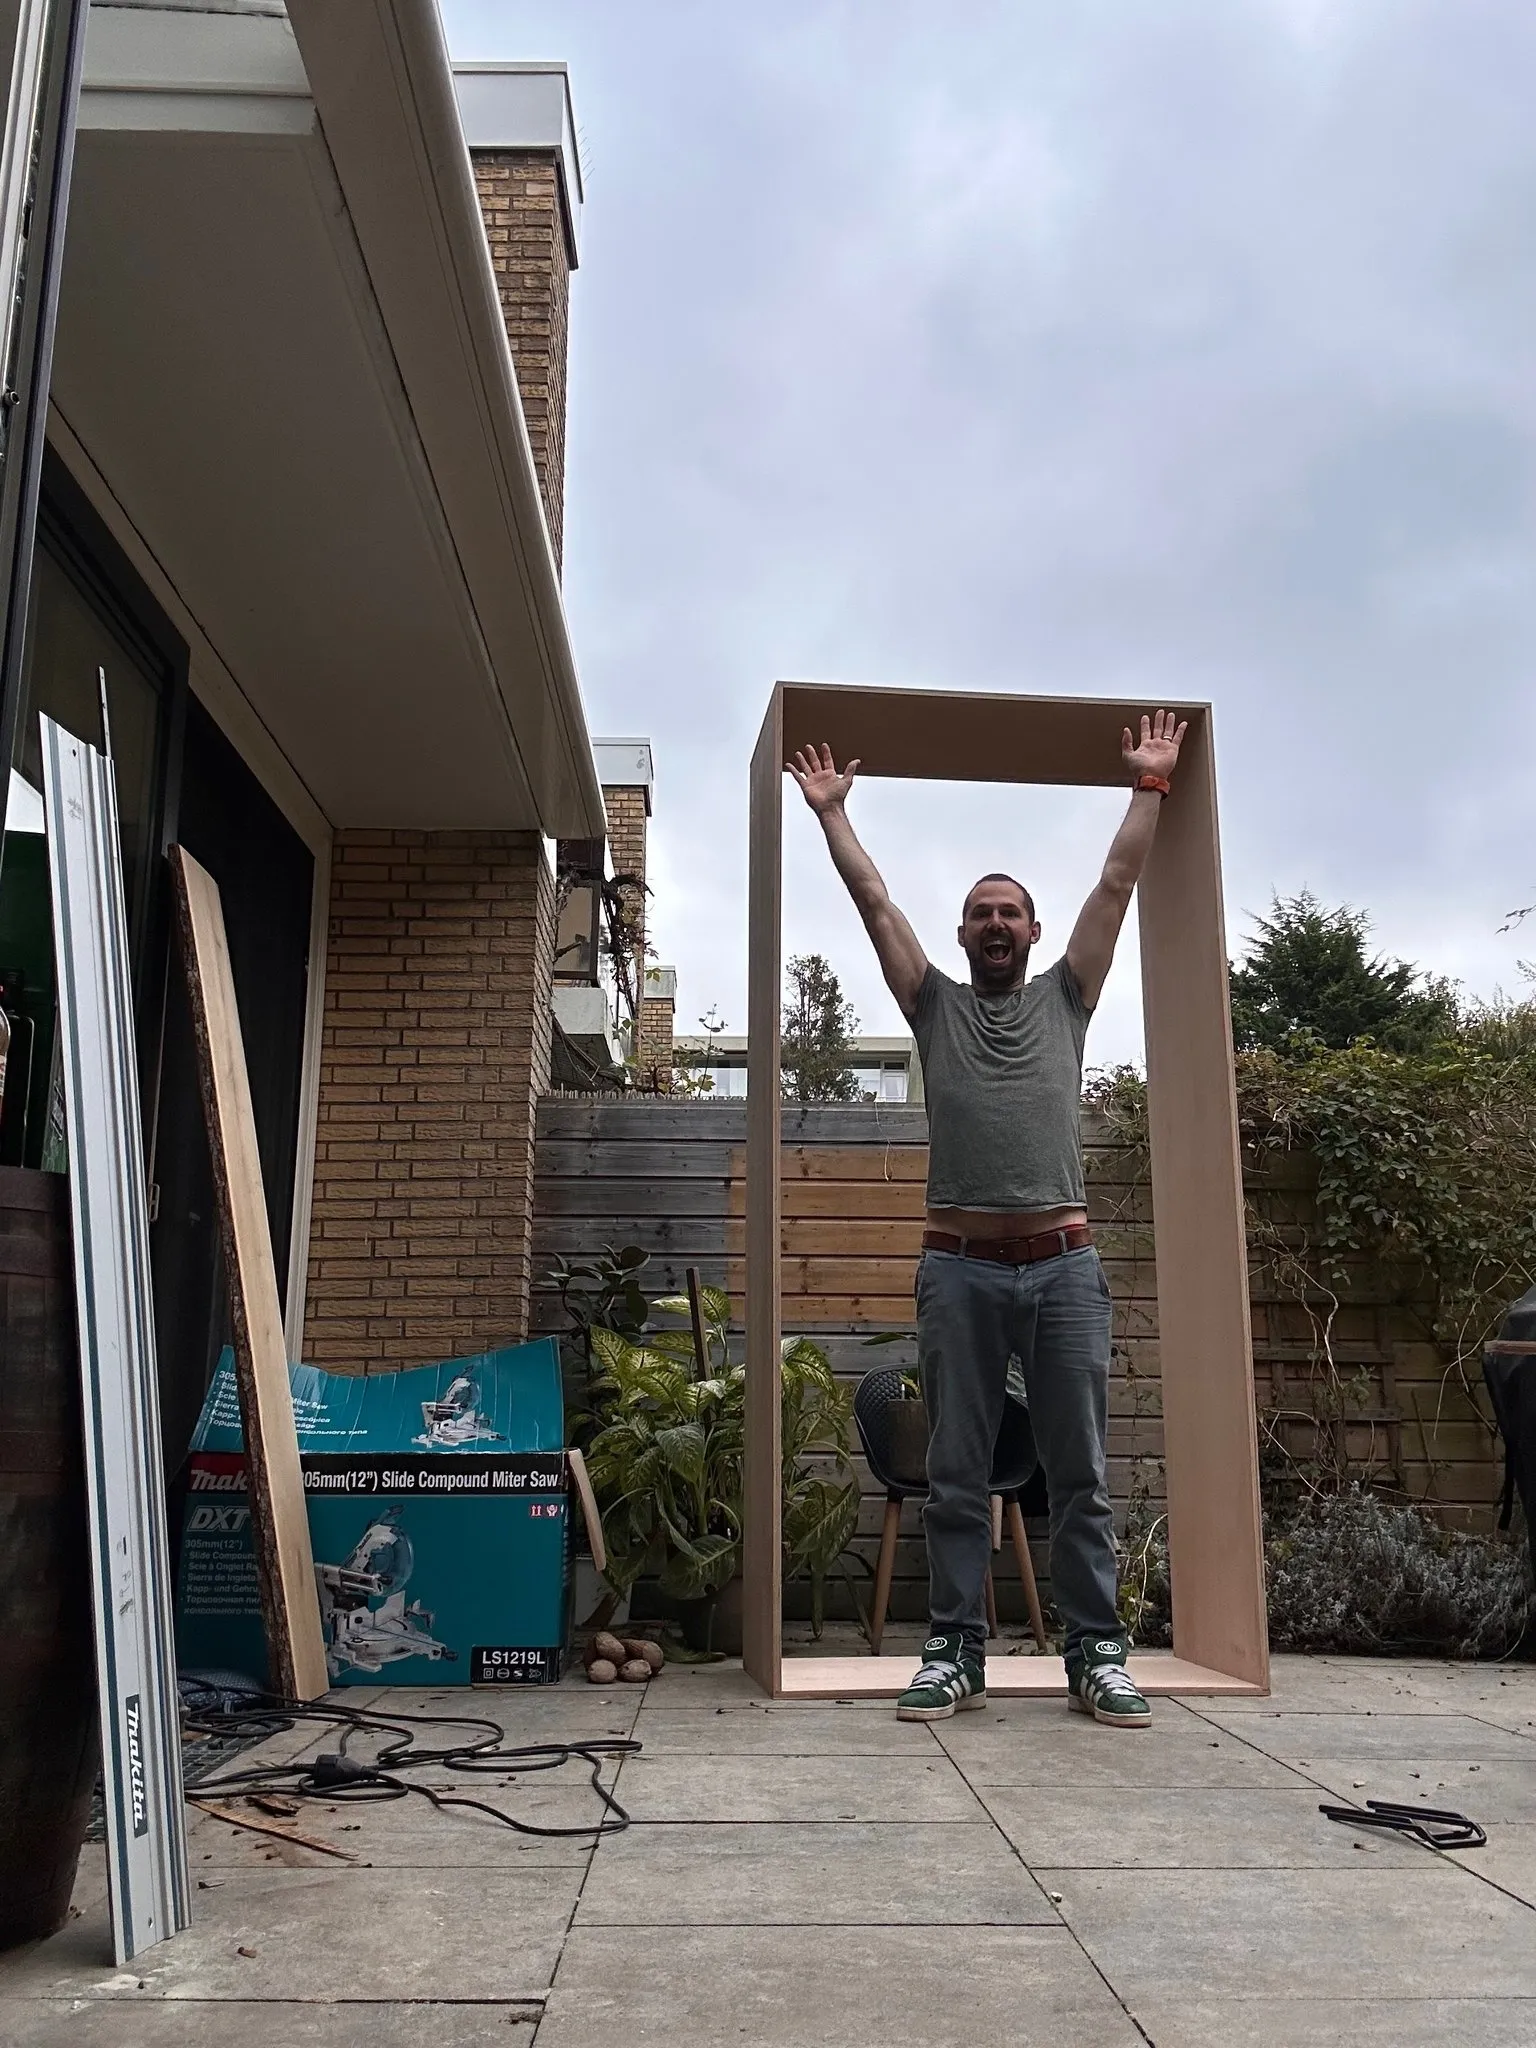
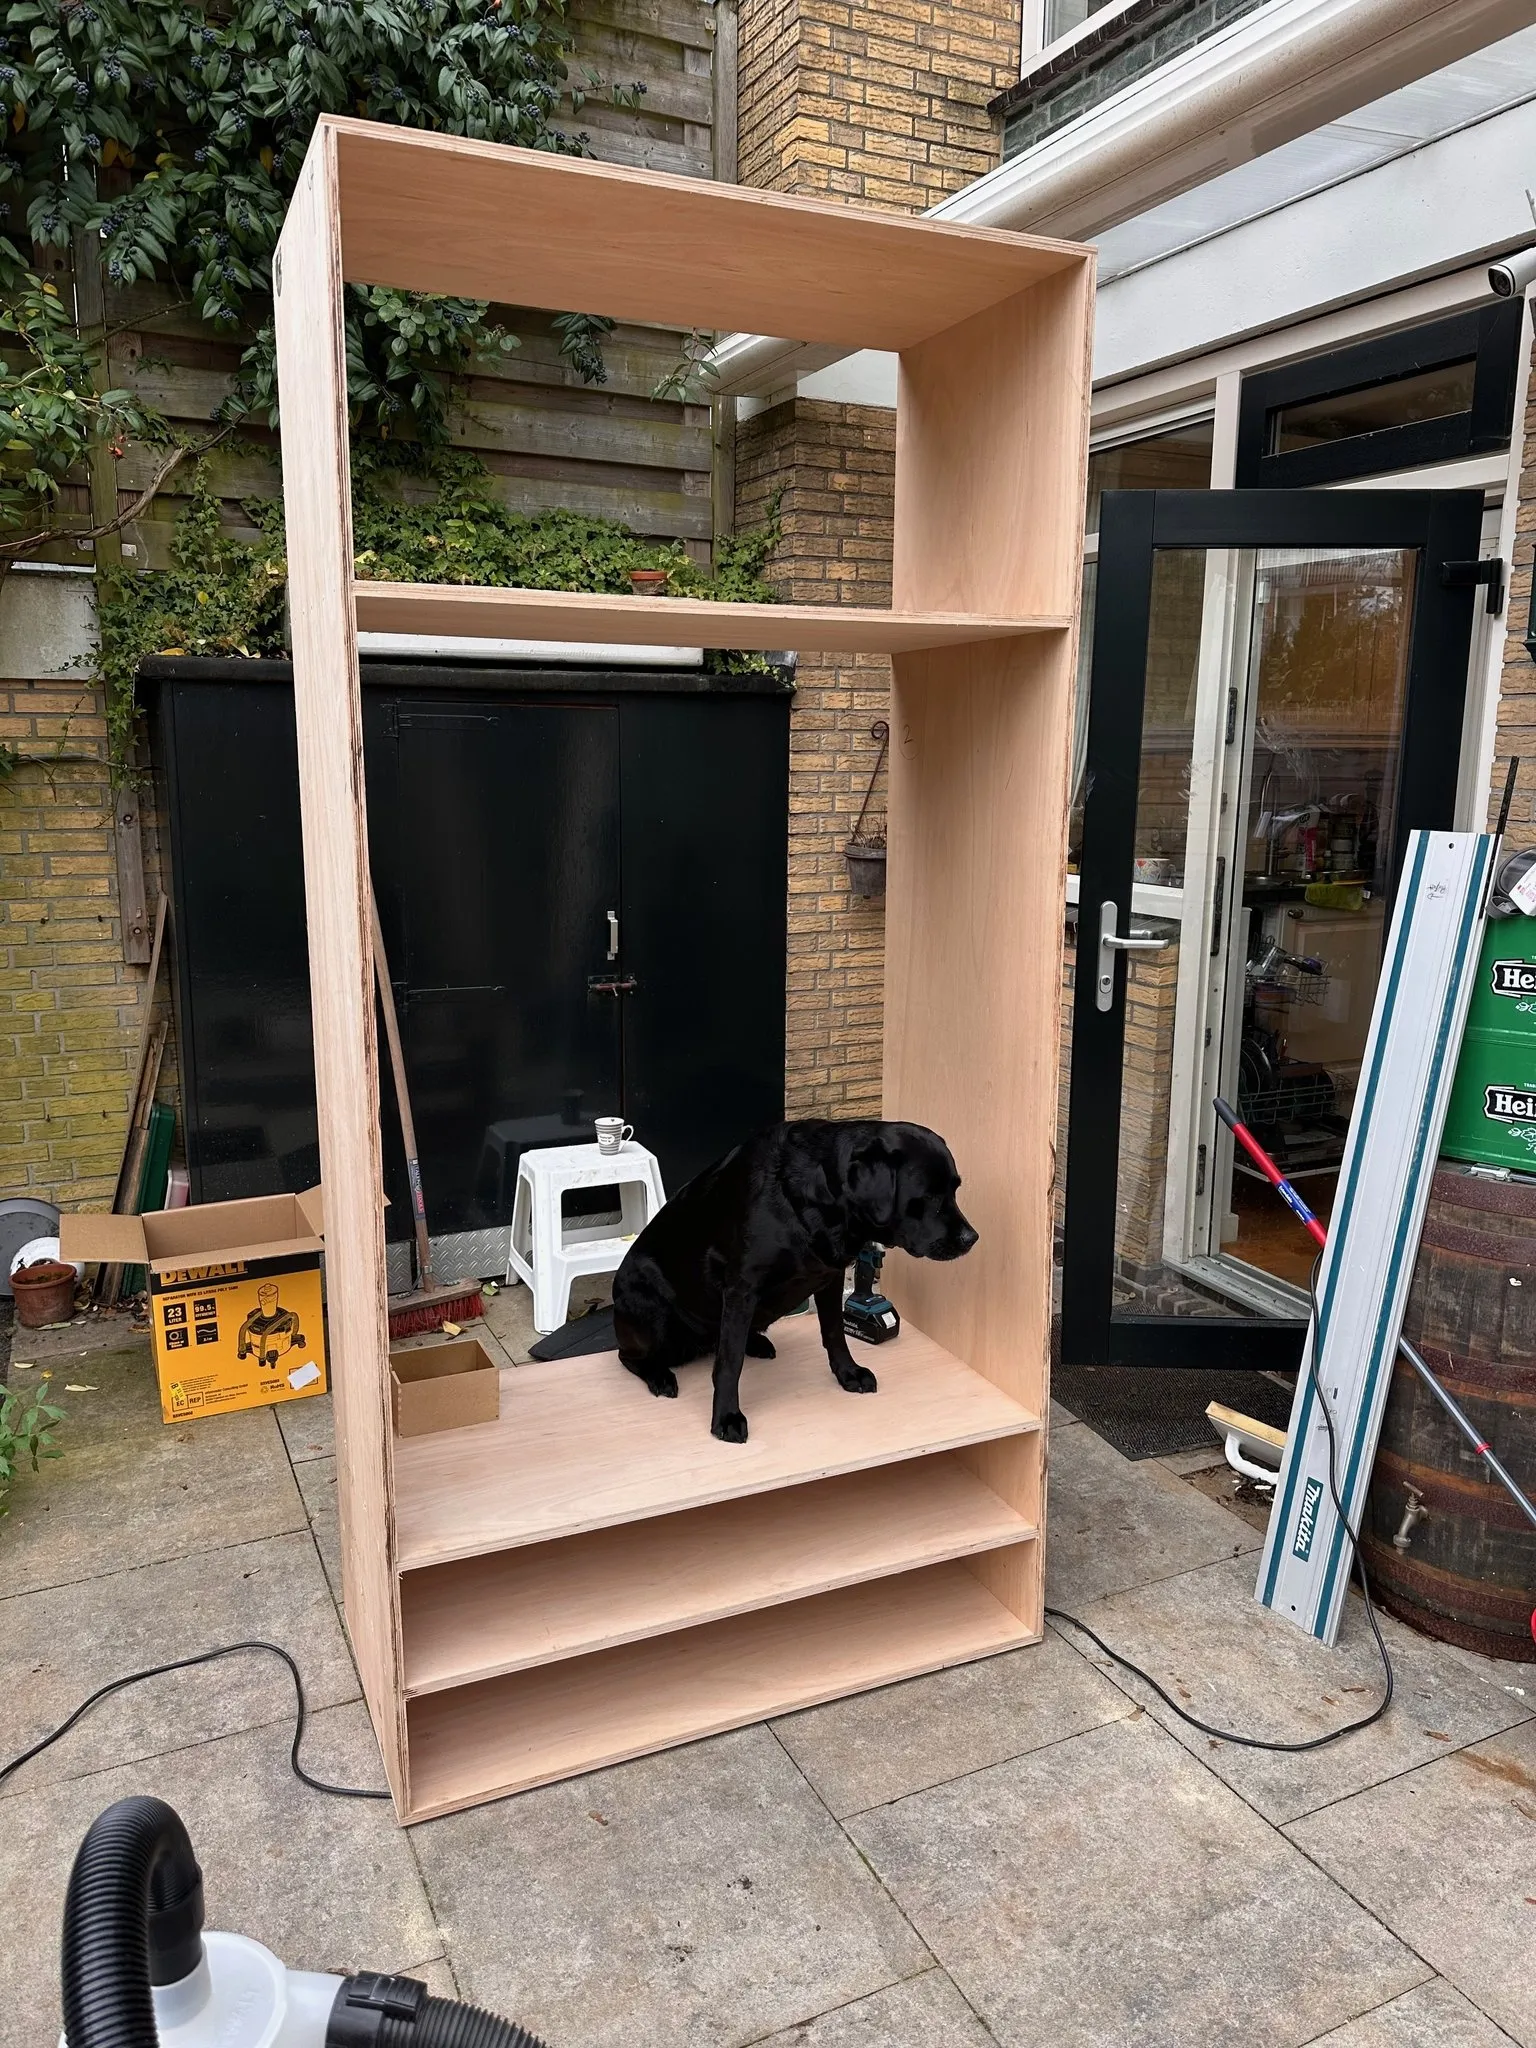
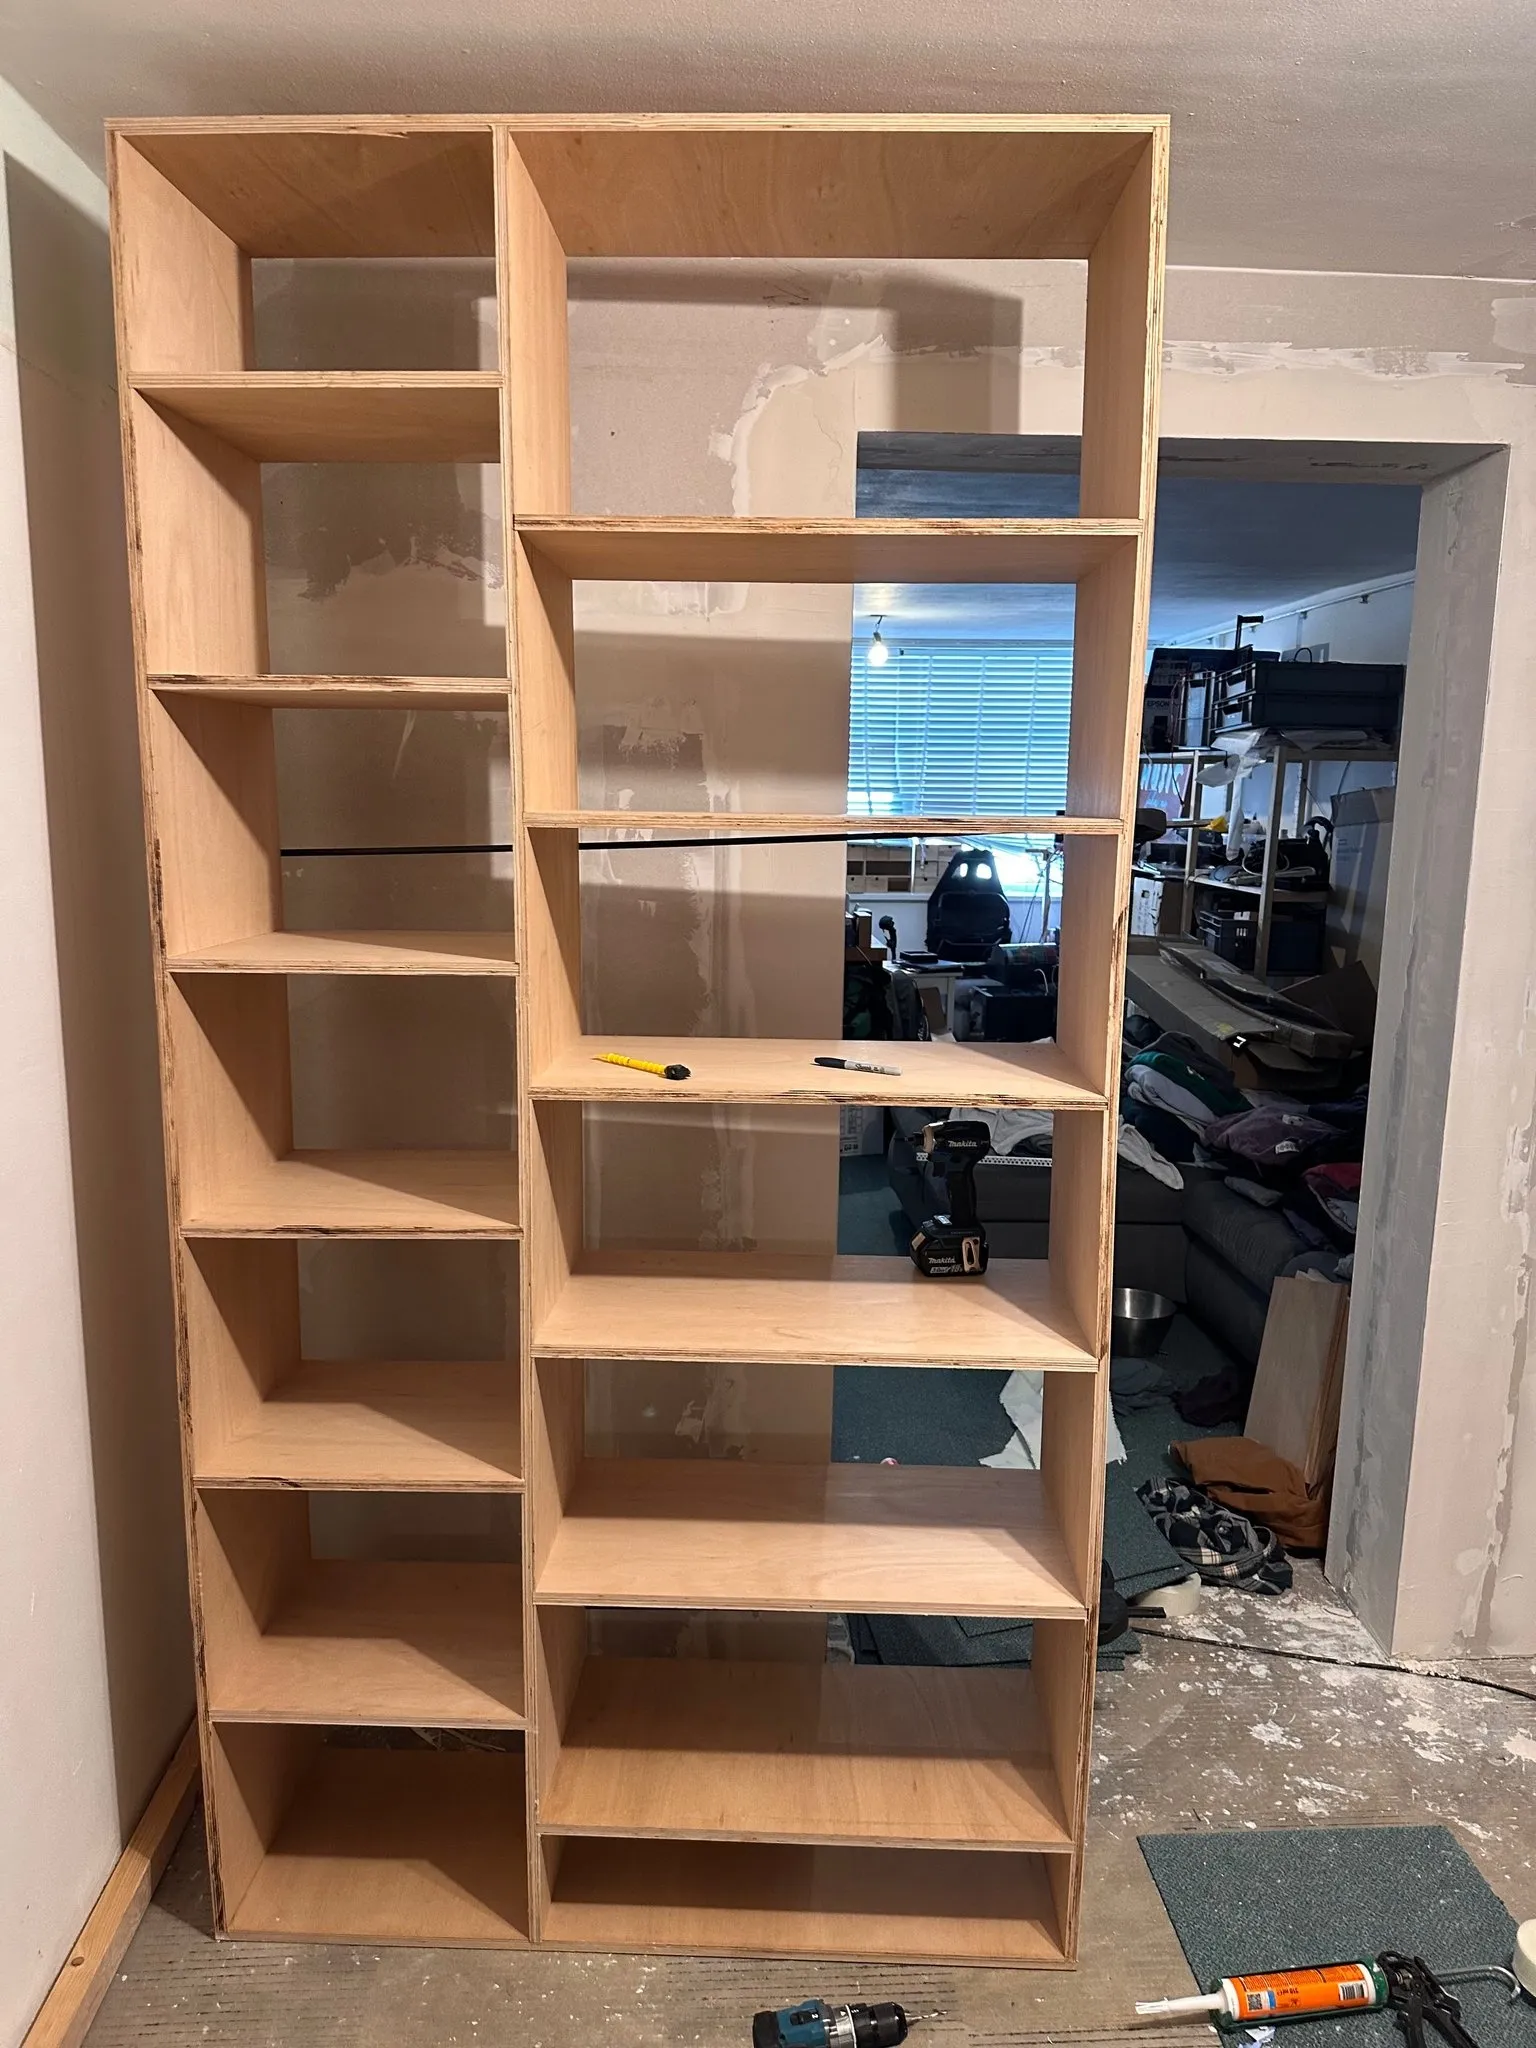
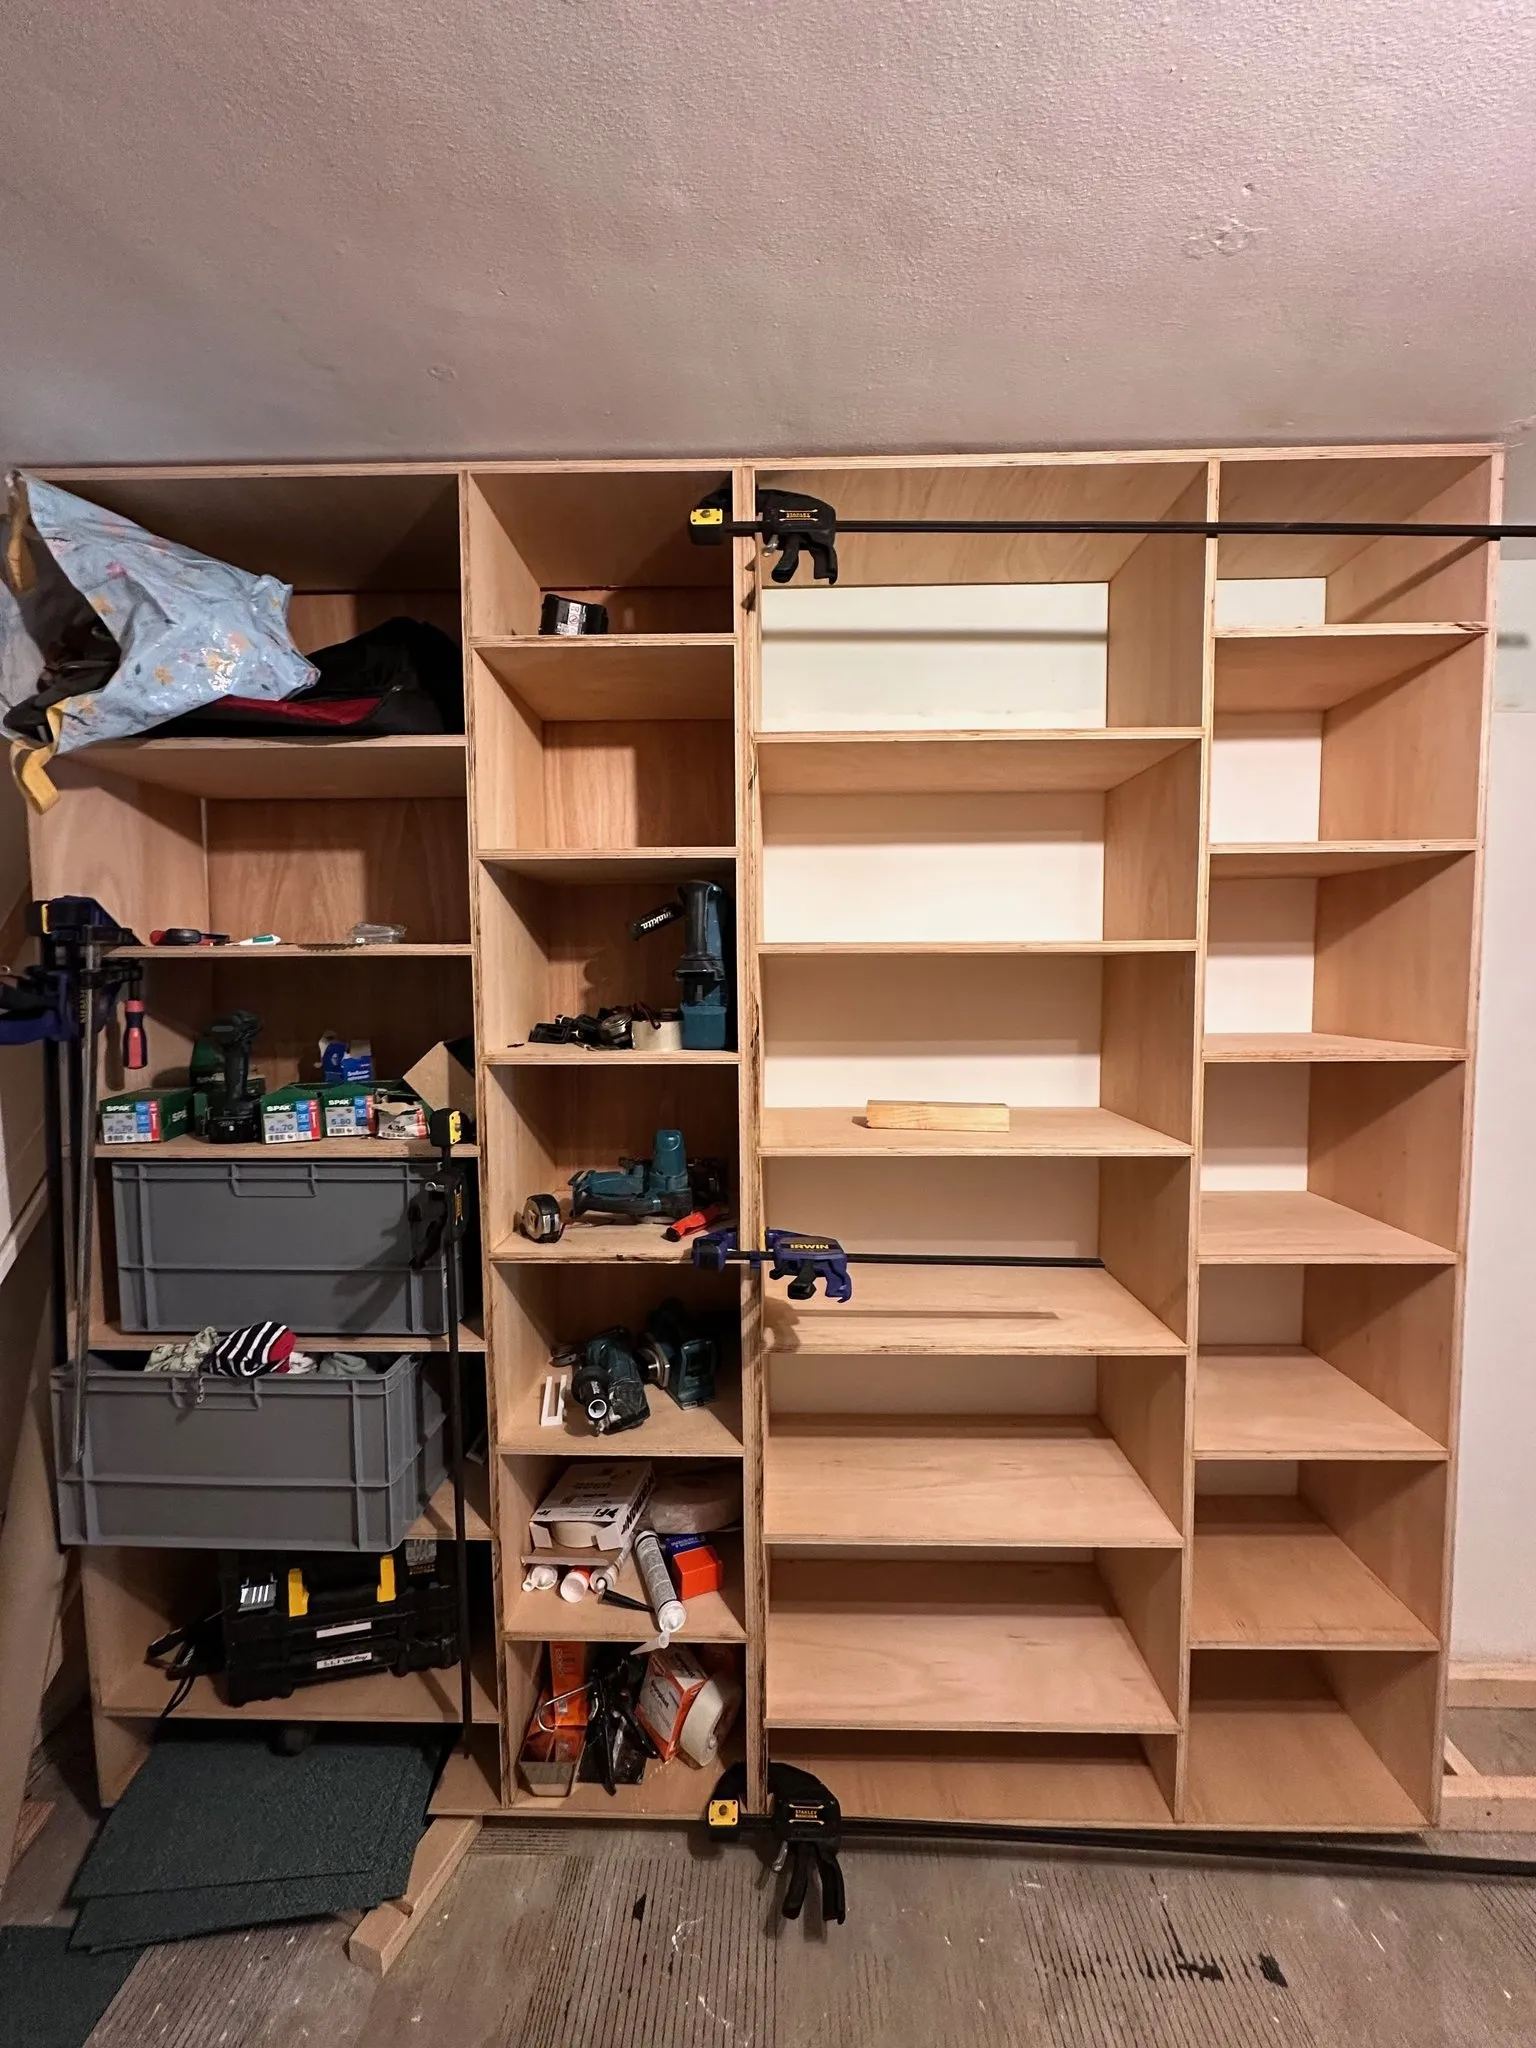
Each part of the system was designed as a specific unit. For example, the hanging shelves unit was three units all put together. This modular approach made construction more manageable and allowed for precise fitting in the space.
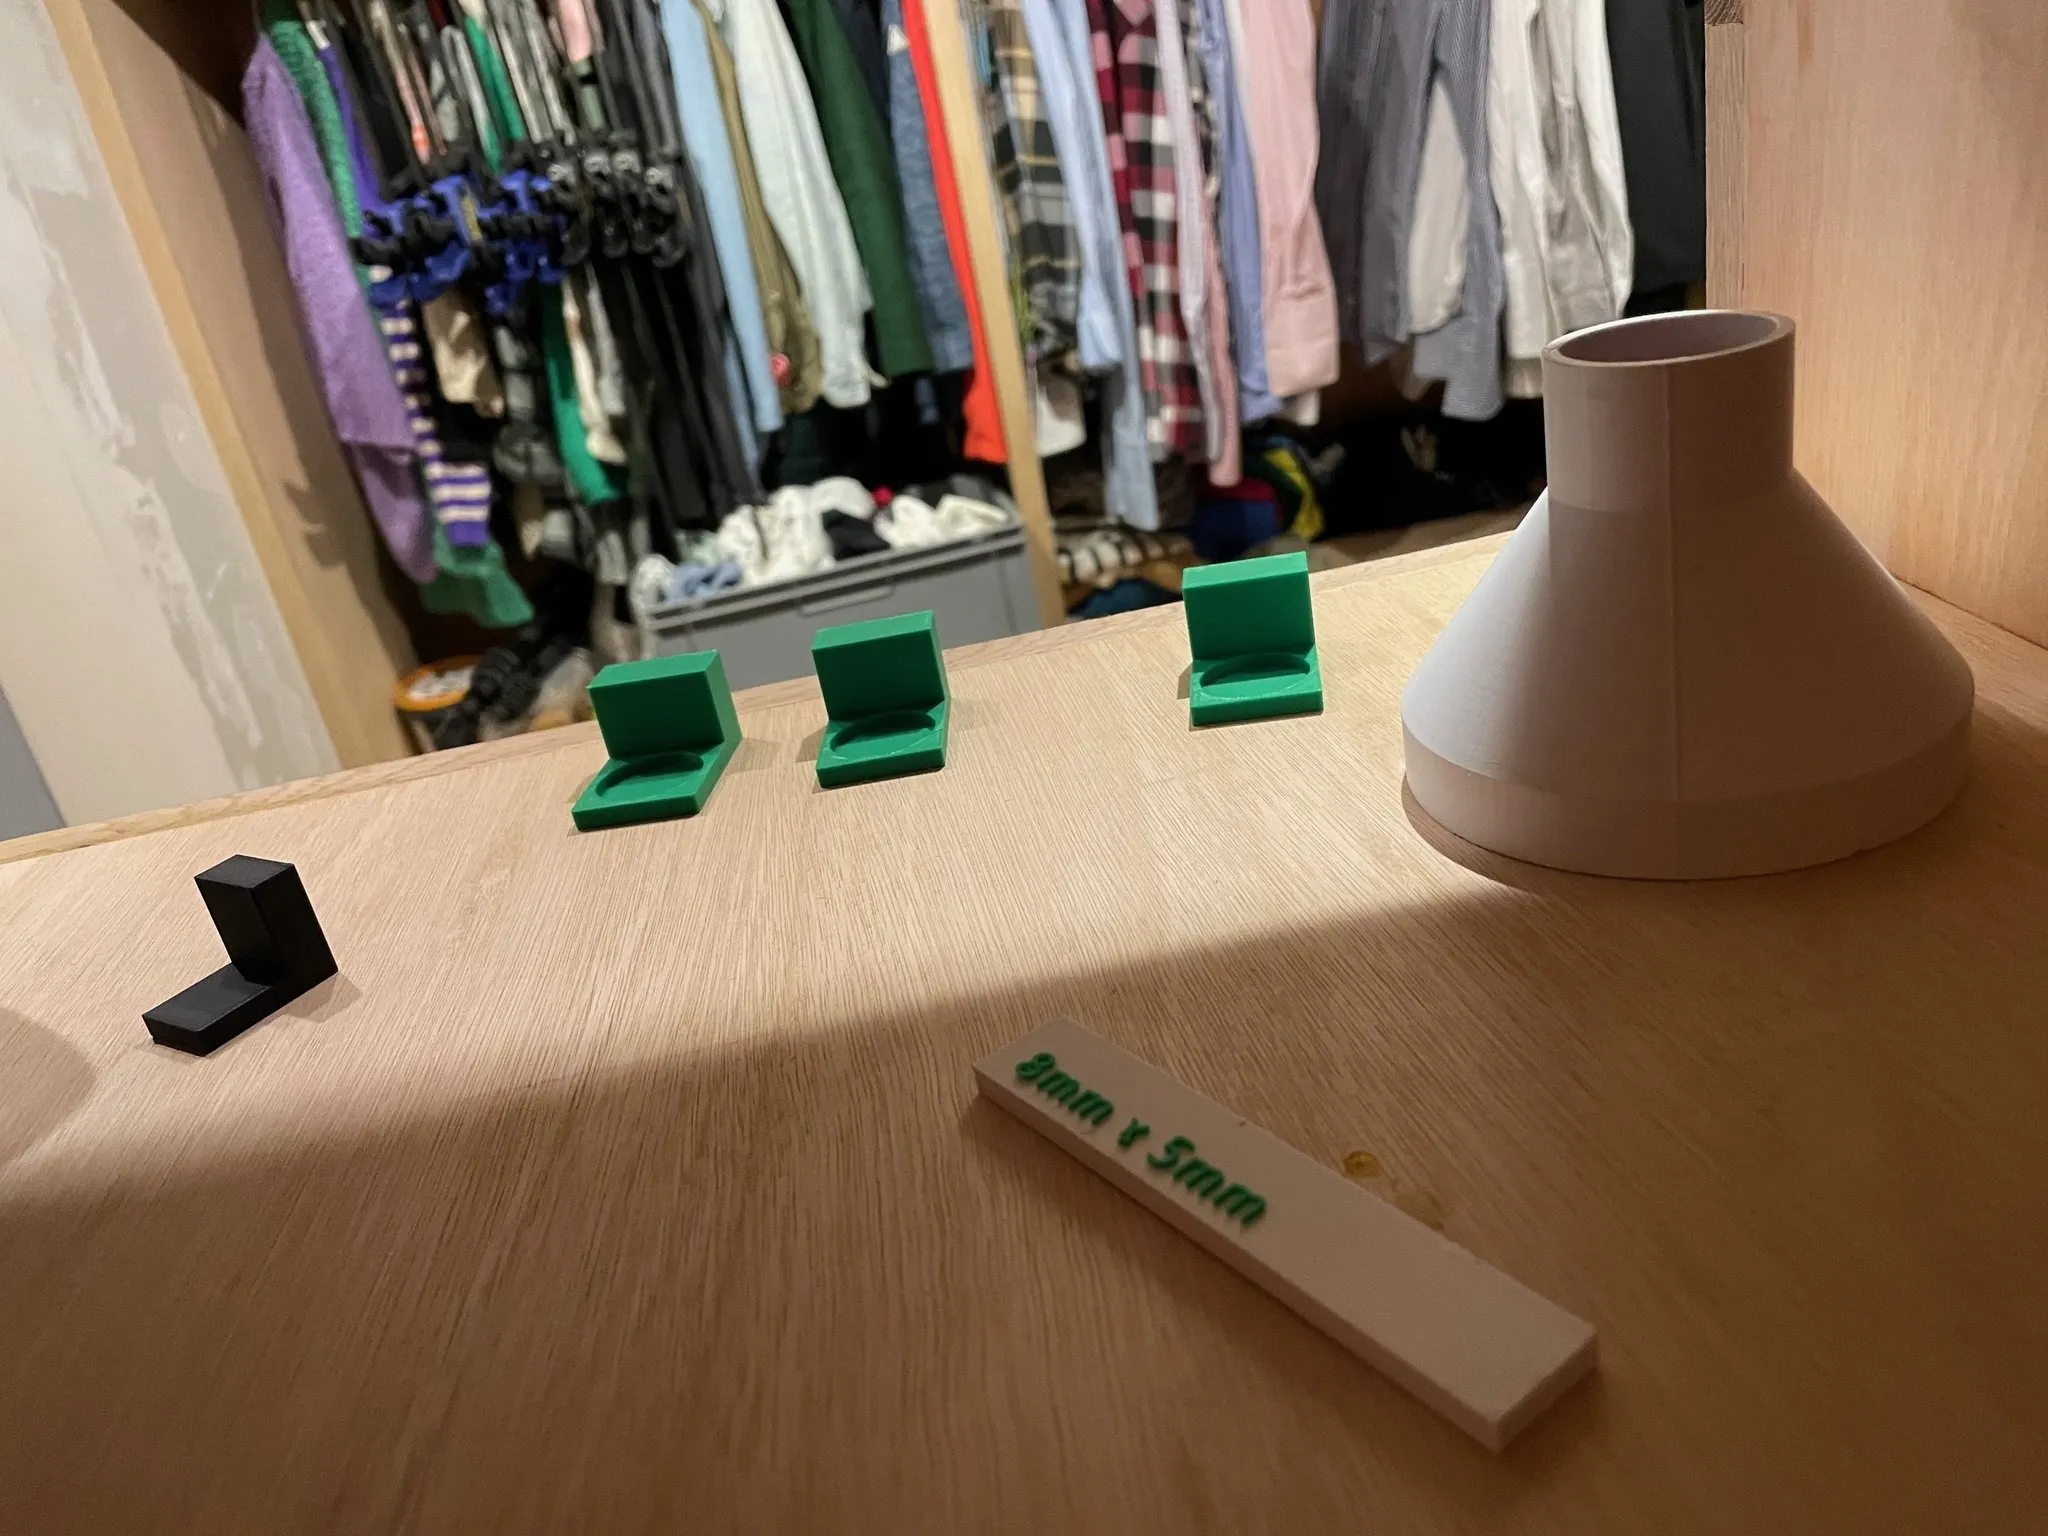
As I went through the process, I also upgraded my 3D printer from an old Creality printer to a new Bambu Lab printer. This just helped with little templates and measuring guides that I could use. For example, I could make sure that the slots were all being cut to the right size, depth, and width to make sure that the shelves would fit snug but not also be too tight or too loose. Rather than having to measure this all out specifically, I could just print out a specific spacer that I could then slot in. So every time I made a cut, even though I was using a template, I could make sure that if something went wrong, it would be caught straight away rather than propagating that error all the way through multiple pieces.
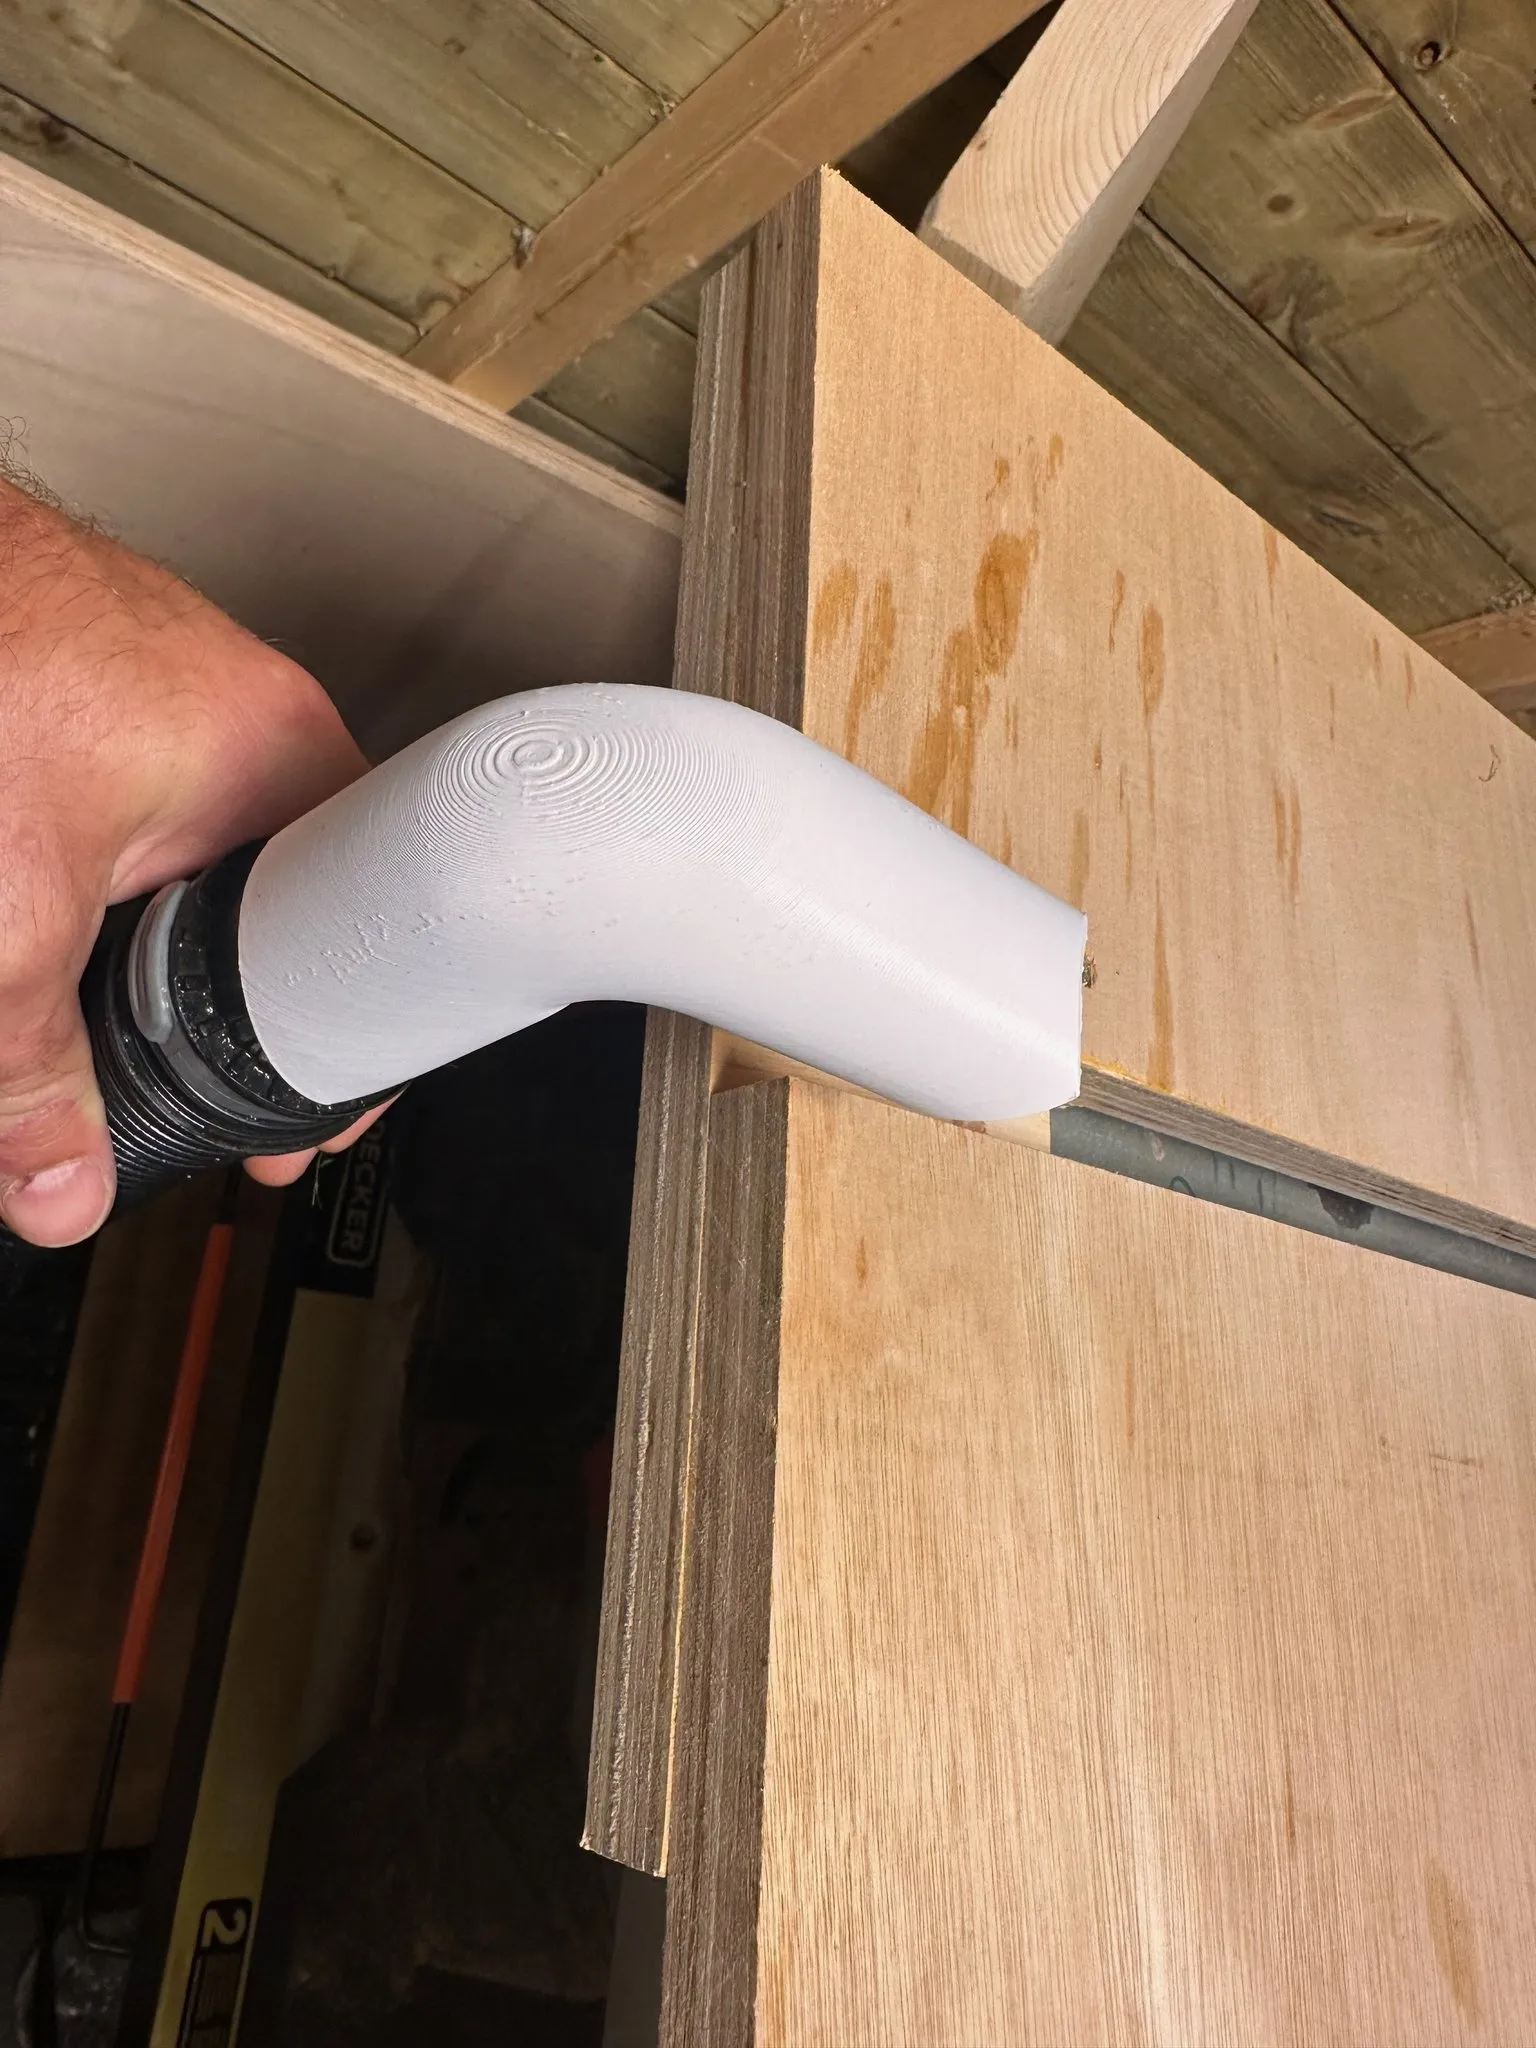
Also for just simple things like dust collection—for example, when I was cutting all of the slots for the shelves, the router creates a huge amount of dust. With the dust collector adapter that I added to the template, it meant that probably 90–95% of the dust was collected without even going into the air.
Even though I was doing good dust collection, I still always took dust management very seriously and wore a 3M full face mask that helped with obviously not inhaling the dangerous hardwood dust but also provided eye protection.
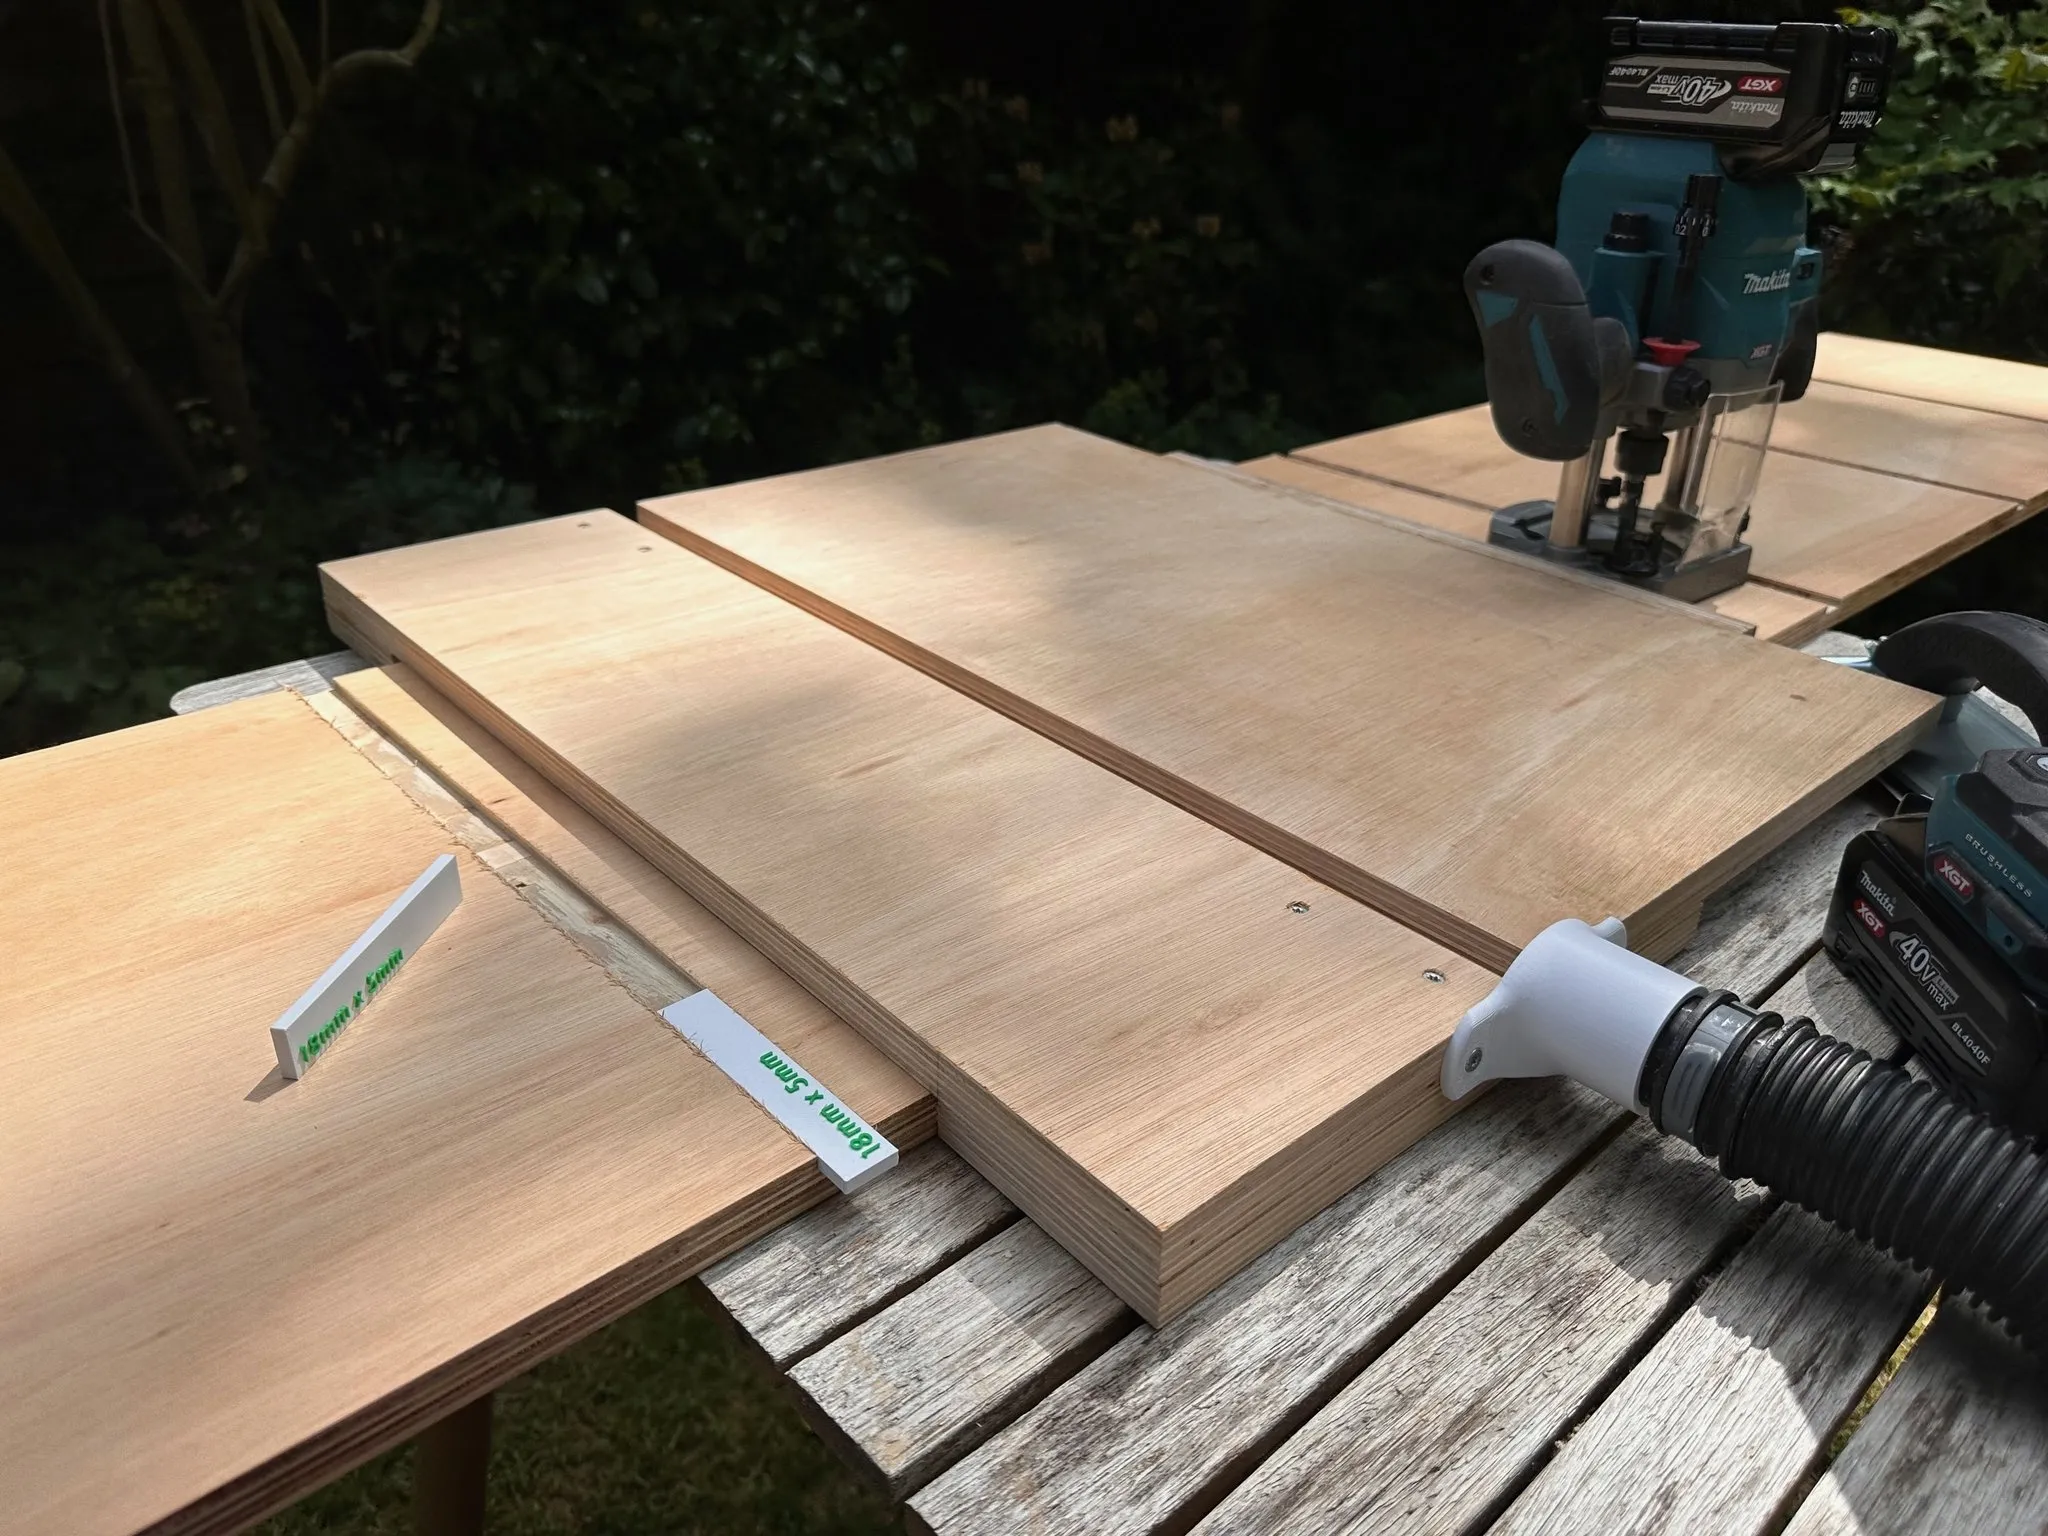
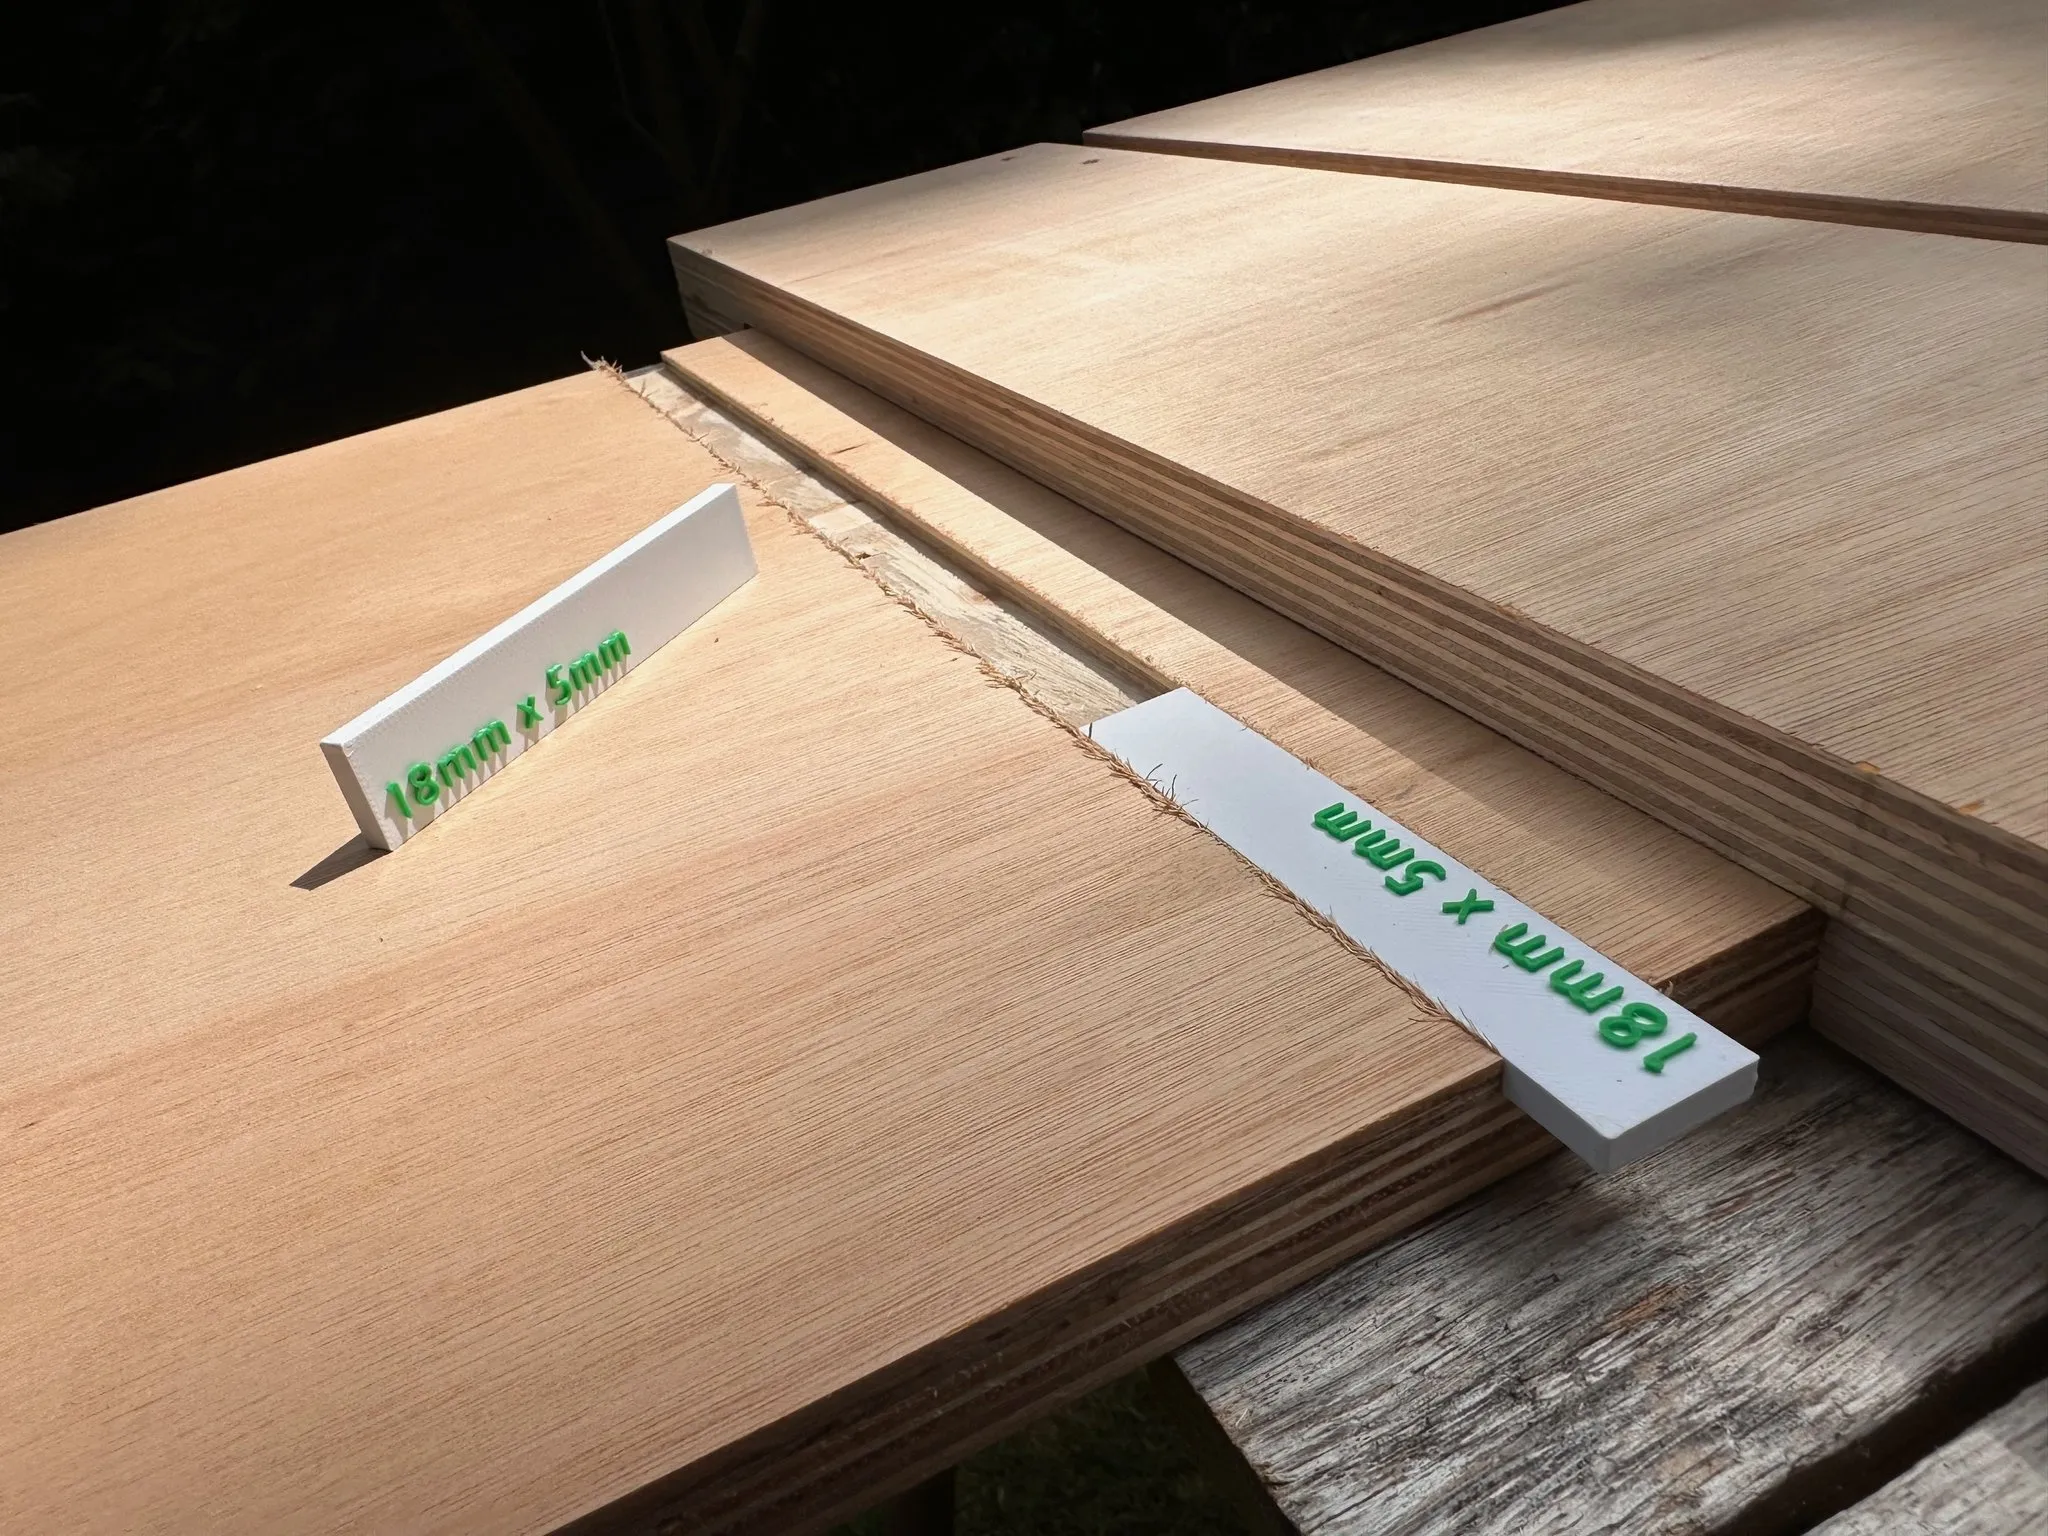
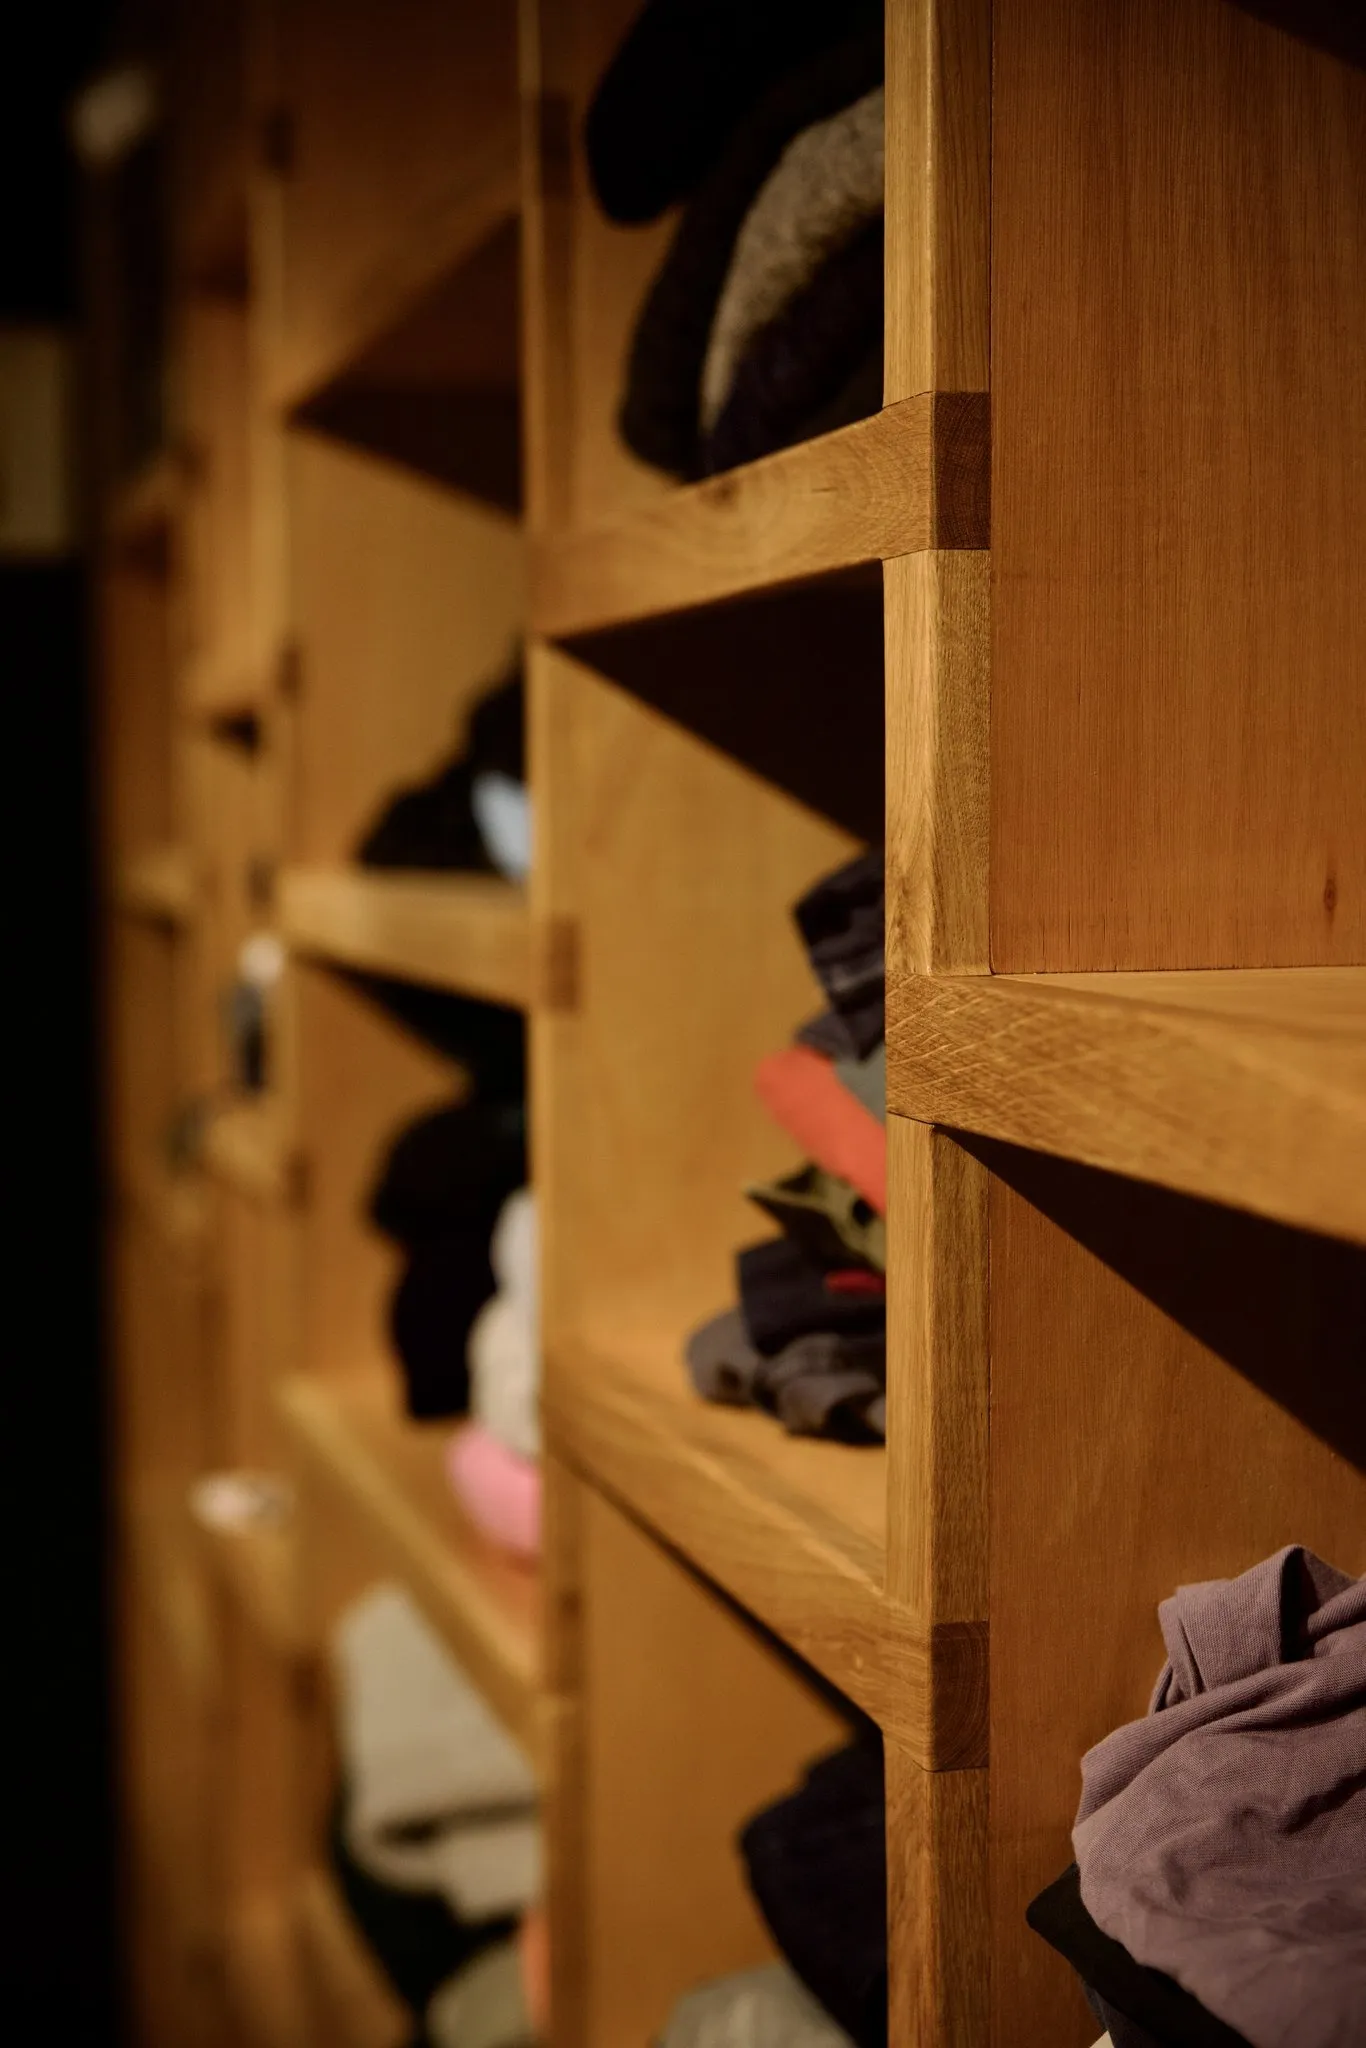
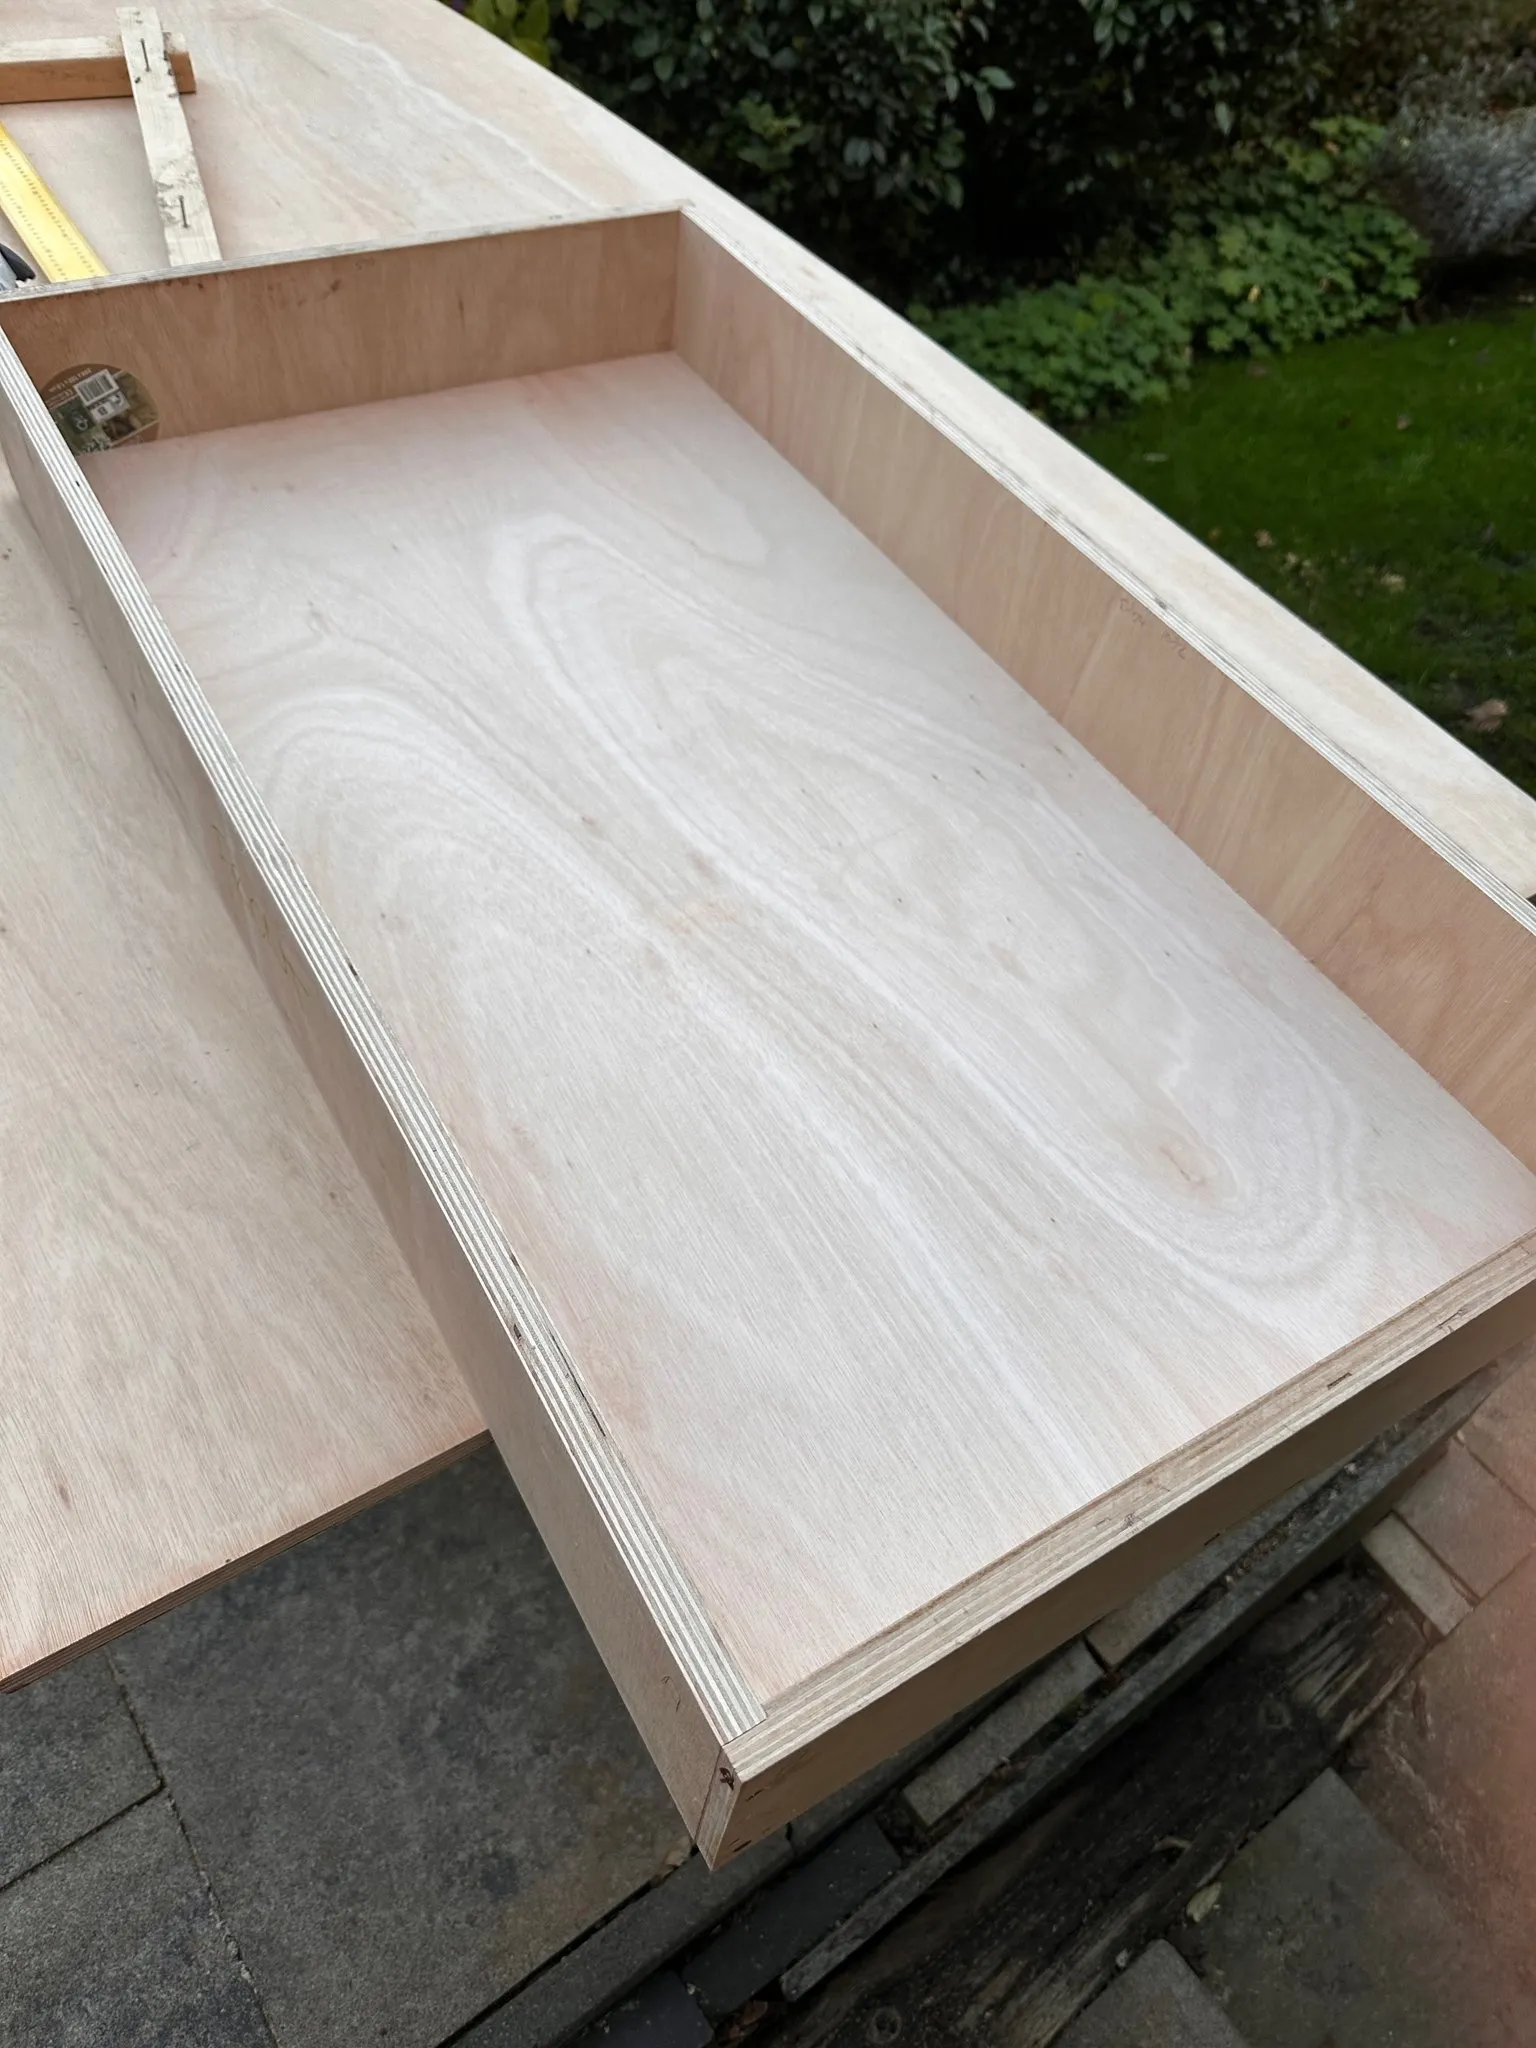
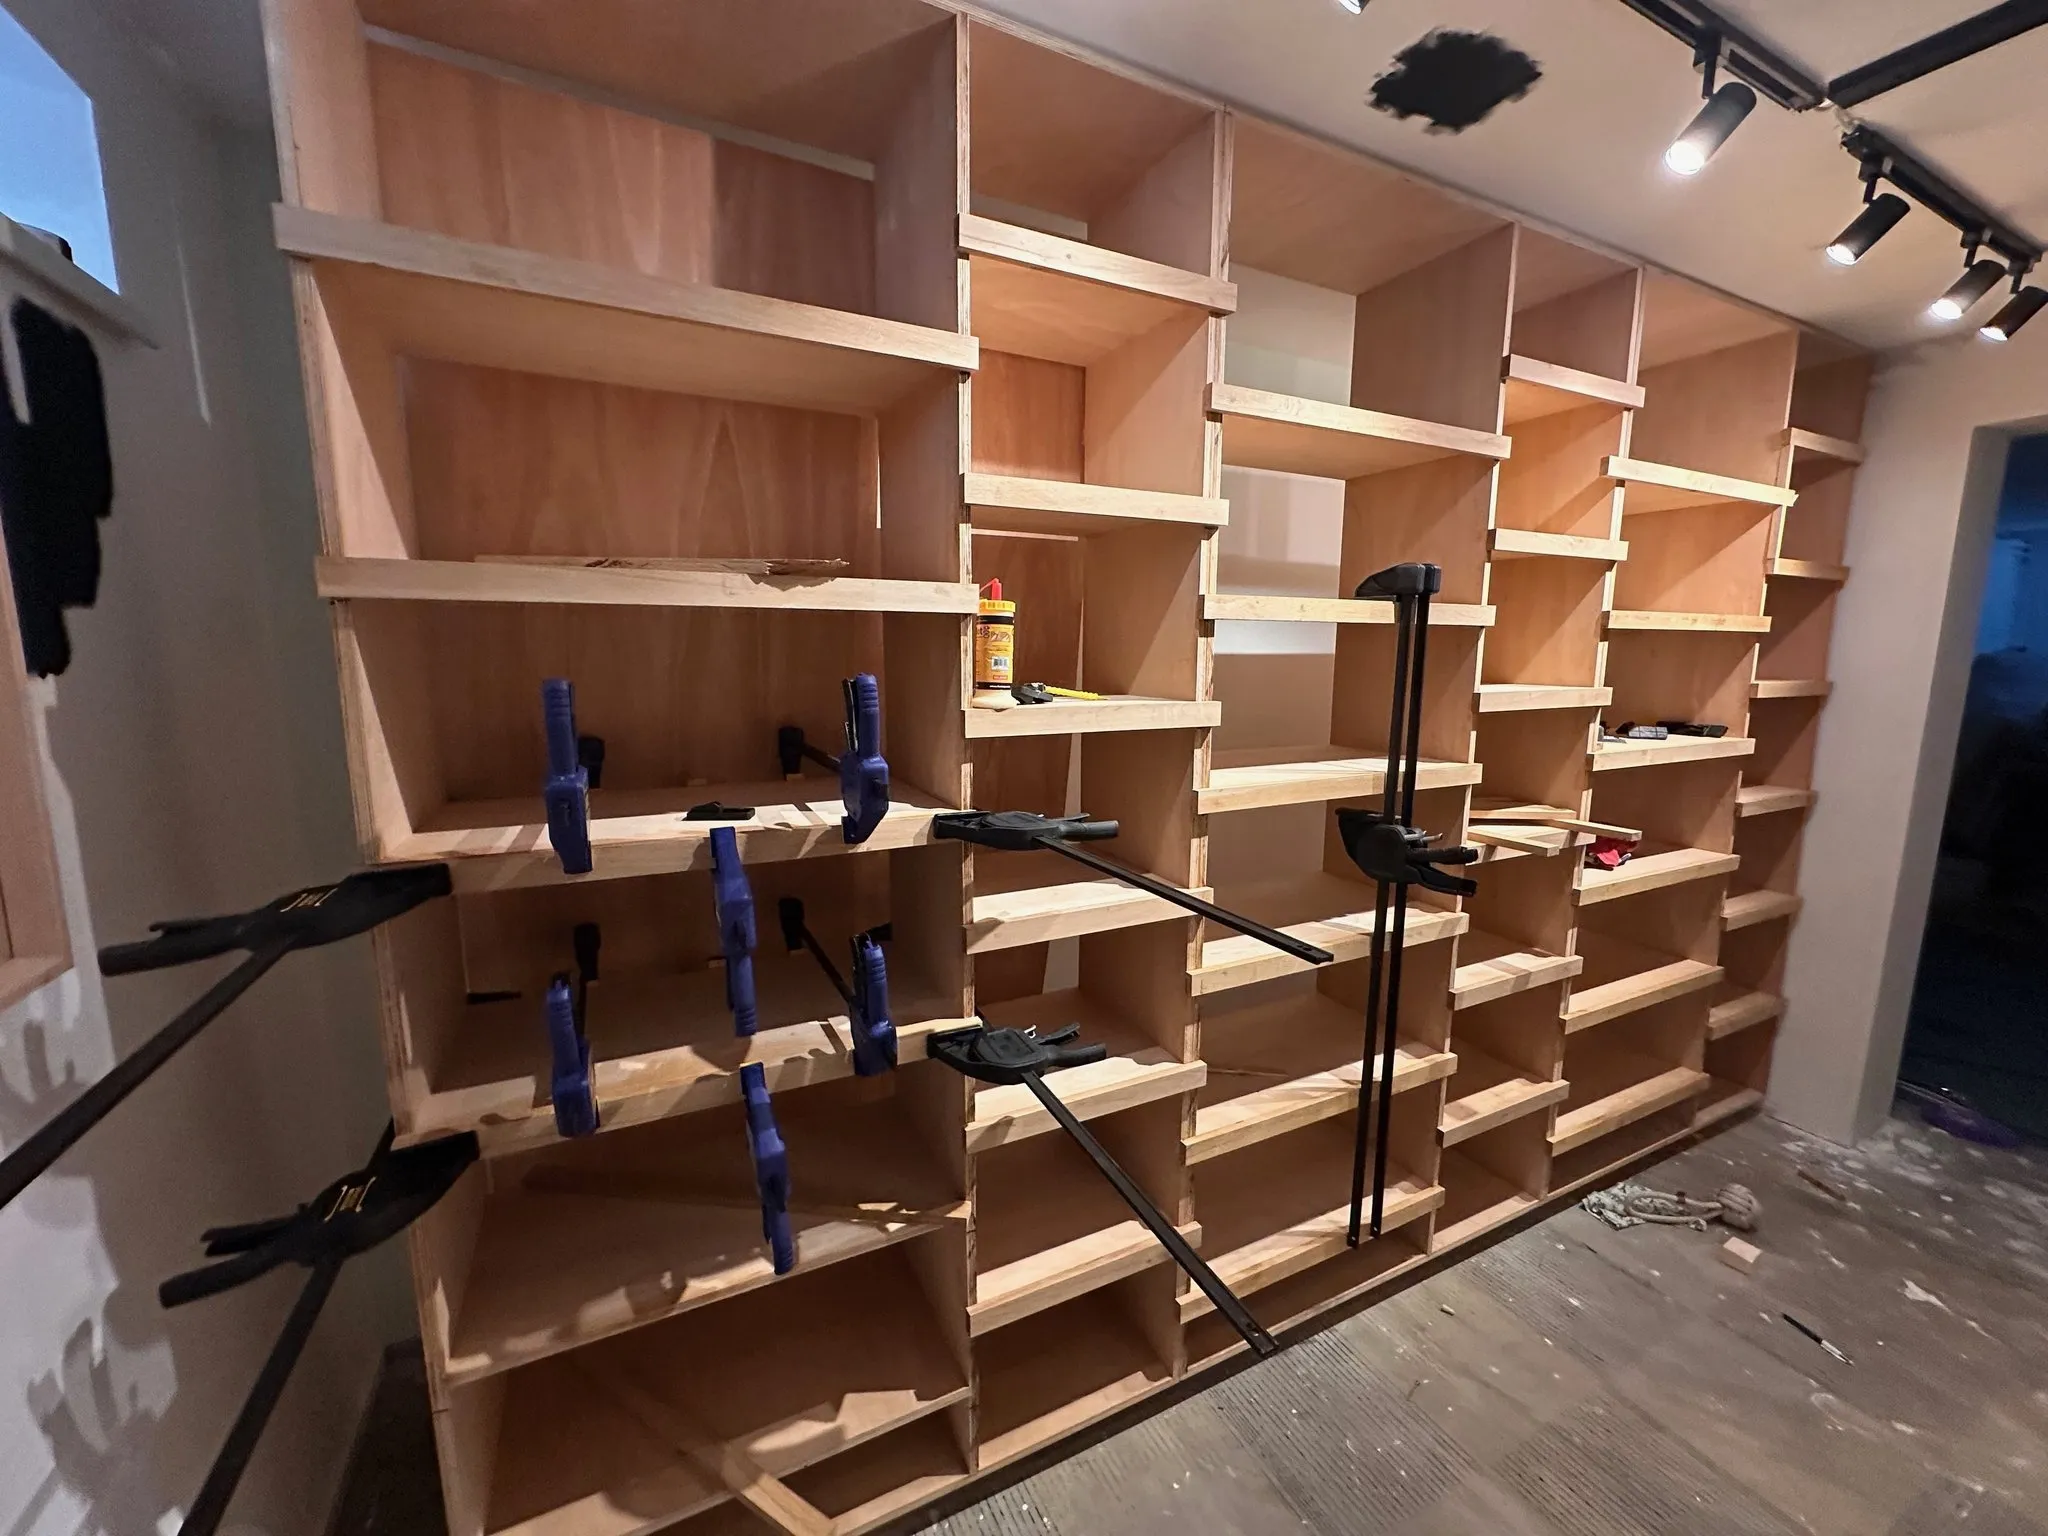
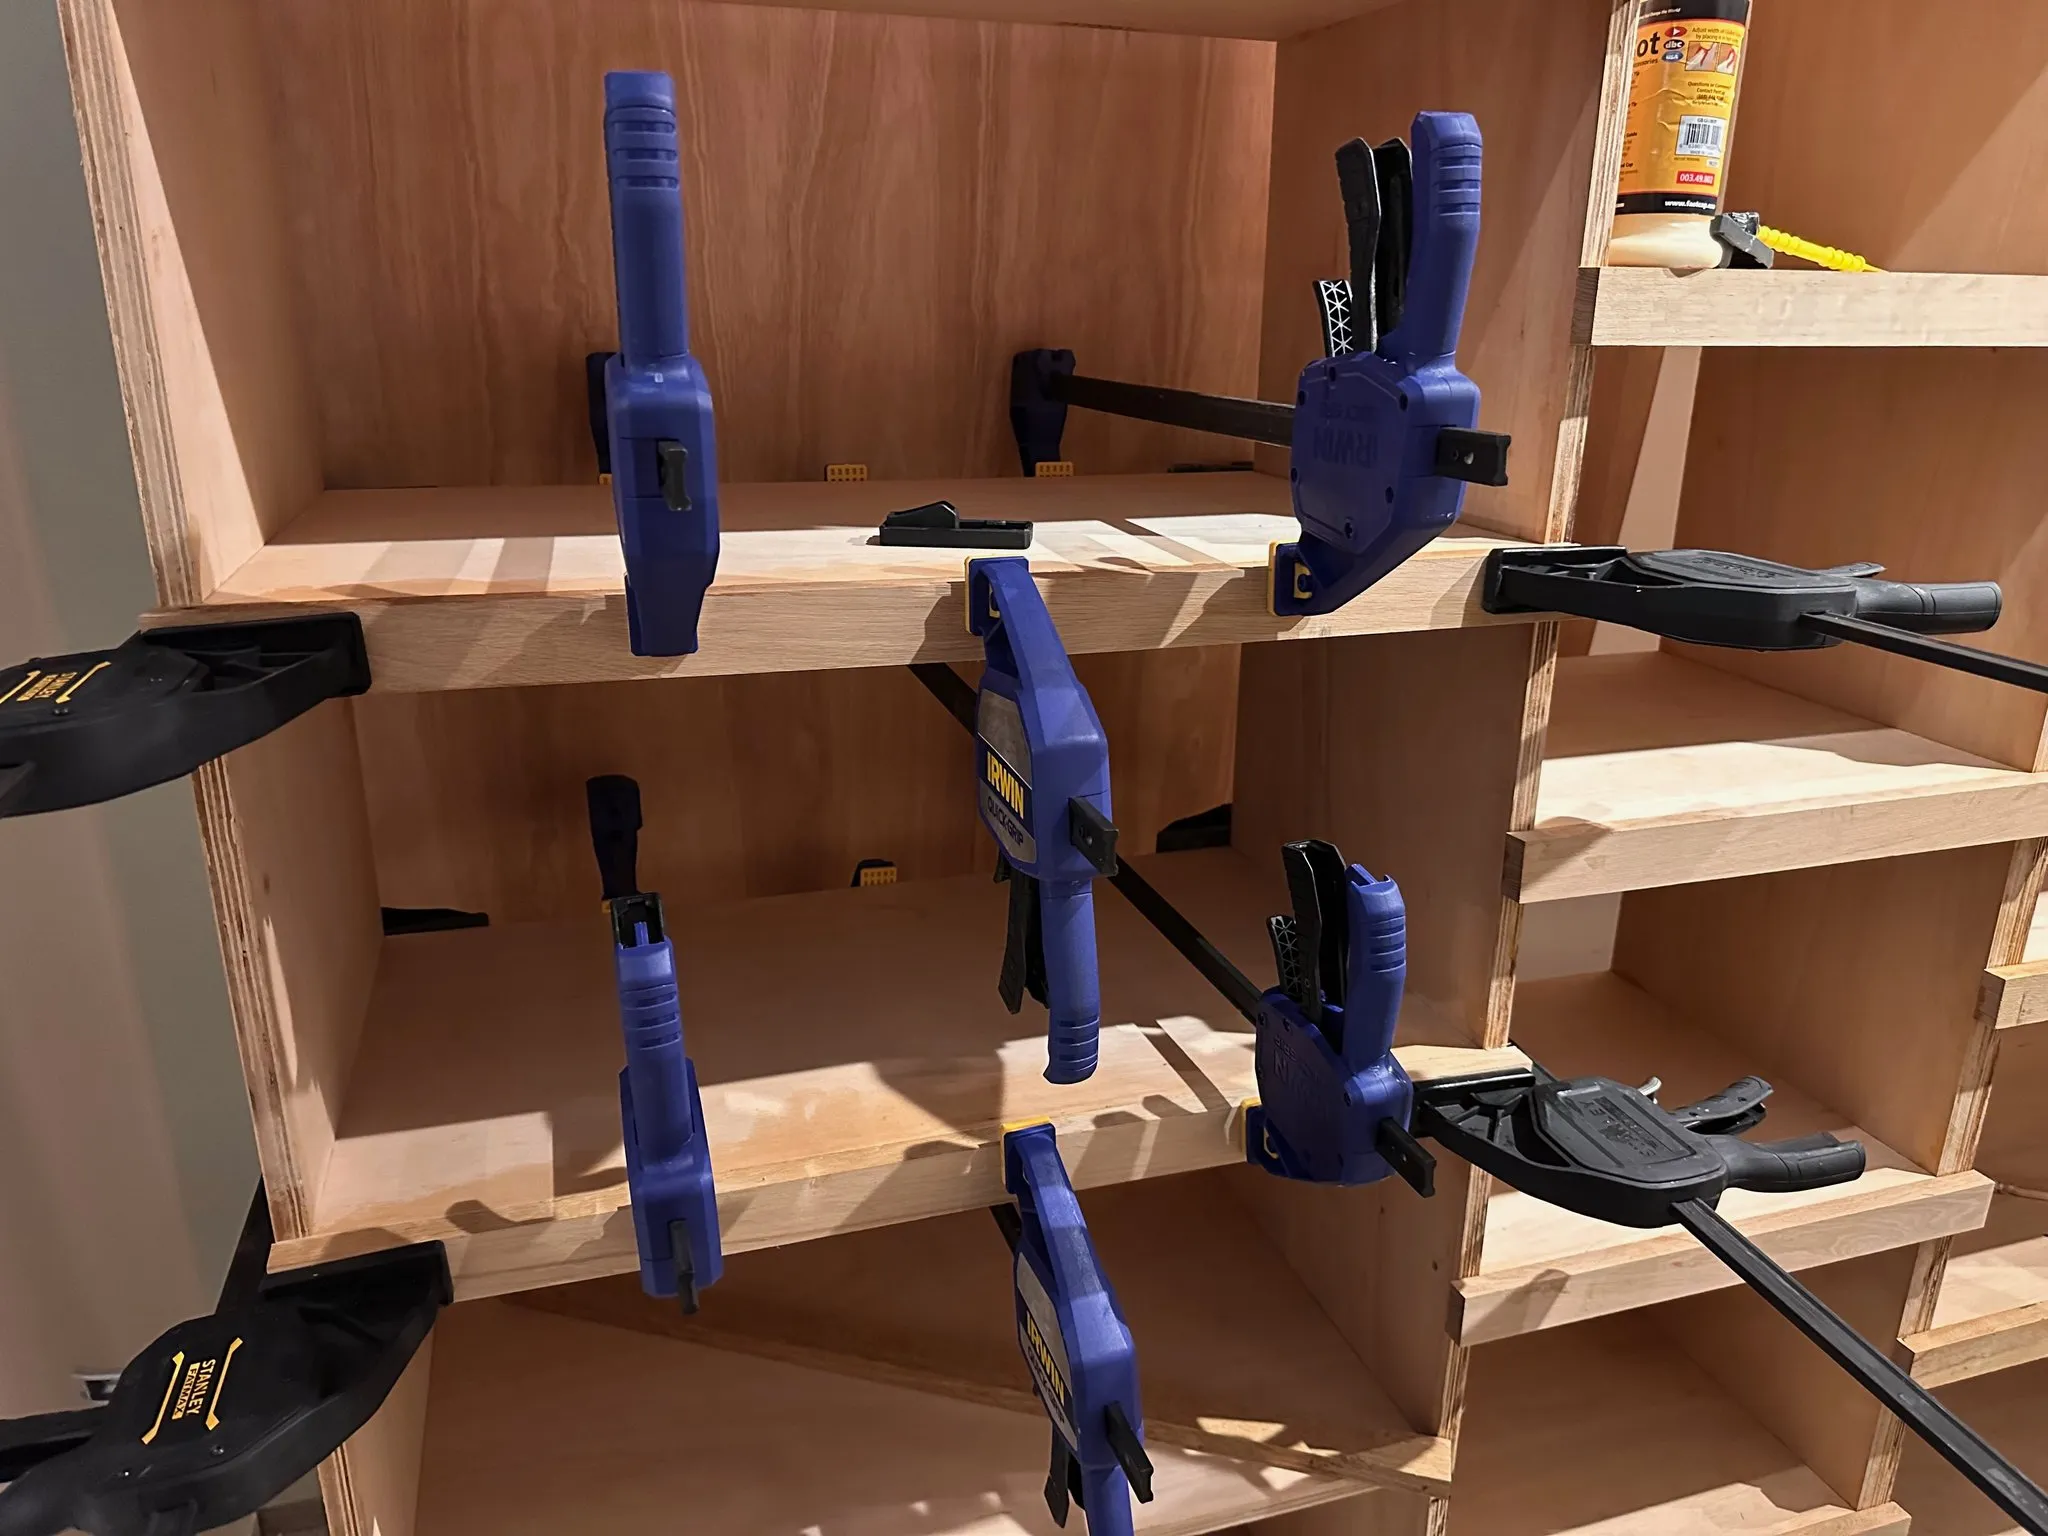
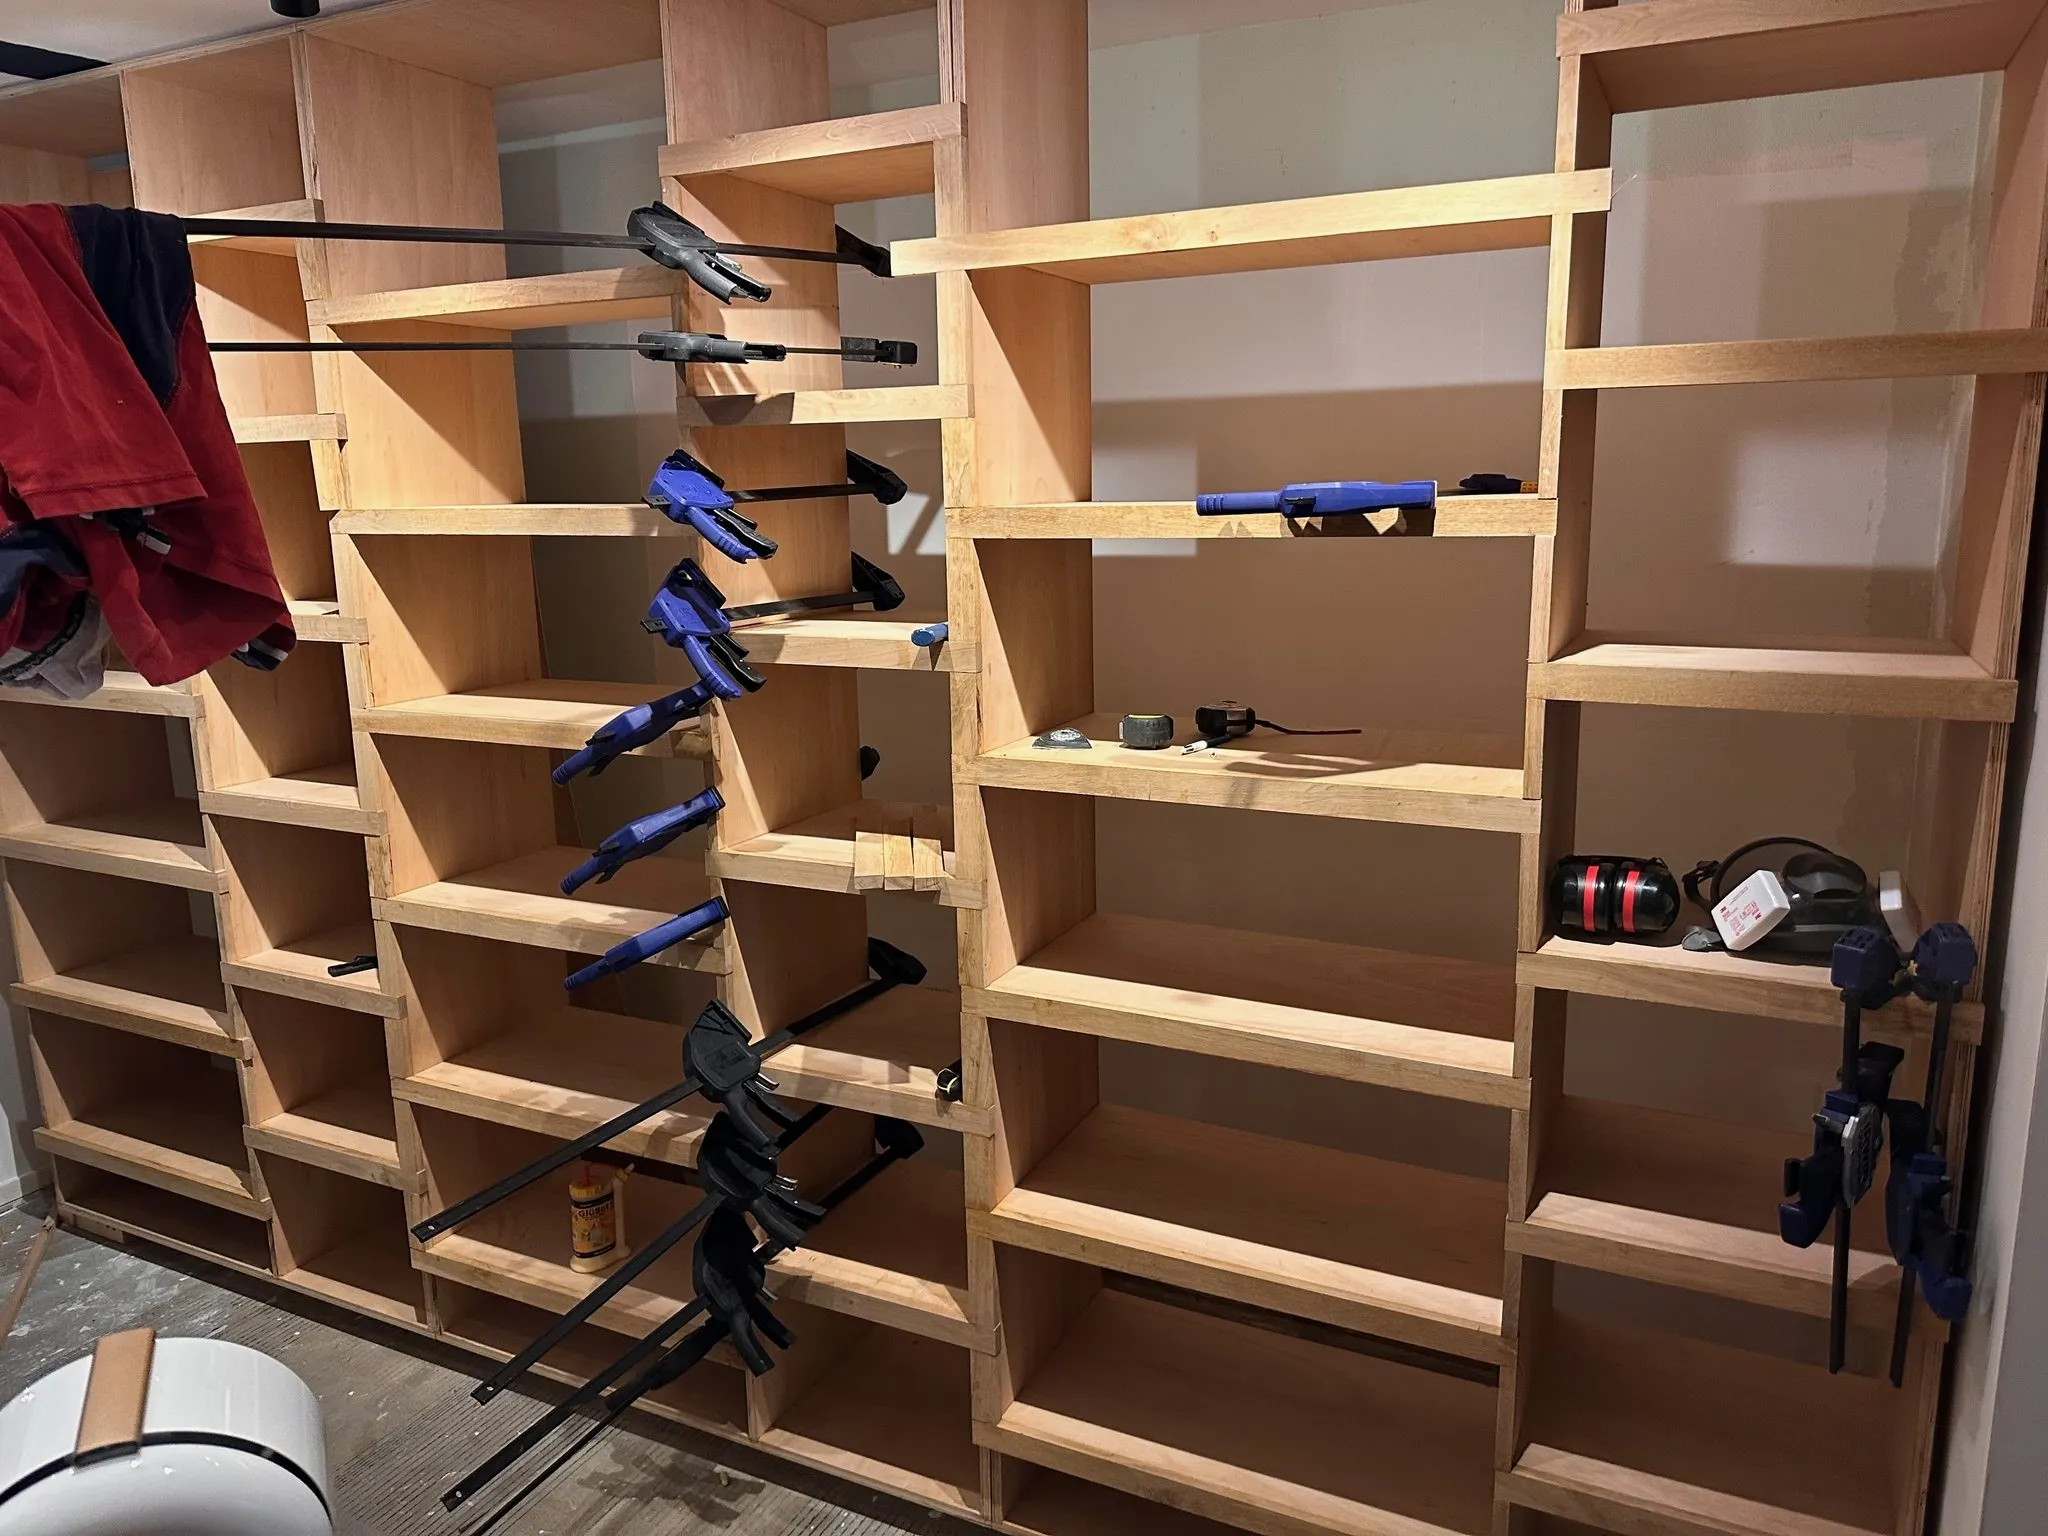
For the shelves, they would be slid into their rails. I decided on a 5mm slot for the shelves to fit in. This would be glued using Titebond glue. And then I would also glue them in a way that you couldn't see the screws at all in the finished setup. This meant that the shelves were in a rail, glued and screwed, which meant that they were incredibly strong.
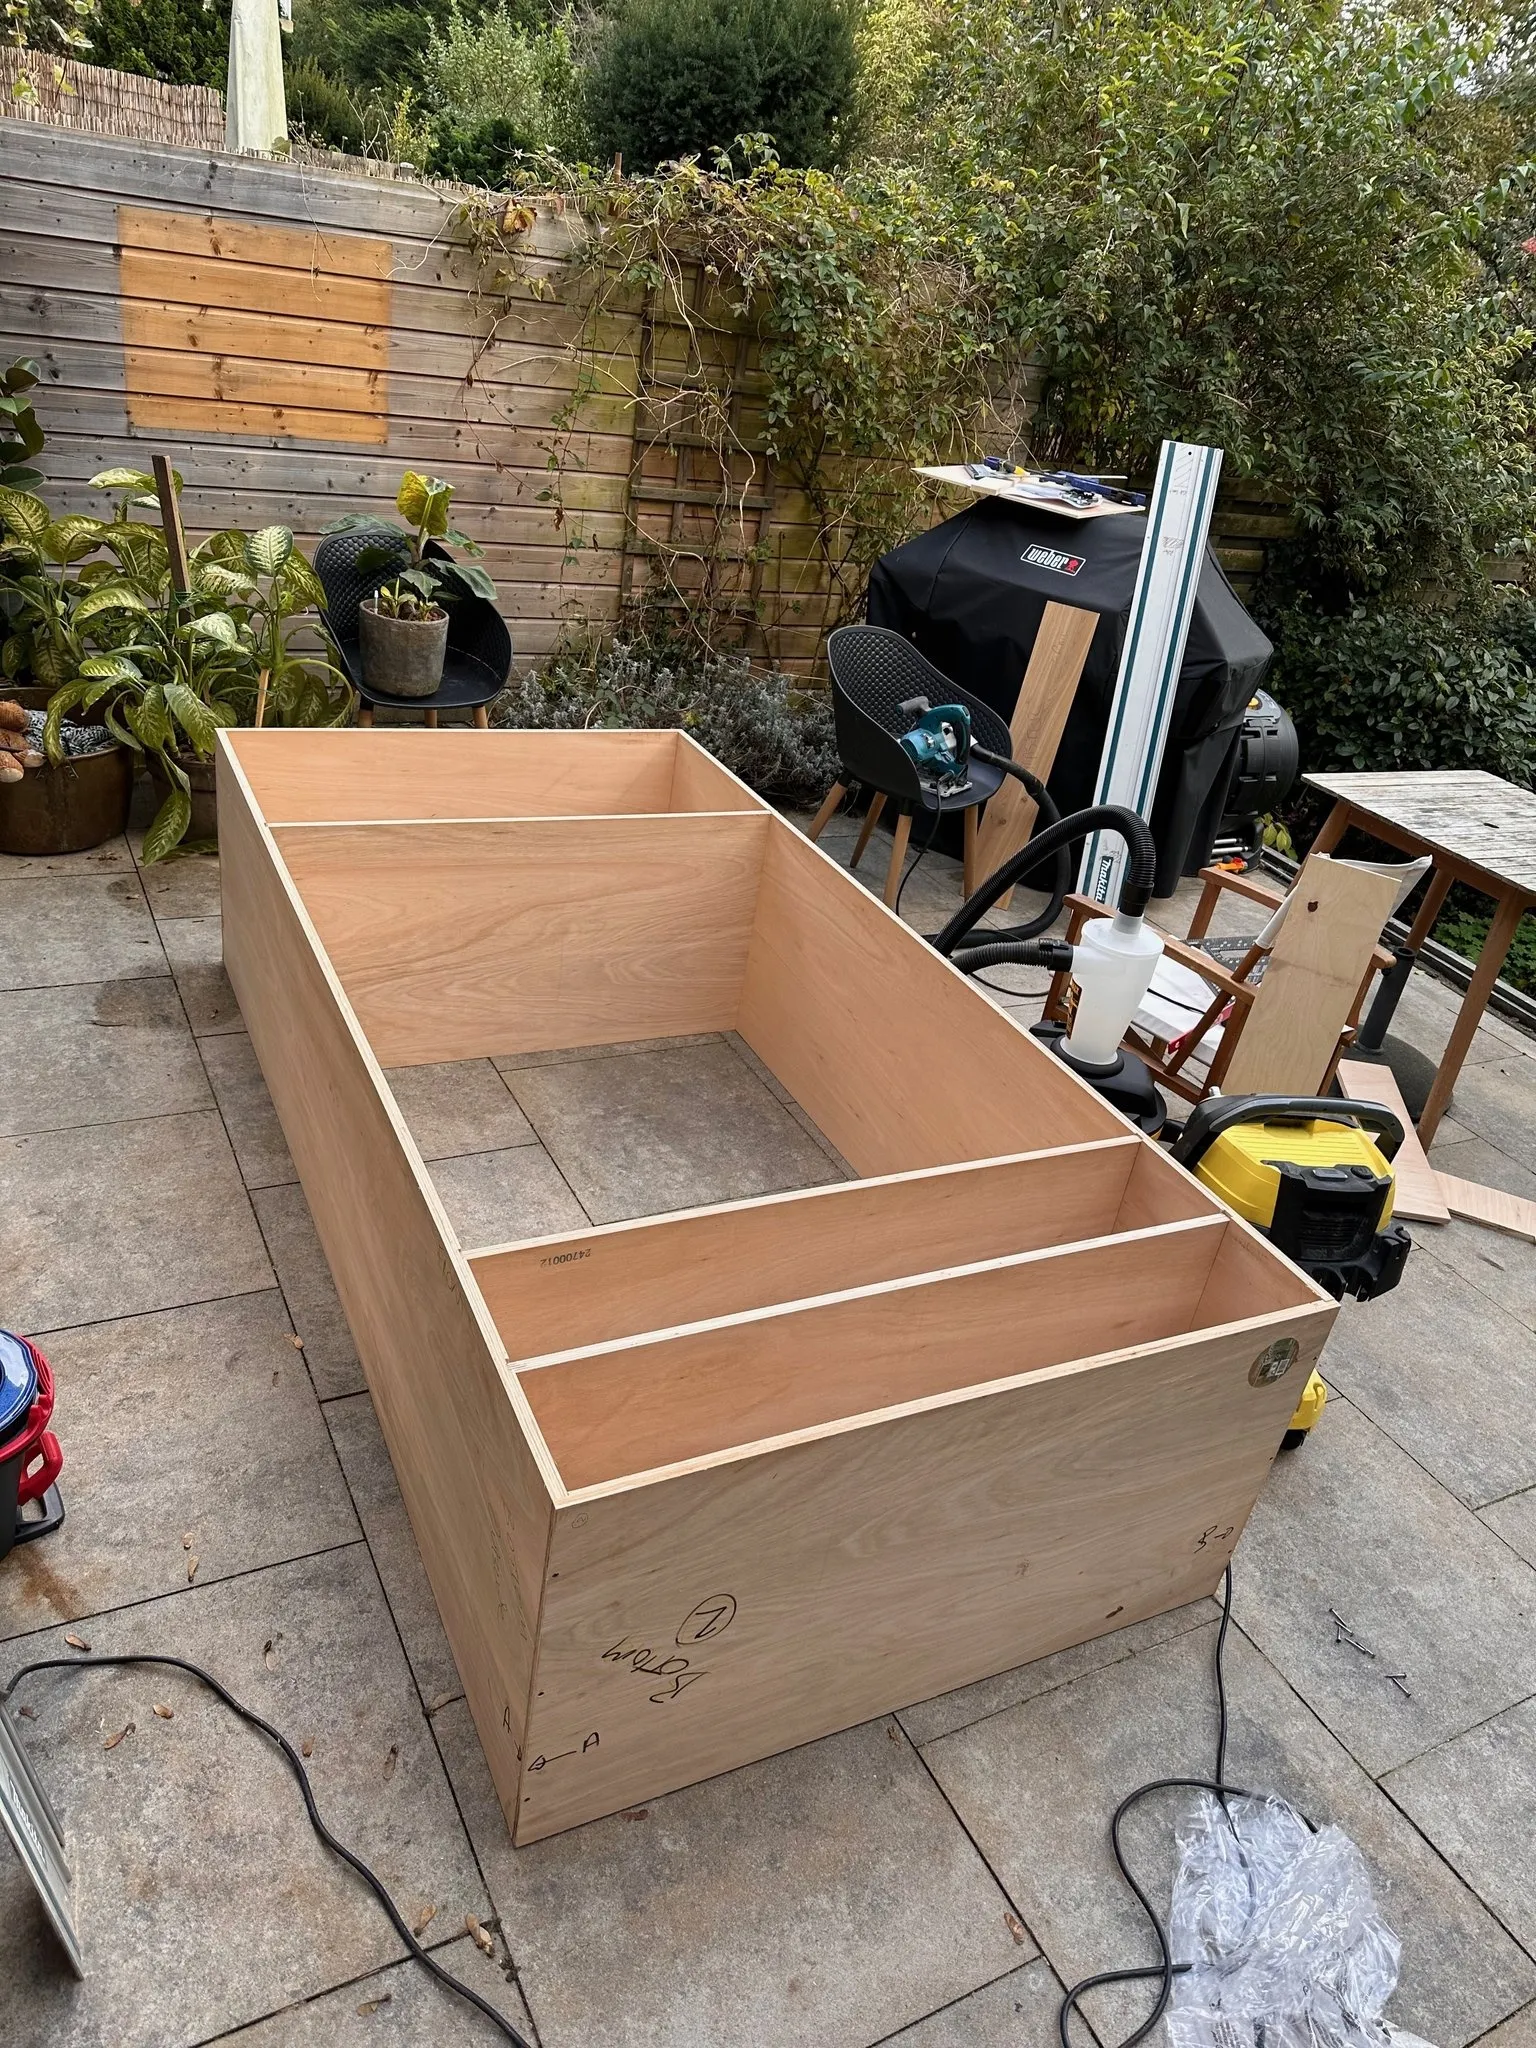
The plywood I decided to be 18mm thick, and each part of the system was designed as a specific unit. This approach ensured structural integrity while maintaining the clean aesthetic we were aiming for.
With the wall up and the hanging side plywood complete, I needed to add oak fronting to hide the plywood edges. I went back and forth on the approach: attach the oak before assembly for easier access, or glue it in place after assembly for a better finish that could span multiple plywood pieces. I chose the latter, which meant gluing entire rows at once and required access to both front and back of the units.
I bought semi-finished oak planks from Bauhaus—not perfect, but reasonably straight. After ripping them to size on the table saw, I ended up needing about 15 clamps to hold entire lengths in place during gluing. This was an unexpected budget item, as I didn't start with that many. The clamping approach meant I had to move each unit away from the wall, which was challenging given the size and weight. The units were so built-in that they couldn't be tipped—they had to be translated straight out and back. I even had to use clamps and drill holes in the wall to push against, just to inch the units back and forth. The tolerance between plywood pieces was critical, making this an awkward but necessary step.
For the shelf side, I started with the horizontal oak fronts, which could overhang because I planned to trim them flush using a router flush cut bit with the plywood as a guide. These were relatively straightforward—just ensuring the top edge aligned with the shelf top. The vertical pieces between the horizontals were much more demanding. Each space was almost exactly the same size, but any fraction of a millimeter difference would show as a visible gap. Rather than measuring, I scribed each piece directly: held a ruler to the space, marked the line on the oak, cut it slightly oversized, then gradually shaved off tiny amounts until it fit perfectly. The sides still overhung and would be trimmed with the flush cut bit.
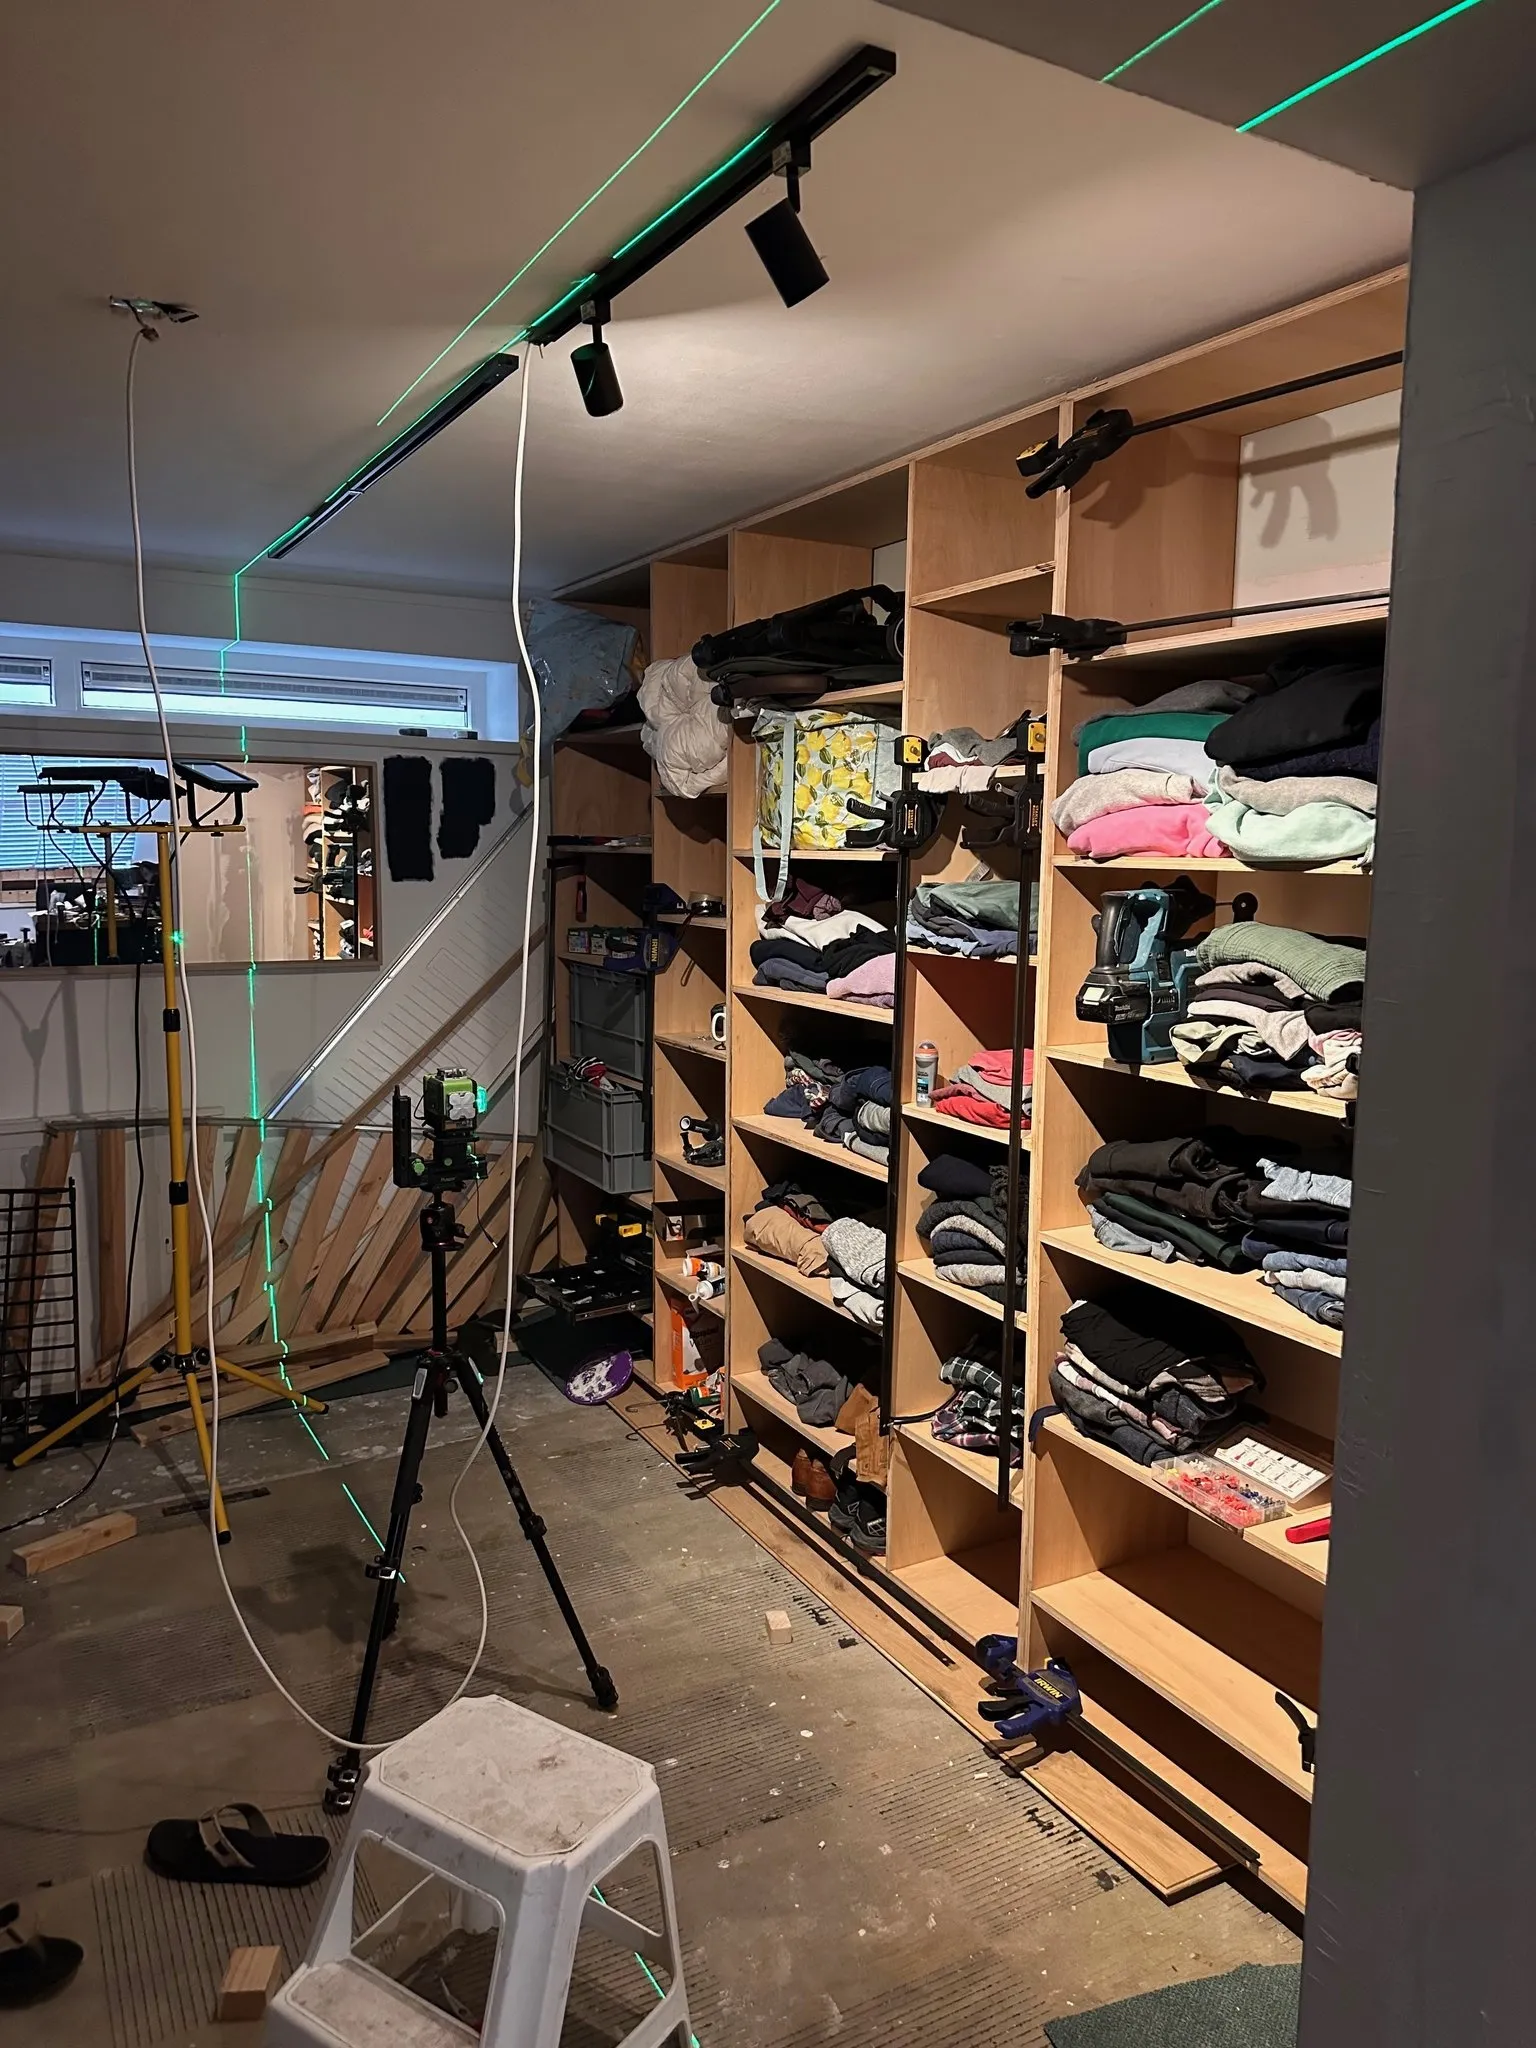
The flush cut bit presented a problem: since the oak fronts are 40mm wide but the shelves are only 18mm wide, there was nothing to stop the bit from cutting into the horizontal pieces. I solved this by 3D printing magnetic stoppers that attached under each shelf, providing a surface to stop the router at the right depth. In retrospect it seems obvious, but it took considerable thought to arrive at this solution. For dust management during all the in-situ routing, I 3D printed hoover guides to collect the mess from the flush cut bit. Combined with a HEPA filter air purifier, air quality monitor, and full face mask, I kept the dangerous hardwood dust under control throughout the process.
Once the oak fronting was complete, the units needed to be carefully installed in their final positions. Given the size and weight of the components, this required careful planning and execution. The units were designed to fit precisely from floor to ceiling, making the installation process critical to the final appearance.
Finally, once all of the fronting was done, it then needed to be sanded because although the oak fronting was pretty well prepared, it still had a really rough finish and that wouldn't oil well. So there was probably about a week worth of sanding through grits starting with 80 grit, then going to 120, and finally 160. For this I also bought a new Makita sander that was not an orbital sander but a detail sander, and it was part of their 40V system. Basically just a really good upgrade to the sanders that I have already. Because I was doing so much sanding and the finish needed to be quite good, I thought this was a good tool to add to the list.
The sanding process was meticulous, ensuring that every surface was smooth and ready for the final oil finish. This attention to detail in the finishing stage is what transforms a functional piece into something that looks truly professional.
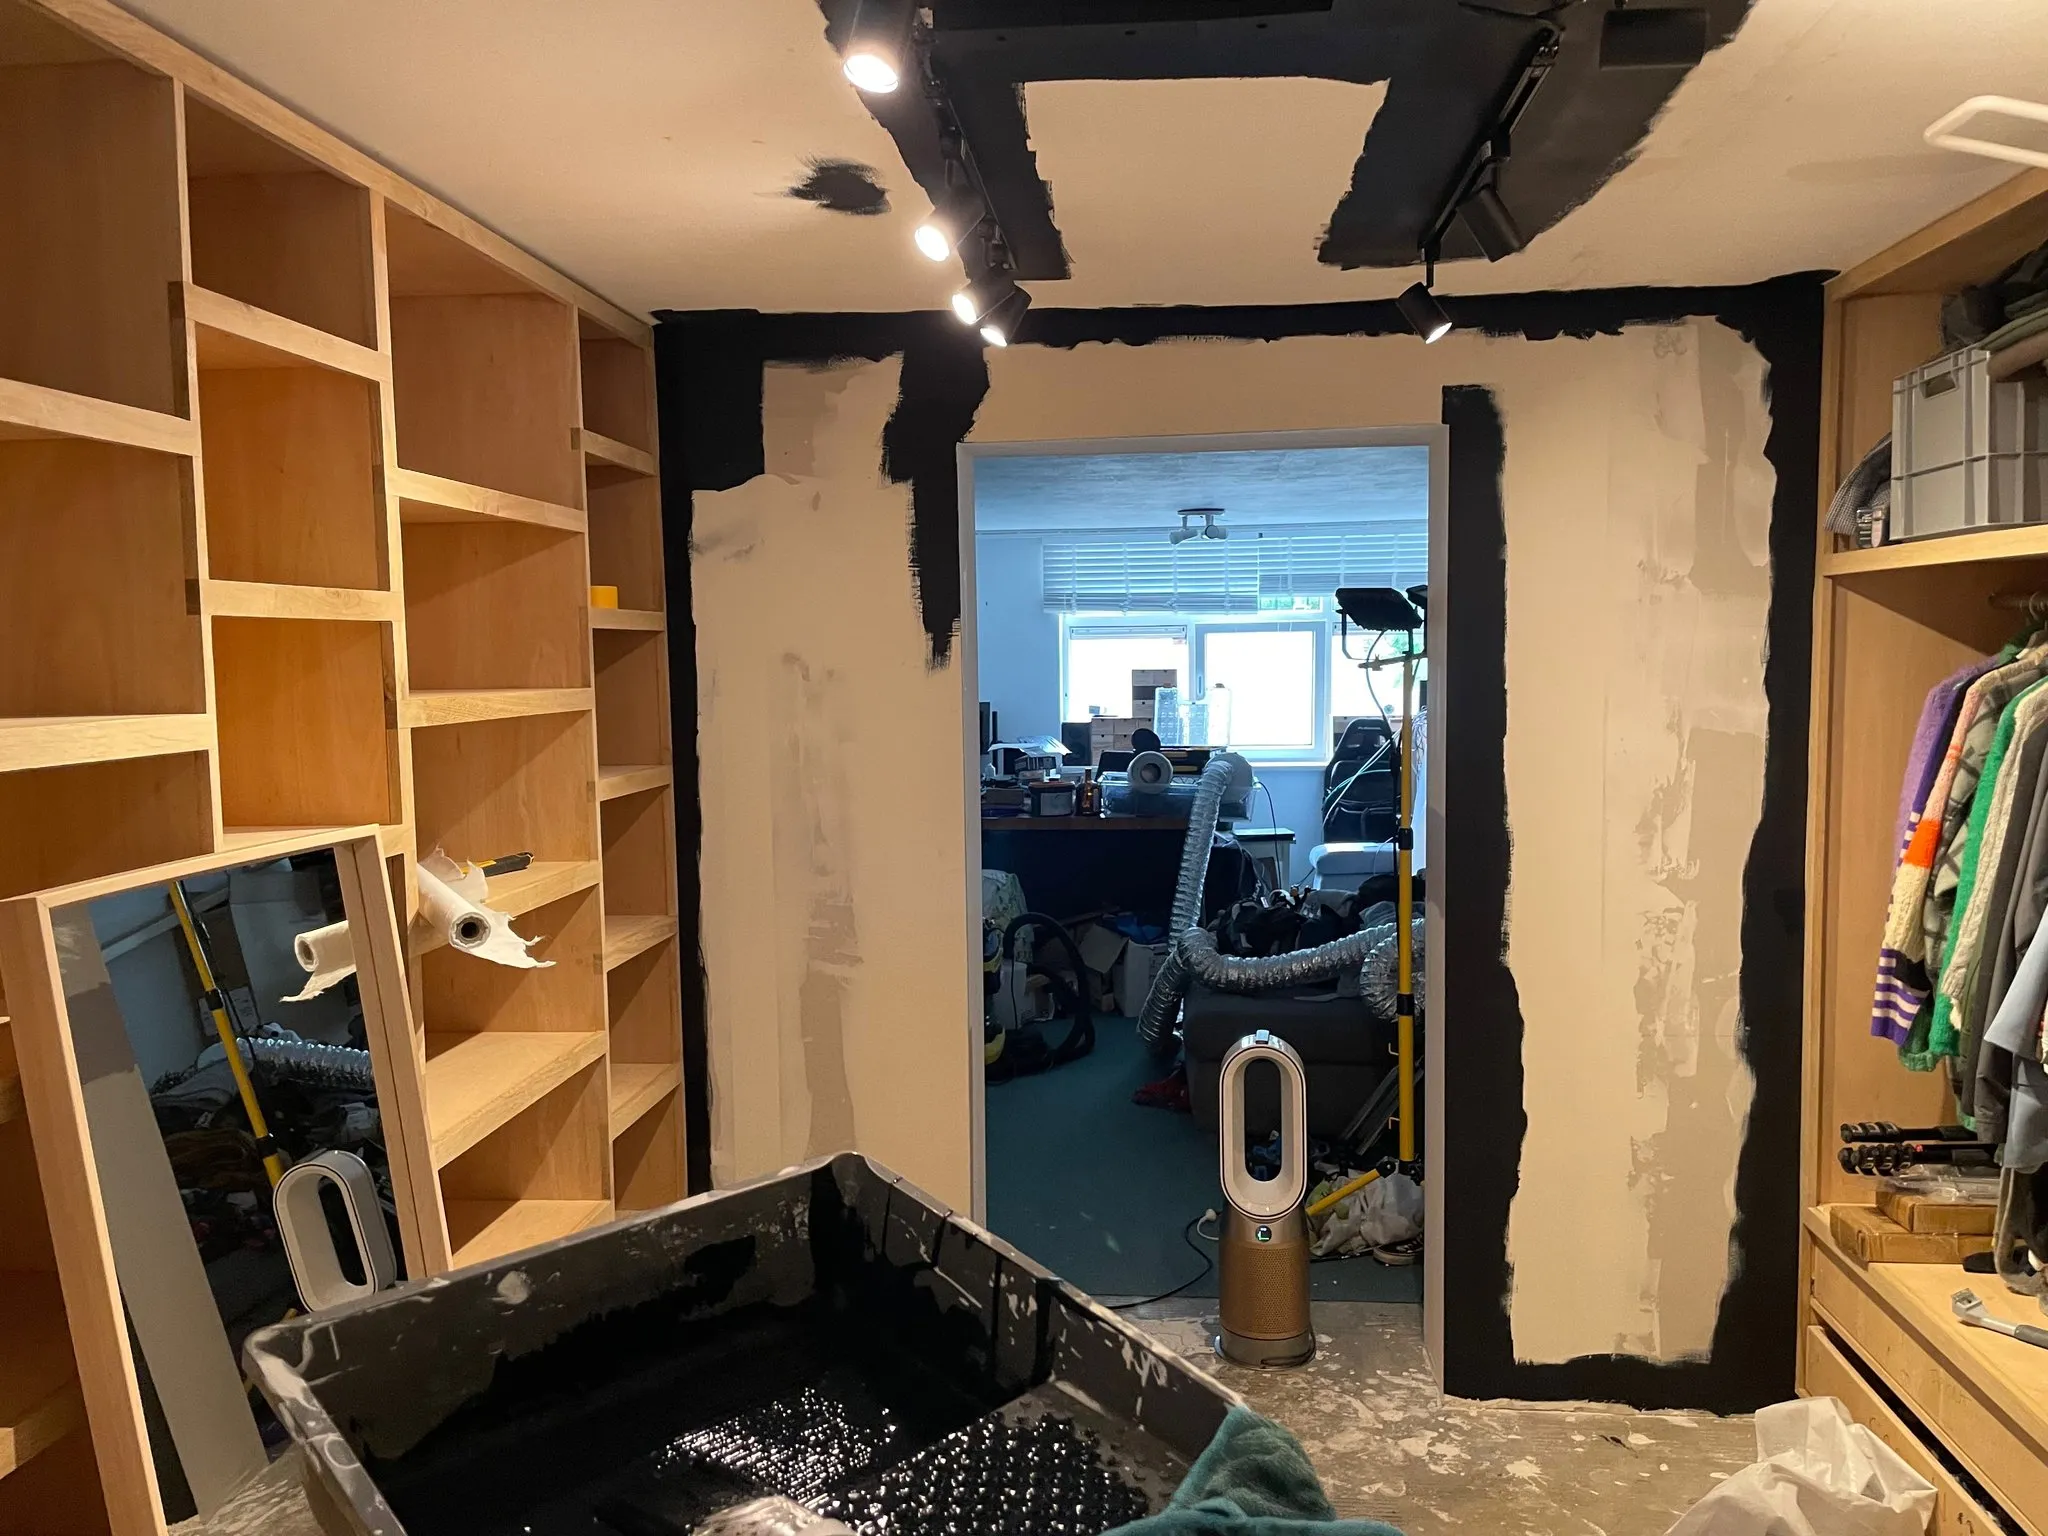
Beyond the wardrobe construction itself, I also painted the room to complete the dark aesthetic we were aiming for. The paint choice was important to achieve that premium retail store feel, with the dark walls providing the perfect backdrop for the strategic lighting that would highlight the clothing.
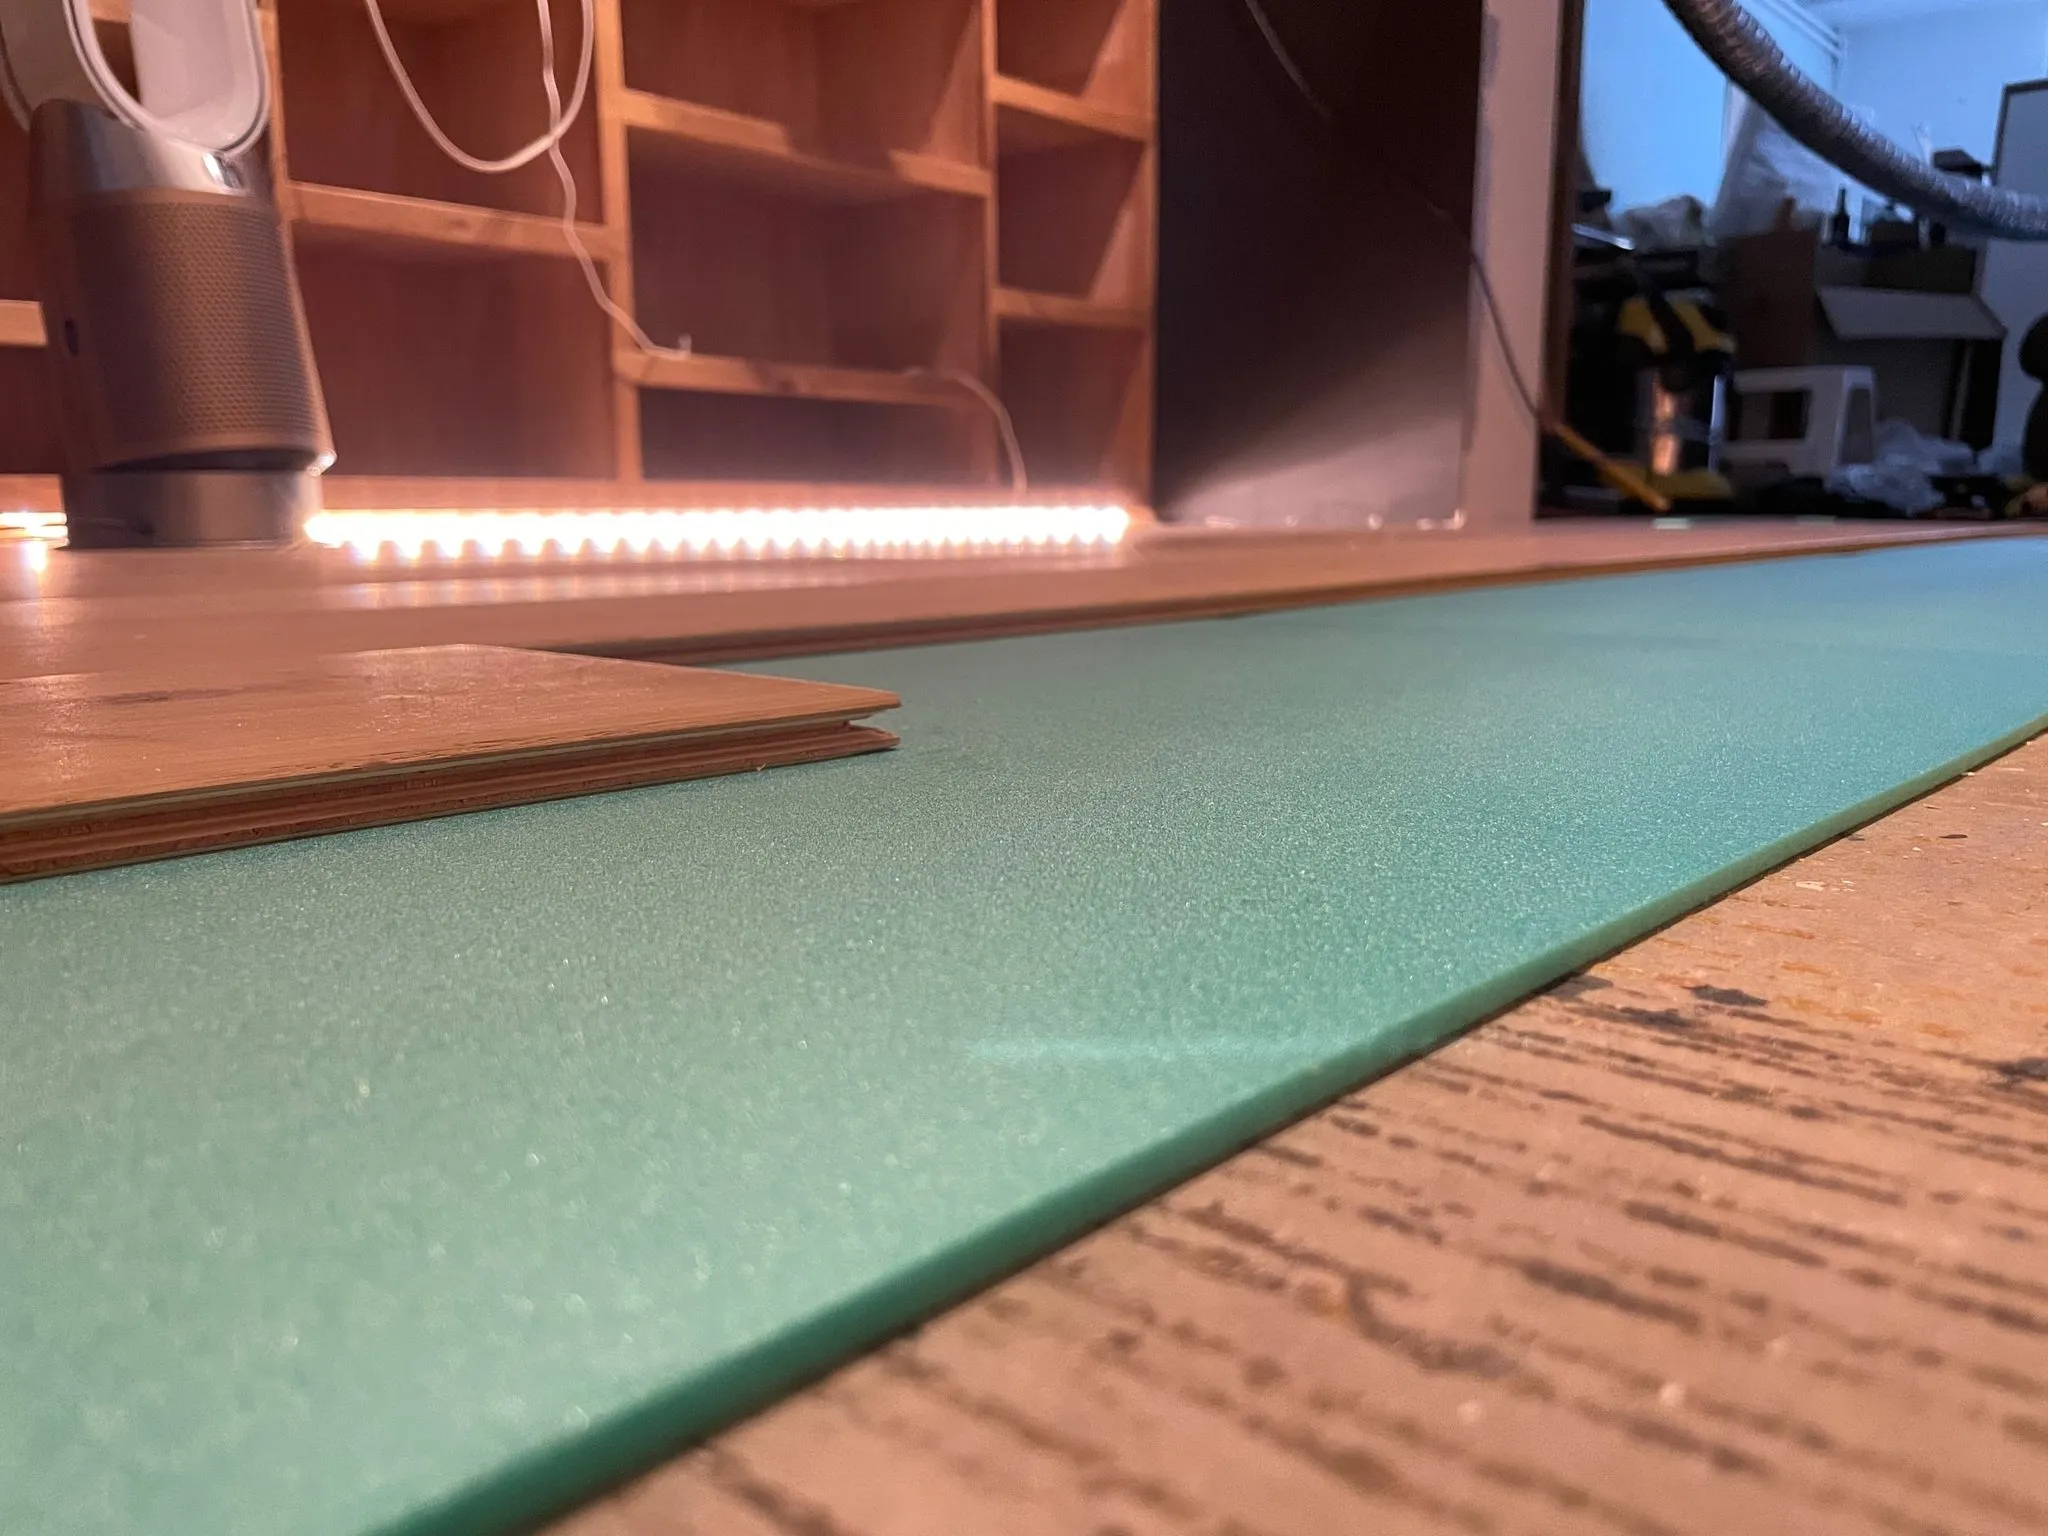
For the flooring, I put in new flooring that for the time being is just floating on a layer of insulation. I'm going to see how this works with time, and if needed, I'll put it in more permanently. This approach allows us to test the solution and make adjustments if necessary without committing to a permanent installation right away.
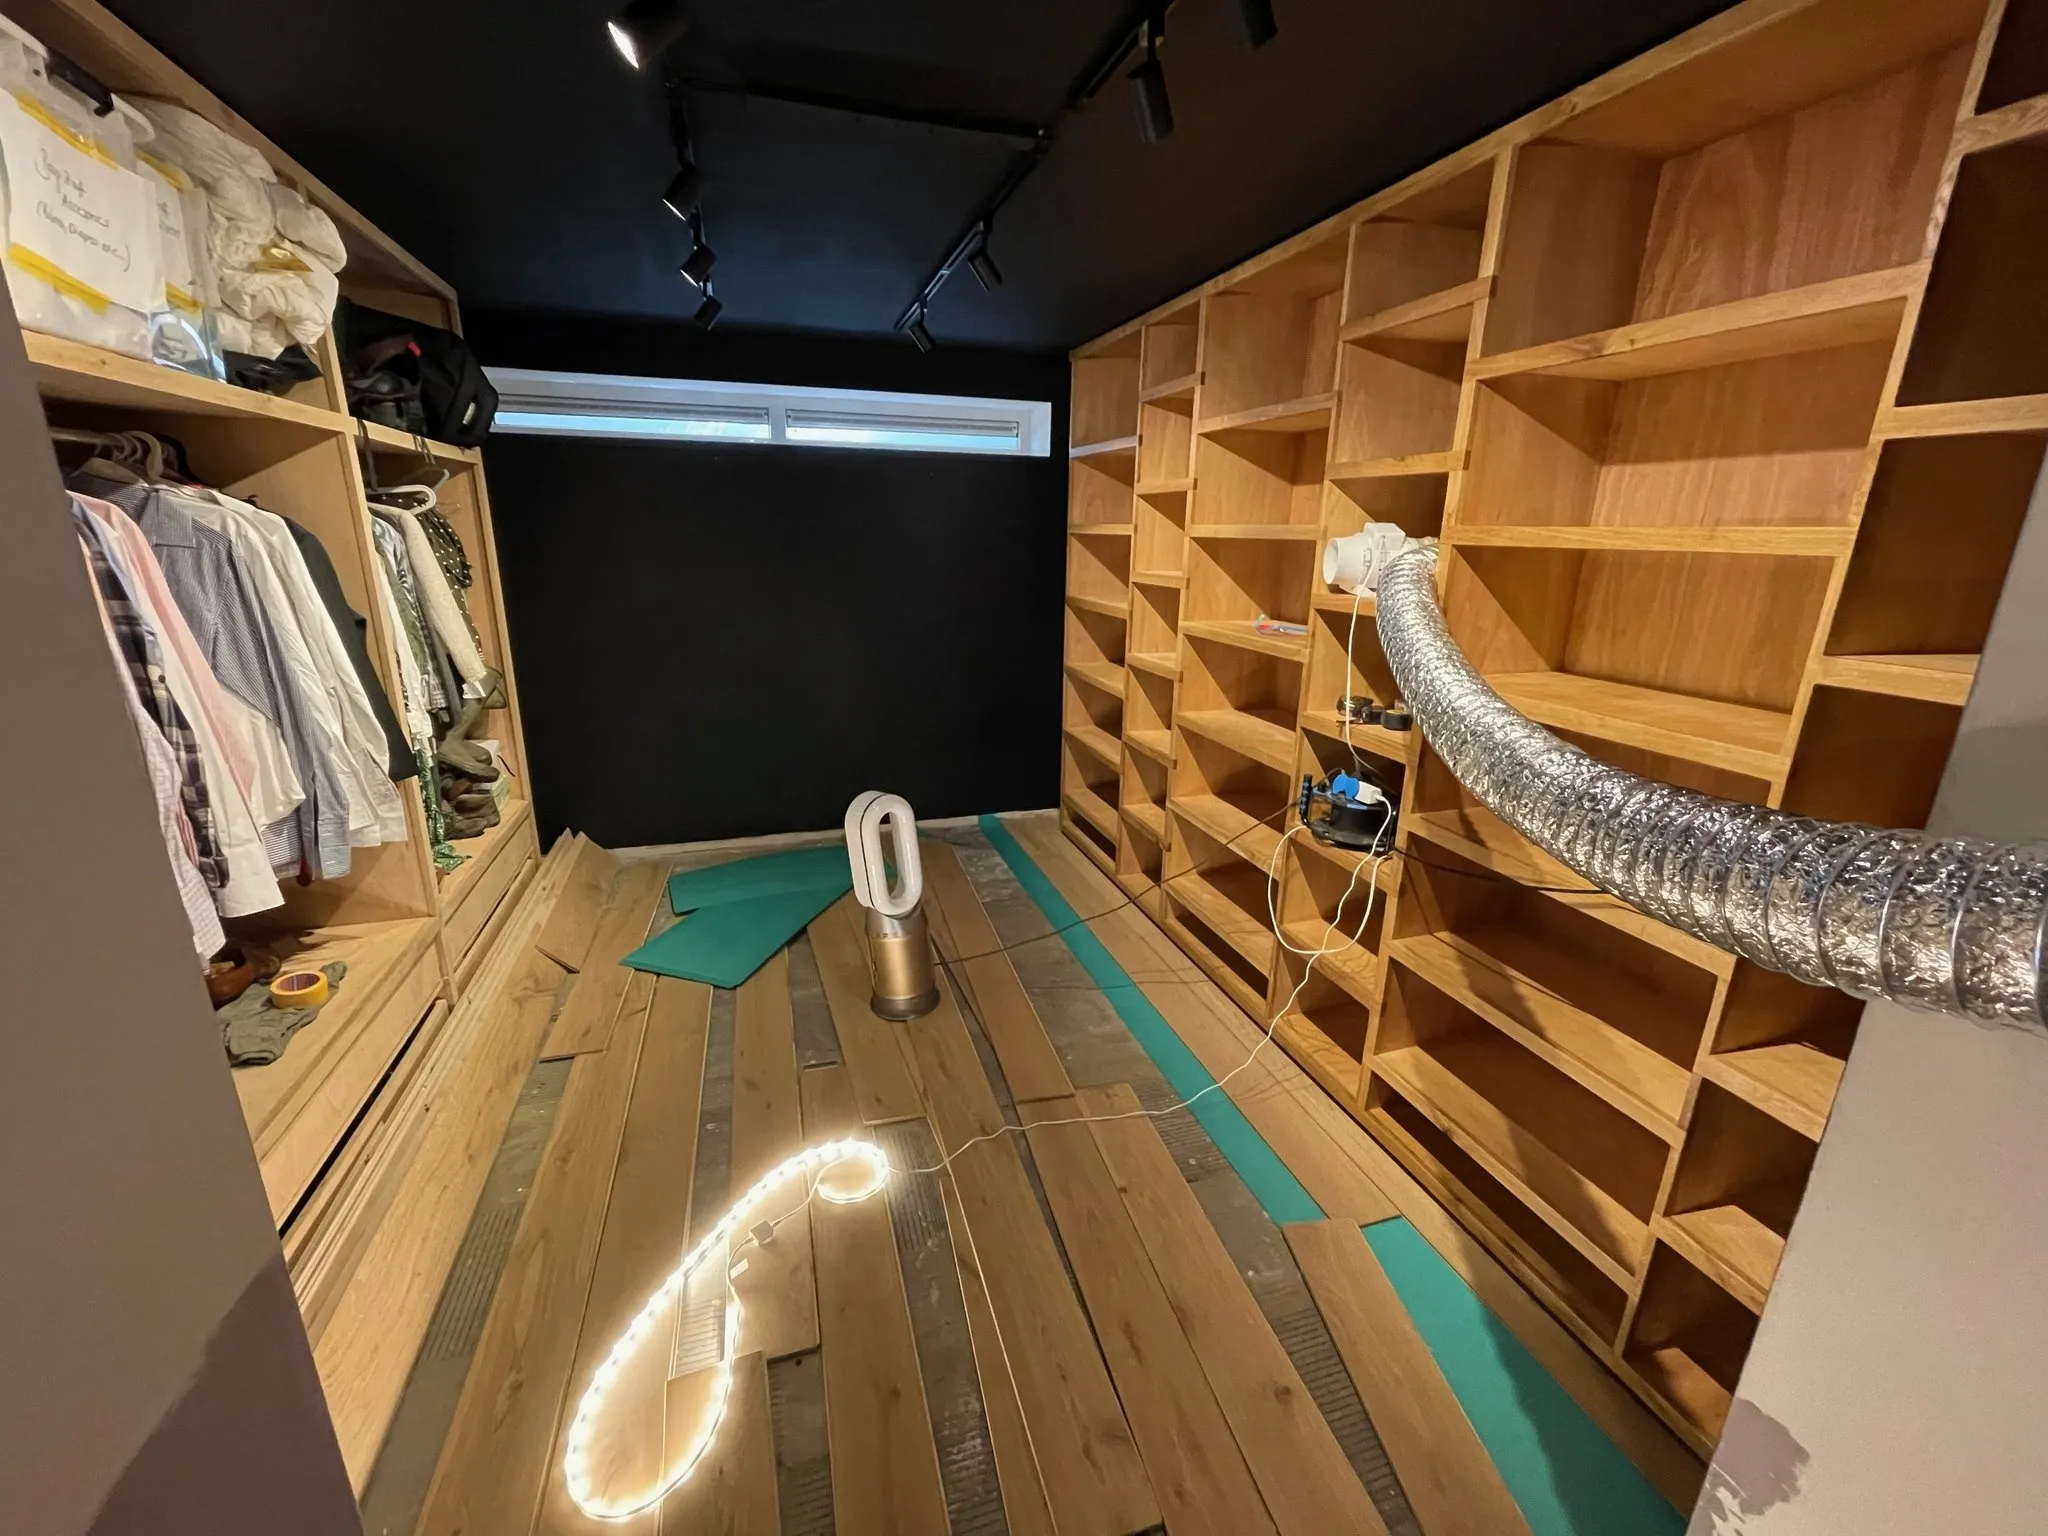
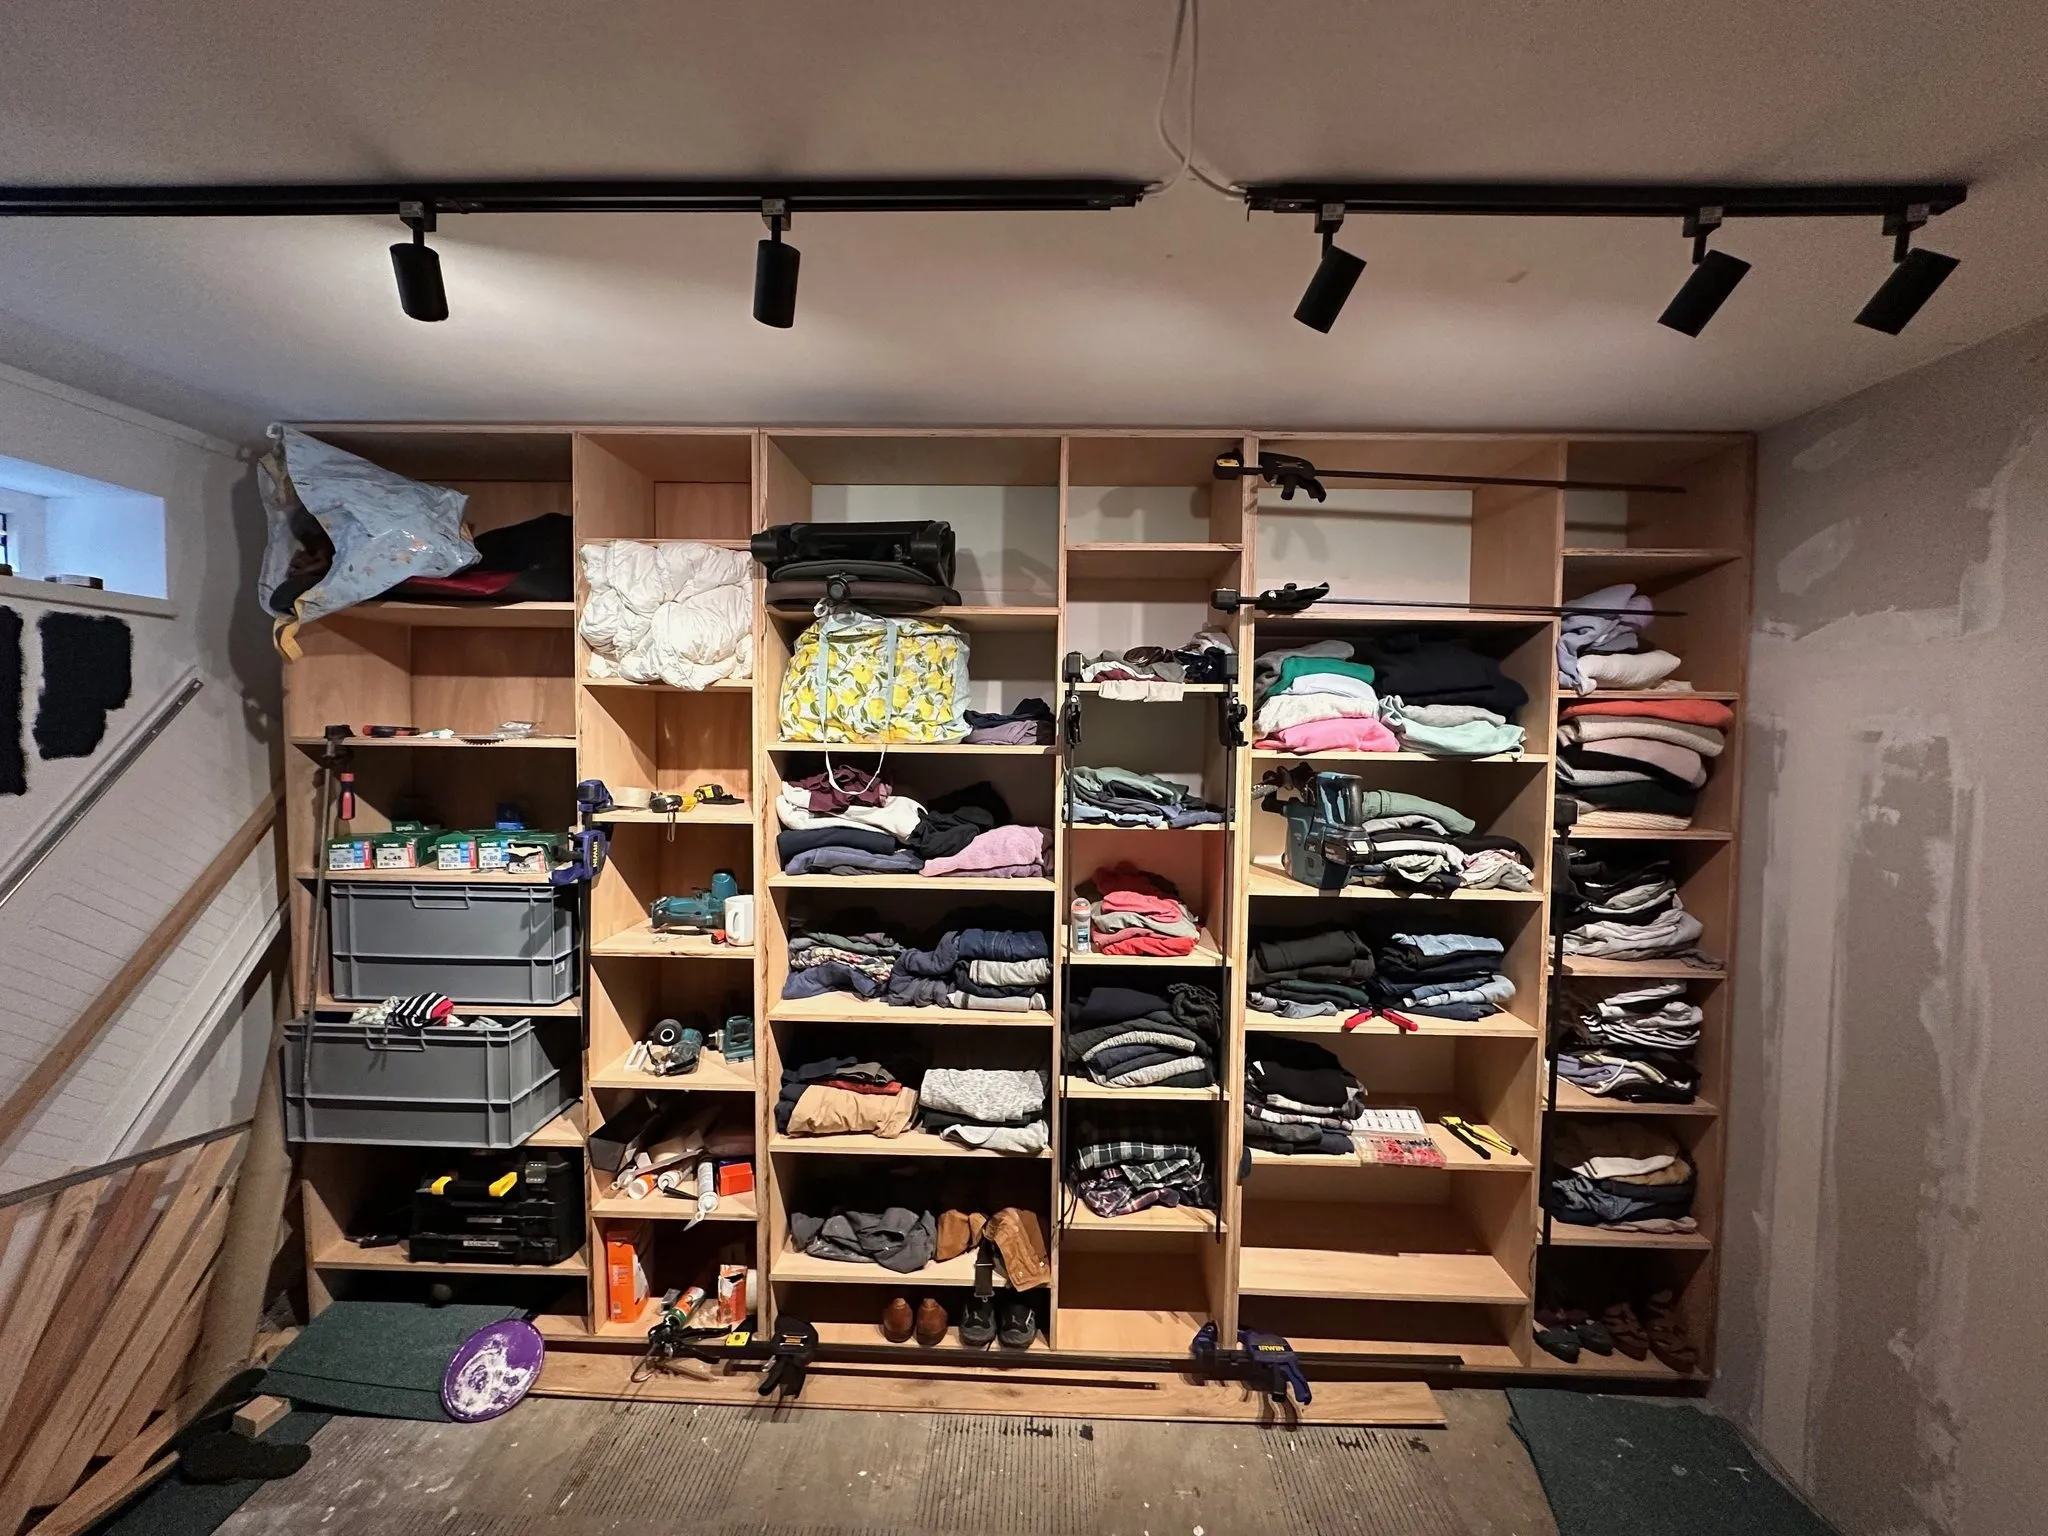
The completed walk-in wardrobe successfully achieves all of its design goals. It provides massive amounts of storage while maintaining the dark, premium aesthetic we were inspired by. The strategic lighting highlights the clothing beautifully, and the oak fronting gives it a warm, natural feel that contrasts nicely with the dark walls.
The system is incredibly strong—you can stand on any shelf without worry, which was a key requirement. Everything is accessible without digging, and the shallow drawers encourage good organization. The built-in nature of the system means it will stay with the house and add value, making it a worthwhile investment.
This project demonstrated the value of taking time to do things right. The year-long timeline, while challenging, allowed for proper planning, precision work, and attention to detail that simply wouldn't have been possible in a rushed timeline. The result is a storage system that feels truly custom and built to last.